Wednesday, May 23, 2018

May 24, 2018 - This Week's Box Contents, Featuring Rhubarb


Cooking With This Week’s Box: 

This Week’s Summary of Recipes & The Vegetables They Utilize:

Rhubarb:  Chipotle Rhubarb Sauce (see below) & Grandma Yoder’s Rhubarb Custard Pie (see below). 
Green Garlic:  Green Pancakes

While it feels like spring has been slow to come this year, I’m always amazed at how the natural progression of vegetables always happens and each week we’re able to pack our CSA boxes.  Just as ramps were winding down, asparagus started to come in and this week we’ve replaced the ramps with green garlic and Egyptian walking onions.  We also have several new greens in this week’s box along with a splash of color from pretty little radishes and rhubarb.  Yes, we have plenty of ingredients to use this week!

Chipotle Rubarb Sauce on Pork Loin
Our featured vegetable this week is rhubarb, which may be used in both sweet and savory preparations.  One of this week’s recipes is for a Chipotle Rhubarb Sauce (see below) which may be used as an Enchilada Sauce or treat it like a barbecue sauce and use it to baste barbecued chicken, grilled pork chops, pork loin roast or serve it with grilled or pan-fried salmon.  I used it on a pork loin roast and it was delicious!  I mixed some of the leftover sauce into mayonnaise and used that as a spread to make sandwiches with the leftover pork.  The sauce has a little kick of heat from the chipotle and the rhubarb gives it a nice tanginess that works well with meat.

If you prefer a sweet recipe for your rhubarb, I’ve shared my Grandma Yoder’s recipe for Rhubarb Custard Pie (see below).  It’s been probably 20 years since I made this recipe, so I was happy to find the recipe on a card in my old recipe box.  The recipe was one of my grandma’s typical recipes, written in the cryptic way that only my grandma and those who know her would understand.  I had forgotten how easy this pie is to make!  It really doesn’t take much to put it together, and don’t be afraid to use a prepared pie crust if you need to expedite the process even more.  Grandma always used water in the filling, likely because it was more thrifty than using precious milk or cream as you normally would to make custard.  If you prefer a creamier filling, substitute milk for the water in the recipe.

I hope asparagus season will continue for several more weeks as I have accumulated a stack of asparagus recipes I really want to try!  This week I’m going to use the asparagus to make this recipe for Spring Salad with Asparagus and Soft Boiled Eggs.  The mini romaine lettuce heads will work great for this salad. This recipe is written for a single serving, so you’ll need to double it if you’re serving two people or quadruple it for four servings.  If you use both heads of lettuce for this recipe, you should be able to make four servings of this salad.  This salad will be great for a light lunch or dinner served simply with a piece of buttered toast.  You could also add a few sliced radishes!

I look forward to spring radishes every year and can’t get enough of them!  My favorite way to eat them is dipped in salt, and a little butter.  I came across this simple recipe for Radish Toasts with Scallions featured on the Edible Communities website.  It’s the perfect combination of radish, butter and salt with a little extra flavor from onions.  These simple toasts will be delicious using some of this week’s Egyptian walking onions.  I’m going to make these for our weekend brunch served with a fried egg.

The green tops on this week’s radishes are beautiful!  Don’t discard them, they are edible too!  Radish greens are a nice spicy green that may be sautéed with other greens or on their own.  I’ve been chopping them up and sautéing them with a little bit of green onion and green garlic and then I use that as the vegetable base for our scrambled eggs in the morning.  Add a little bit of feta cheese and it’s a delicious and invigorating way to start the day!  There’s also a recipe for Radish Top Pasta with Chickpeas and Parsley that we featured in a newsletter back in October 2016.

Frosty Banana & Sorrel Smoothie
I’ve been anxiously and impatiently awaiting sorrel!  This is a delicious, unique green that many people enjoy in soup such as this Sorrel & White Bean Soup.  However, this week I am using the sorrel to make Frosty Banana & Sorrel Smoothies!  This is a refreshing and invigorating way to start your day and a super-easy way to eat your greens!

The pea vine surprised us and really grew over the past few days, so we decided to go ahead and include it in this week’s box.  Every spring I look forward to making Pea Vine Cream Cheese.  This is a very simple recipe and is especially good when made with the Egyptian walking onions.  You can spread this on a bagel for breakfast or lunch or use it to make a wrap.  We usually fill our wraps with leftover cooked chicken, salmon or a little crumble of bacon along with whatever fresh vegetables are available.  This week you could add some diced red radish and roasted asparagus or some of the romaine lettuce.

Green Pancakes
Finally, the last item in your box is the green garlic.  I’m going to use this week’s green garlic to make these savory Green Pancakes.  The green in these pancakes comes from green garlic (both the greens and the lower white portion) as well as spinach.  If you don’t have spinach in your refrigerator, you could also substitute nettles if you have some remaining from the previous delivery.  This would also be a good way to use the radish tops!  Serve these with a little dollop of sour cream and enjoy them with eggs or as a side dish along with fish or meat for dinner.

I hope you enjoy this week’s recipes and have fun cooking with these fresh, spring vegetables.  We have more exciting vegetables coming up very soon including hon tsai tai and baby white turnips!  See you next week!—Chef Andrea  

Featured Vegetable: Rhubarb  

By Chef Andrea

Rhubarb in the field
I grew up in a Mennonite & Amish community where it’s expected that everyone has a rhubarb plant in their back yard.  I loved to harvest rhubarb and we looked forward to eating it every spring, mostly in the form of pie.  In the world I came from, I only knew rhubarb as a “fruit” that paired well with sugar in my Grandma Yoder’s kitchen to create a delicious rhubarb custard pie or a rosy rhubarb sauce we would spoon over shortcake.  My mother made a delicious rhubarb crisp, Aunt Marty made tasty rhubarb snack bars, and there was a lady at church that made this magical dessert that was simply called rhubarb fluff (and likely contained Cool Whip as the main ingredient.)  It wasn’t until my adult life that I learned that rhubarb is really a vegetable and can be used in savory ways as well!
 
Rhubarb is thought to have originated in the areas of China, Mongolia and Russia.  Before it was used as a food, rhubarb root was traditionally used as a medicine to treat a wide range of ailments.  Its culinary use also started in the east where it was used in drinks and meat stews before later spreading to Europe and finally the United States at the end of the 18th century.  It now holds a special spring time slot in our Midwestern diets.

Sorrel in the field
Rhubarb is part of the knotweed family of plants that also includes sorrel and buckwheat.  Both rhubarb and sorrel are perennial crops that we rely on to fill the gap in our diet between stored winter vegetables and spring planted crops.  Both rhubarb and sorrel are high in oxalates which is what gives both of these vegetables that sour, tangy flavor characteristic of both.  In the case of rhubarb, the stalk is the edible part of the plant and the leaves are discarded.  Rhubarb may be eaten raw, however it is pretty sour in the raw state so most individuals prefer to cook it first. 

While the tart, sour flavor of rhubarb is often masked or covered with copious amounts of sugar and sweeteners, it doesn’t have to be that way.  Instead of masking the characteristic flavors of rhubarb, why not use those innate qualities to your advantage?!  Rhubarb pairs well with fatty meats such as duck, pork, chicken thighs and salmon.  The tartness of the rhubarb helps to balance the fattiness of the meat as well as eggs and dairy products such as cheese & cream.   In a previous newsletter, we published a recipe for Braised Pork Shoulder with Rhubarb- Red Wine Sauce.  It also helps to wake up your taste buds which makes it easier for you to experience other flavors in a dish.  The flavor of rhubarb can stand up to bolder spices such as curries, cardamom, peppercorns, cinnamon and ginger.  Rhubarb can be used as a stir-fry vegetable, added towards the end of cooking so it just starts to soften, but still holds its shape.  It can also be used to create a flavorful braising liquid and then sauce for pork and other meats.  It also makes a delicious compote or chutney to eat alongside Indian food, spoon over grilled or roasted meats, or simply eat as a snack with cream cheese and crackers!

Of course, you’ll never go wrong with enjoying rhubarb in sweet preparations as well.  Muffins, cakes, cobbler, fruit crisps and beverages are all excellent ways to use rhubarb.  Rhubarb pairs well with fruits including strawberries, raspberries, blueberries, lemon, oranges and apples.

Rhubarb should be stored in a plastic bag in the refrigerator to keep it fresh and firm until you’re ready to use it.  If it gets a little floppy or dehydrated, don’t throw it away as it can still be used in dishes where you’re cooking the rhubarb.  Rhubarb can also be frozen for later use.  If you want to freeze rhubarb, simply wash the stalks, cut into smaller pieces (size is up to you) and put it in the freezer in a freezer bag.  You do not need to cook rhubarb before freezing it, you can freeze it raw. 


Chipotle Rhubarb Sauce

Yield: About 2 cups

This recipe was adapted from the recipe for Swiss Chard and Black Bean Enchiladas with Chipotle Sauce that was featured at naturallyella.com.  You can use this sauce as an enchilada sauce or treat is like a barbecue sauce and baste it on grilled chicken or pork chops or slather it on a pork roast.  It would also make a good dipping sauce for chicken strips or mix it with mayonnaise to make a sandwich spread.

1 Tbsp olive oil
¼ cup minced onions
2 cups diced rhubarb
½ tsp chipotle powder
1 tsp ground cumin
½ tsp paprika
¼ tsp salt, plus more to taste
2 ½ Tbsp maple syrup
2 Tbsp apple cider vinegar


  1. In a large pot, heat olive oil over medium.  Add in onions and sauté until the onions become translucent, 4-5 minutes.  Stir in rhubarb and continue to cook until rhubarb begins to soften, 3-4 minutes.
  2. Next, add remaining ingredients.  Stir and bring sauce to a boil, then reduce to a simmer.  Let cook for 10-15 minutes.  The rhubarb will begin to break down and sauce will smooth out as it cooks.  You can leave it as a coarse, slightly chunky sauce, or you can puree it in a blender for a smooth sauce.
  3. Once the sauce is cooked, taste it and adjust the seasonings as needed by adding more salt, chipotle powder and/or maple syrup.


Grandma Yoder's Rhubarb Custard Pie


Yield:  1—8 or 9  inch pie


Pie Crust Dough, enough to make an 8 or 9 –inch single crust pie

2 ¼-2 ½ cups rhubarb, small to medium dice

2 eggs
5 Tbsp water
1 cup sugar
1 Tbsp all-purpose flour
1 Tbsp cornstarch
Pinch of salt
Cinnamon
1-2 Tbsp cold butter

1.       Preheat the oven to 400°F.  Roll out pie dough to a thickness of about 1/8 inch.  Put the pie dough in an 8 or 9 inch pie pan and trim the excess dough from around the edges.  Crimp the edge of the pie crust if you would like and then put the pie crust in the refrigerator until you finish preparing the filling.
2.       In a medium mixing bowl, beat 2 eggs until pale yellow, then add the water and beat until the mixture is frothy.  In a small bowl, mix together the sugar, flour, cornstarch and salt.  Once the dry ingredients are combined, add them to the egg mixture and beat well to combine. 
3.       Remove the pie crust from the refrigerator and put the diced rhubarb in the pie crust.  You want enough rhubarb to fill the pan evenly.  Pour the egg and sugar mixture over the rhubarb.

4.       Dot the top of the pie with pieces of cold butter and sprinkle the top of the pie with cinnamon.
5.       Bake the pie for 10 minutes at 400°F, then reduce the oven temperature to 325°F and continue to bake for another 40-50 minutes.  Bake the pie until the crust and top of the pie are golden brown.  The center of the pie may still be soft, but it should not be runny. 
6.       Remove the pie from the oven and cool to room temperature before you cut and serve it.  If you are not going to eat it right away it is best to store the pie in the refrigerator.

This recipe has been passed down through our family and is the rhubarb pie recipe my Grandma Yoder always made for us.  Her original recipe was essentially a list of ingredients with a few comments eluding to the procedure.  I interpreted the recipe, recreating it to match the memory of it in my mind!  While I’ve never tried this, I think you could substitute milk for the water in the filling to give a creamier filling that is more similar to traditional custard.—Chef Andrea

Wednesday, May 16, 2018

The Nature Principle

By Farmer Richard

I’ve recently been reading Richard Louv’s books including this one entitled The Nature Principle, Reconnecting with Life in a Virtual Age. He has spent years researching and experiencing the benefits of human contact and connection with the natural world.  There are both physical and mental health benefits from being exposed to nature including the ability to help heal from illness, increased mental capacity and ability to learn and increased productivity in the work place.  These benefits as well as others are seen even with the smallest and most brief, but regular contact with nature.  Richard Louv’s books offer hundreds of ways for us to combat what he calls “nature deficit disorder.”  The possibilities are endless, but many doable almost immediately.  Here are just a few of his suggestions ranging from urban renewal and suburban community planning to incorporating nature into school programs and curriculum, growing and connecting with our food sources and bringing nature into our home environments with something as simple as a piece of wood or a plant.

Farmer Richard sharing the farm's beauty with a young visitor
We plan to do a more in depth follow-up in the future, but for now we want to introduce this concept and make some obvious contributions.  As a CSA member with our farm, you have the opportunity to connect with nature in the form of your food every week and every day when you eat!  You have the opportunity to visit our farm at any time to witness and participate in the act of growing food as well as experience the environment in which it is grown. 

Another way you can connect with nature and your farm is to read our newsletters!  We go to considerable effort to educate, provide transparency about our life and efforts to produce food in the most environmentally friendly and worker friendly way with respect and care for our natural world and the people and creatures involved.  If you really want to immerse yourself, we can also offer you a campsite or cabin so you can stay overnight.  Bring your family for a weekend so you can explore and experience the beauty and treasures in nature that we experience daily.

Watercress growing in natural spring
As I write this on the back porch, I hear the chorus of tree frogs, the “spring peeper” frogs, and the whippoorwills calling.  Some nights you can hear the coyotes yipping and howling in the distance.  Every morning we are greeted by the hooting of the Great-horned owls that live in our pine forest.  This weekend, May 19, we are offering a very special opportunity to walk our land and woods with a very knowledgeable nature guide—“Little John.”  We will visit a special little creek that is a natural spring coming from the hillside.  We consider it a place of magic where we find special plants growing in the spring.  Perhaps we’ll even be able to harvest a little watercress and of course we’ll be looking for morel mushrooms as well! 

We’ll have more treasures to share with you, both ones we know about and others we discover along our way.  Just this last week I found some beautiful ground nests of the Eastern towhee bird at the very foot of one of our effigy mounds that is shaped like a bear.  I’d love to show you the delicate nest with its eggs and we’ll probably get to see the male and female pair that are caring for them!  Our valley is particularly beautiful and filled with energy in the spring.  You never know, this could be one of those life changing experiences, especially for young people, to experience the natural world in this season in a respectful and caring way.   We so badly need more “respectful and caring” people in this world of disrespect and hatred.  We hope you’ll join us!


May 17, 2018 - This Week's Box Contents, Featuring Asparagus


Cooking With This Week’s Box: 

Welcome back for another week of delicious spring cooking!  I want to start by thanking all of the members who have been posting their recipes and pictures in the Facebook Group.  You’ve been making some delicious creations and I appreciate the recipes you’re sharing with other members! 

So this week’s main focus is Asparagus!  In addition to the two recipes included with this week’s newsletter (see below), Food52 also has an interesting and diverse collection of asparagus recipes.  Asparagus is truly one of nature’s fast food recipes, so at the very least just give it a quick saute and serve it with your dinner. 

Sadly, this is our last week for ramps.  If you haven’t made Ramp Pesto or Ramp Butter yet, this might be the week to do so.  Both of these can be eaten when freshly made or you can freeze them in small portions and pull them out later in the year.  Ramp pesto is delicious when simply tossed with pasta for a quick meal and ramp butter is good on bread, steak and mashed potatoes. 

If this is your first time working with nettles this week, don’t be intimidated or afraid.  Check out last week’s vegetable feature on our blog which will guide you in handling them and includes a delicious recipe for Nettle & Mushroom Pizza with Ramp Cream.  One of our members also shared this recipe for a Crustless Spinach & Feta Pie that some members made using nettles instead of spinach!  What a great suggestion!

This week I’m going to make this Smoked Trout Spread using chives as the herb of choice.  This will be great spread on a bagel for lunch or on crackers for a little afternoon snack.  Kelly also reminded me that I need to make our annual batch of Chive & Parmesan Popcorn while chives are in season!

Lastly, we’re excited to be able to include rhubarb in this week’s box.  While rhubarb may be used in both sweet and savory ways, I always need to squeeze in a dessert or two during rhubarb season so I’m starting on the sweet side this week.  I found a recipe for Rhubarb Picnic Bars that I’m going to make for our market crew snack this weekend.  On the same website there’s also a recipe for Rhubarb Spice Cake that looks really good!

Have a great week and enjoy the last of the ramps and the first of the asparagus.  Next week we are looking forward to sending some gorgeous heads of lettuce along with the first radishes of the season!—Chef Andrea

Featured Vegetable: Asparagus 

“Asparagus signifies spring regardless of the weather…..The closer to you asparagus is grown, the better it is.”  This is an excerpt from vegetable chef expert, Deborah Madison, in the introduction for Asparagus in her book, The New Vegetarian Cooking for Everyone.  Asparagus is a perennial crop that we rely on in the spring before other spring planted vegetables are ready.  It is very weather dependent and it’s hard to predict when asparagus season will start.  Once it does start producing, it responds dramatically to temperature.  If you have a hot day, yields may double or triple compared to a colder day.  We usually harvest at least three times a week, however sometimes we pick five to six days a week when it’s in peak production.   Typically we see a harvest window of about 5 weeks, so pace yourself and plan out all the recipes you want to make!

As a perennial crop, it takes about three years to establish a field.  During the first few years after asparagus crowns are planted, the goal is to build fertility in the field, provide adequate moisture, and allow the plant to capture solar energy and store it in the roots.  Once we do start harvesting, we continue to focus on making sure there is enough fertility in the field as well as moisture. We also focus on weed control, which is very important in a field that will have the same crop for multiple growing seasons.  In the world of conventional asparagus production, asparagus fields are often bare because they are sprayed with herbicide to keep weeds under control.  Our asparagus fields are actually green because we employ a method of cover crops and hand weeding to control weeds instead of using chemicals.  We sometimes also use mechanical cultivation, but the risk of damaging the root system is pretty great so we’re limited with this technique.  While cover crops help to build soil fertility and help to decrease weed pressure, they also compete to a certain extent with the asparagus.  We do also walk the fields and pull weeds by hand.  As you can see, asparagus can be a labor-intensive and challenging crop to maintain!  Our cost of production is greater than conventional production, so if you ever wonder why our price might be higher than other growers, this is why. 

Asparagus may be eaten raw, although it’s most often cooked.  It may be steamed, boiled, sautéed or roasted.  The lower portion of the stem may be a little tough.  If this is the case simply snap or cut that portion off.  You can save these pieces and use them to flavor vegetable stock.  Be careful not to overcook asparagus or it will become soft, mushy and a dull olive green color.  Cook it just until it’s bright green and tender.  If you are boiling or steaming it, either serve it immediately or put it in cold iced water to stop the cooking process. 

Asparagus pairs well with other spring vegetables including ramps, mushrooms, green garlic and green onions and peas.  It’s also often served with lemon, cheese, cream, eggs, mint, parsley, chives, dill, bacon, pancetta.  Many times I never get past simply roasting asparagus as it is good when just eaten in this simple form.  It is also delicious in a quiche, frittata, scrambled eggs, risotto, or savory tarts. 

We hope you enjoy the bounty of this year’s asparagus harvest and eat it to your heart’s content.  Remember, we’ll only have it for a few more weeks!

Asparagus and White Bean Salad with Feta and Lemon Dressing 

Yield:  2 servings as a main dish or 4 servings as a side dish

“Served with crusty bread, this salad makes a terrific meal.  White beans provide a delectable hearty-tenderness, without overwhelming the delicate asparagus.  Tangy feta, zesty lemon, and a touch of mint give this salad a bright and refreshing flavor.”

1 pound asparagus, cut on an angle in 1-inch pieces
1 Tbsp extra virgin olive oil
2 tsp freshly squeezed lemon juice
1 tsp chopped fresh mint
½ tsp freshly grated lemon zest
¼ tsp salt
⅛  tsp freshly ground black pepper
1 cup cooked or canned white beans, drained and rinsed
½ cup crumbled feta cheese
½ cup thinly sliced radishes
2 Tbsp thinly sliced scallions (may substitute green garlic or ramps)
  1. Place the asparagus in a steamer basket, set over 1 ½ inches boiling water, and cover.  Steam until the spears are tender-firm, 4 to 7 minutes depending on the thickness.  Drain and place in an ice water bath (or under cold, running water) for a moment to stop the cooking. (Chef Andrea Note:  You may also roast asparagus.  Lay the spears on a baking sheet and drizzle with olive oil.  Season with salt and pepper and then roll the spears with your hand to coat them with the oil.  Roast for 10-12 minutes in a 350°F oven.  Remove and cool before cutting into smaller pieces and adding to the salad)
  2.  Put the olive oil, lemon juice, fresh mint, lemon zest, salt, and pepper in a small bowl and whisk until well combined.  Drain asparagus.
  3. Combine the beans, feta, radishes, and scallions in a large bowl.  Add the asparagus pieces.  Pour on the dressing and gently toss.  Serve at room temperature or chilled.  (Chef Andrea Note:  You can turn also add a can of tuna, poached salmon or cooked chicken to this salad and serve it as a main dish.)
This recipe is featured in Farmer John’s Cookbook: The Real Dirt on Vegetables, by our friend, Farmer John Peterson.

Sesame Noodles with Asparagus 

“Whenever people ask what they can make a lot of easily and ahead of time for a party, this is what I suggest.  It’s endlessly versatile-you can vary the vegetable to go with the season.”—Chef Deborah Madison in The New Vegetarian Cooking for Everyone.

Serves 6 to 8

Marinade:

                ¼ cup light sesame oil
                1 Tbsp toasted sesame oil
                7 Tbsp soy sauce
                3 Tbsp Chinese black or balsamic vinegar
                3 ½ Tbsp dark brown sugar
                2 tsp sea salt
                2 tsp chili oil
                1 Tbsp minced ginger
                1 clove garlic, finely chopped
                ¼ cup chopped cilantro

Noodles and Asparagus

                2 pounds asparagus, trimmed and thinly sliced on a diagonal
                1 (14-ounce) package thin Chinses egg noodles or rice noodles
                10 green onions, including the firm greens, thinly sliced (may substitute ramps)
                ¼ cup sesame seeds, toasted until lightly browned

  1. Mix the marinade ingredients together, stirring to dissolve the sugar.
  2. Bring a large pot of water to a boil.  Add salt and the asparagus.  Cook until bright green and tender but still firm, just a few minutes.  Scoop the asparagus out, rinse it under cold water, and set on a towel to dry.
  3. Pull the noodles apart with your fingers, add them to the boiling water, and give them a quick stir.  Boil until tender but not overly soft, tasting them often as they cook.  It should take only a few minutes.  Pour the noodles into a colander and immediately rinse under cold water.  Shake off the excess water.
  4. Toss the noodles with all the marinade and most of the onions, sesame seeds, and asparagus.  Mound them in a bowl or on a platter, then garnish with the remaining asparagus, onions, and sesame seeds.

Wednesday, May 9, 2018

Pollinator Packs…Doing Our Part


By Farmers Richard & Andrea


This week is our first of two deliveries for our Pollinator Packs.   These are a garden pack of nine different native plants including grasses and flowers that have been carefully selected by Richard.  These plants are beneficial for our environment for many reasons including providing habitat and food sources for a variety of species that provide pollination services, help control pests, and contribute to keeping our ecosystem healthy and in good balance.  The idea for these Pollinator Packs came about back in 2015.  In May 2015 the White House released the National Strategy to Promote the Health of Honey Bees and Other Pollinators.  Many individuals felt this was a groundbreaking step towards acknowledging and mobilizing action around rapidly declining pollinator populations within North America.  The importance of setting a national strategy to guide the protection, restoration, and enhancement of pollinator habitats is largely undisputed among scientists and others operating within conservation circles.  However, this national plan failed to address a selection of key considerations that appeared to have been left out of the national plan.  Primarily, questions surrounding pesticide use—including that of glyphosate and systemic insecticides like neonicotinoids, which have been directly linked to the decline of bee and other wildlife populations. 

As organic farmers, we do not use these agrochemicals, but felt it was important that we fully understand the impact these chemicals are having on our pollinating creatures as well as our environment and human health.  So, we launched a series of newsletters that we called “The Silent Spring Series.”  Over the course of six articles, we sifted through a variety of resources, journal articles, etc in an effort to educate ourselves about some of these agrochemicals and the direct impact their use is having on the people, creatures and environments where they are being used.  Sarah Janes Ugoretz authored these articles and fearlessly attacked these difficult topics.  She reviewed the research and eloquently presented her findings in a way that we were all able to understand.  We encourage you to take a moment to go back and read this series of articles as the information contained in them is very important to understand for our own health as well as the health of our environment, etc.  Links to each of these articles are as follows: 


About half way through this series, the content was feeling pretty heavy and a bit depressing.  We started asking ourselves, “What can we do?”  Sometimes these problems seem so grand and out of our control that it’s hard to know where to start, but we know that even small, individual efforts can collectively create great change and can make an impact.  So the final article in our series focused on the future.  Our goal with these articles was to leave our members with a sense of empowerment and some motivation.  Empowerment in the sense that, if we’ve done our jobs well, our members would walk away with a deeper understanding of the issues surrounding the use of agrochemicals and the depth of their impact.  As a result of being better informed, our hope is that our members would then be motivated to look at ways they could bring about positive changes within their own circles. 

We have extensive plantings of native grasses and flowers on our farm that we’ve established because we want to provide habitat and a food source that will attract and support a wide variety of beneficial creatures including bees, wasps, birds, butterflies, etc.  These creatures help to support a healthy, balanced ecosystem on our farm, they aid our efforts in controlling pests in our vegetable crops, assist with pollinating our flowering crops such as squash, melons, cucumbers, etc and they are a joy to watch and observe.  We know how to grow plants, so we thought perhaps we could grow these Pollinator Packs to share with our members.  In this way we are able to expand the benefit these plants can offer beyond our own valley and into the neighborhoods where our members live, work and play. 

So that is how Pollinator Packs came to be!  We didn’t plant them last year and we had quite a few members asking for them, so we decided to do them again this year.  We’re offering these, free of charge, to our CSA members and encourage each of you to consider where you might be able to plant these in your community.  Some members have larger garden areas and are able to plant several packs while others are more limited in their space and do something as simple as plant them in pots on their balcony or patio.  Every little bit helps and we guarantee you’ll enjoy watching these plants become established, grow and come back year after year.  Of note, all of the plants in the pack are perennials.

This year the contents of the packs are different from two years ago and will be a good complement to the previous selections.  Some of the flowers may not bloom until next season, so don't get discouraged if you don't see flowers this year.  We purchased all of the seed from Prairie Moon Nursery, so if you’d like more information about any of these plants or others you can visit their website.  They have a lot of interesting and valuable information to share.   

If you did not request a Pollinator Pack(s) for this week’s deliveries, it’s not too late.  We still have plenty of packs available and will be delivering them again next week.  If you’d like to join in on the fun, please email Kelly at csa@harmonyvalleyfarm.com and let her know how many packs you’d like us to send with next week’s deliveries. 

Here’s a little more information about the plants in this year’s pack as well as a diagram and pictures to help you identify each one:  

Diagram of plants in your pack

Side Oats Grama


Side Oats Grama:  This is an interesting grass that produces tiny flowers during its summer bloom time in August and September.  When the seed heads dry, they have an oat-like appearance.  It is a food source or larval host for at least five types of skipper moths.  It grows to about 2 feet high. 


Great Coneflower


Great Coneflower:  This is a large plant that can grow up to 6 feet tall and produces yellow flowers in June & July.  It does best in full to partial sun.


Smooth Blue Aster


Smooth Blue Aster:  This plant has smooth leaves with a tough stem that sometimes has a shady blue appearance.  It stands 4 feet tall and produces beautiful blue flowers over a long time from August through October.  It does best in full to partial sun.


Purple Coneflower


Purple Coneflower:  This plant is also known as Echinacea purpurea and has a wide range of medicinal uses. It grows to a height of 4 feet and produces purple flowers from July-September.  This plant is very attractive to bees, so get ready to see some action!  It does best in full to partial sun.


Silky Wild Rye


Silky Wild Rye:  This is a common woodland grass.  It is a thicker grass than the others in our pack and actively grows during spring and fall when soil temperatures are cool.  It grows to a height of 3 feet and does best in partial sun to shady areas.


Blue Sage


Blue Sage:  This is an easy, beautiful plant to grow in areas that are a bit more dry.  It grows to a height of 5 feet and produces blue flowers in August and September that are very attractive to butterflies and bees.  Because of its height, it has a tendency to flop over, so it benefits from being in close proximity to other plants that can provide some support or you may want to tie it to a stake to keep it upright.  If you brush up against the leaves, you’ll pick up the typical scent of sage. 


Blue-Ridge Buckbean


Blue-Ridge Buckbean:  This is a legume also sometimes referred to as Carolina Lupine.  This plant blooms early in the season in May and June when it produces bright yellow flowers.  It grows to a height of 4 feet, does well in full to partial sun and can thrive in drier soil.


Purple Prairie Clover


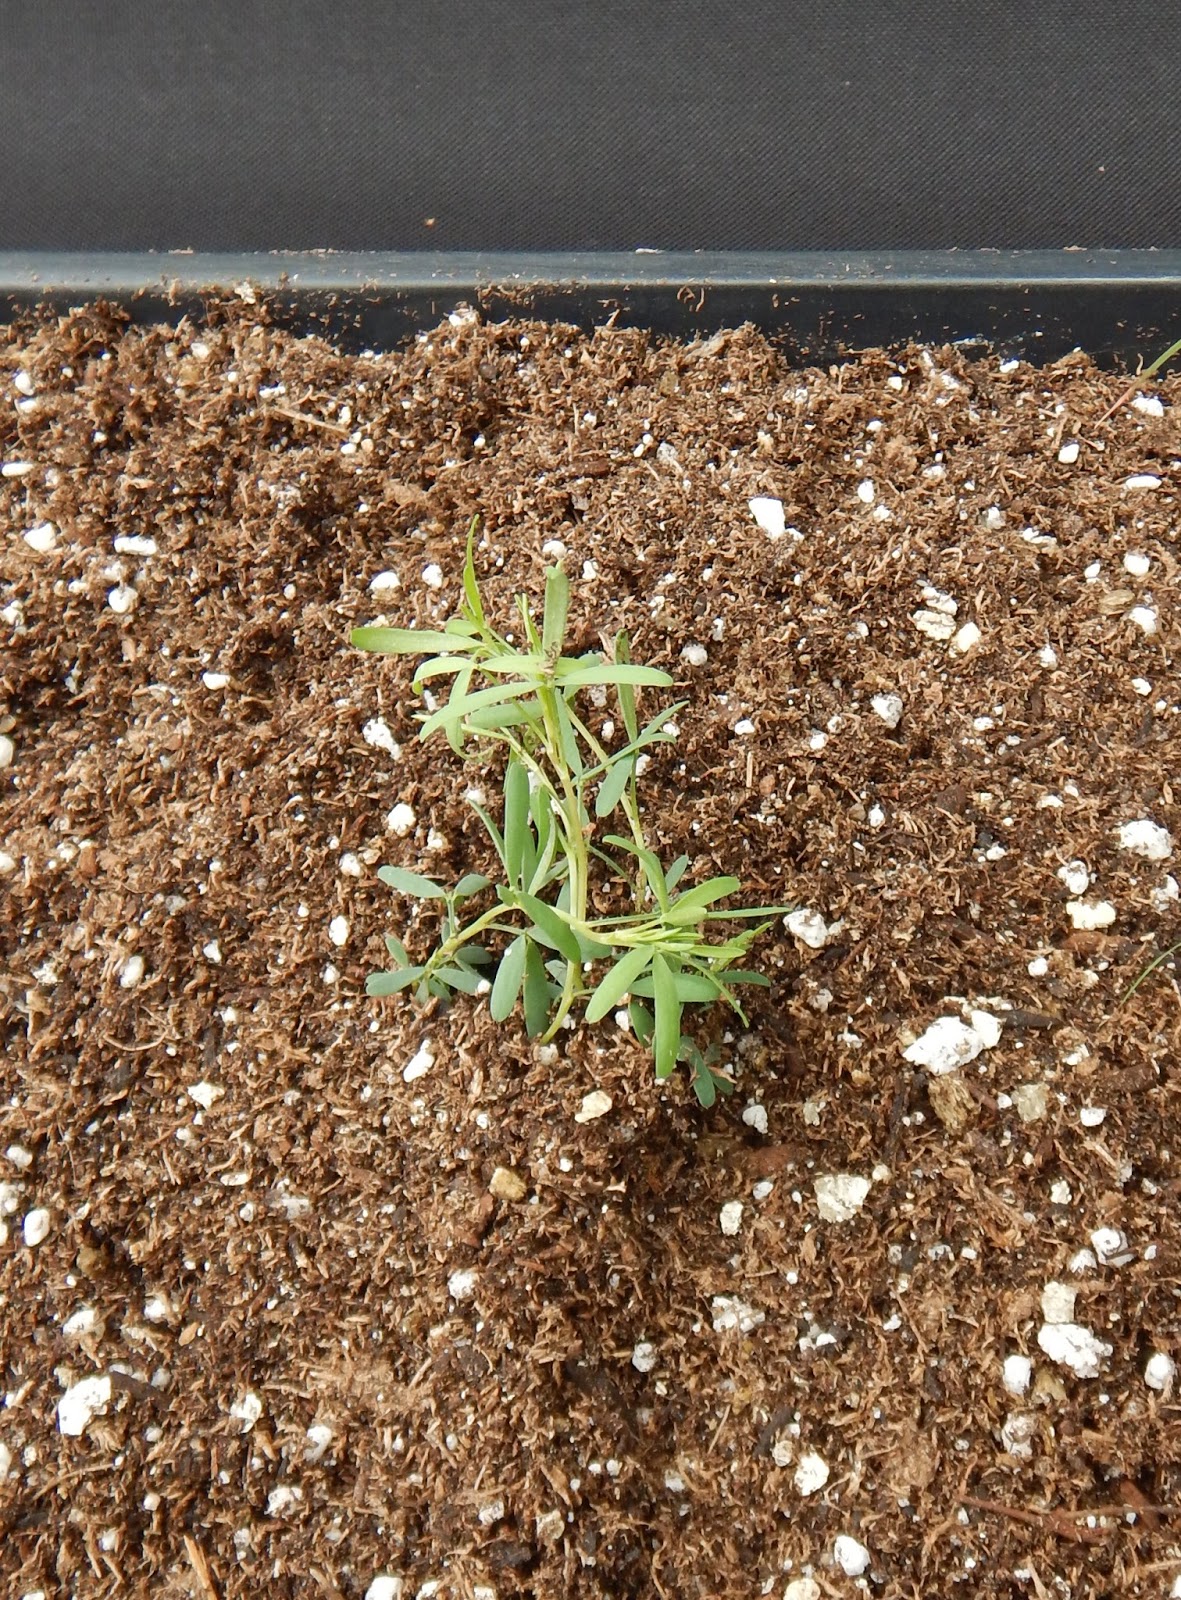
Purple Prairie Clover:  This flowering plant has a shorter stature growing to just 2 feet tall.  It produces purple flowers in July, August and September.  It does well in full to partial sun and drier soil.


Blue Grama Grass


Blue Grama Grass:  This is a drought-tolerant grass that will form a larger clump.  It actively grows during the summer when the soil is warm and only grows to a height of 12 inches.  It forms attractive blue seed heads in late summer to early fall.