Wednesday, September 28, 2022

September 29, 2022 - This Week's Box Contents Featuring Winter Squash


Cooking With This Week's Box

Leeks:  

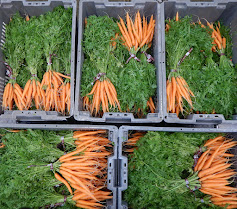
Orange Carrots:  

Asterix Potatoes:  

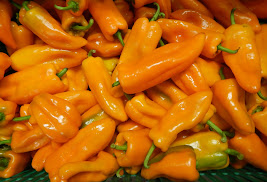
Orange Italian Frying Peppers:  

Mini Sweet Peppers:  

White or Yellow Cauliflower or Broccoli Romanesco:  

Photo from recipetineats.com
Broccoli:  

Jalapeño Pepper:  

Italian Garlic:  

Red Carpet Onions:  

Salad Mix or Baby Arugula:  

Korean or Guajillo Peppers:  


Orange Kuri Squash:  
Winter Squash Turmeric Granola (See Below)

Baby White Turnips:  

Hello!

This week we’re featuring winter squash!  It’s that time of year, so pull out your favorite squash recipes and get ready!  This week’s feature recipe is a little different. I like to make homemade granola and I like to include vegetables in every meal of the day, breakfast included. Thus, I was instantly intrigued by Amy Chaplin’s granola recipe for Winter Squash Granola with Turmeric (See Below). This is super simple to make and is not overly sweet. It’s delicious eaten as “cereal” with milk but is also a tasty topping to eat with yogurt, ice cream, or on top of baked fruit.  I also included links to several of our favorite squash recipes from past years that are good ones to use with this week’s Kuri Squash.

This week we saw our first frost in the valley, but thankfully we were able to cover most of our pepper plants so we can continue to harvest! Check out this recipe for Everything Bagel Cream Cheese Stuffed Mini Peppers  or use that single jalapeño pepper to make Cranberry Jalapeño Dip for something a little different.  If you’re feeling like some comfort food, use your sweet peppers to make Roasted Pepper Potato Soup!

We have a different type of potato this week with the Asterix variety. This is a good variety to use in this recipe for Ultimate Baked French Fries or Baked Parmesan Garlic Potato Wedges.  Serve these with a nice grilled burger topped with Caramelized Onion Jam with Balsamic Vinegar.

I hope you find some tasty ways to transition into fall this week. I wanted to update you on our sweet potato crop. The crew finished harvesting them last Saturday and the sweet potatoes are currently being “cured.”  This is a 7-10 day process that helps to set their skins and develop the sugars.  Hopefully they’ll be ready to start washing next week and if so, they’ll be in your box!  Have a great week and I’ll see you next week!

-Chef Andrea 
 

Vegetable Feature: Winter Squash

by Andrea Yoder

Sugar Dumpling Squash
Winter squash is a broad crop category that is a season within a season. As we transition to fall in the Midwest, winter squash is going to become a main player in our weekly CSA boxes and your cooking adventures. We grow a wide variety of winter squash and strive to select ones that are aesthetically pleasing while still being interesting, delicious, sweet, and flavorful! I say that winter squash is “a season within a season” because different varieties are intended to be eaten at different points in the fall/winter which is greatly based on their storage-ability.  Let me explain.

Orange Kuri
While winter squash is a vegetable meant to be stored and eaten over time, not all winter squash varieties have the same shelf life. Some varieties that have a thin skin and/or are high in natural sugars typically have a shorter shelf life and may not keep into the deep winter. Some of the varieties that fit this category include the very tasty Sugar Dumpling Squash as well as the Orange Kuri and Orange Kabocha squash, we’re delivering this week.  In contrast, other varieties have a thicker skin and are often able to be stored for quite some time. Tetsukabuto and Winter Blush squash are two varieties characterized by their ability to store into the winter. 
Tetsukabuto Squash
In fact, we don’t even touch Tetsukabuto until it has been in storage for several months as it needs that storage time for its natural sugars to develop!  Both Tetsukabuto and Winter Blush have thicker skin and drier flesh. The fact that they do not develop sugars right away lends to their ability to store, but when you do eat them on their time schedule, they are actually sweet and delicious!  The other factor that greatly affects how well a squash may store is related to the field conditions where it was grown.  If we have a wet year or there is some plant disease in the field, we find some squash varieties do not store very well. Thankfully, field conditions were pretty good this year and we were able to get the majority of our squash harvested ahead of some rain and the onset of too much plant disease.  

Autumn Frost Squash
I mentioned a few varieties that mark the beginning and end of the squash spectrum, but there are other varieties we grow to fill in the middle as well! Butternut squash is probably the most common variety and I consider it more of an “all-purpose” workhorse kind of squash.  In general, most butternut varieties are able to be stored into the winter months.  However, all varieties of butternut are not the same either! We grow a tasty little one called “Butterscotch.”  This variety has rich, sweet flesh and is delicious! Due to its high natural sugars, it does not usually store for very long which is why we prioritize this as our first butternut to enjoy.  In recent years seed companies have released some new offerings for butternut spin-offs. We grow two of these types and they are Autumn Frost and Butterkin. Both of these varieties have a butternut parent, which lends to the quality of their flesh that resembles butternut.

Butterkin Squash
Another common variety of winter squash is Acorn squash. For many years we’ve refused to grow acorn squash because it really didn’t have any flavor.  I guess that’s why many recipes using acorn squash are full of sugar!  Recently we have found two acorn spin-offs that are actually quite tasty as well as being attractive.  The first is Heart of Gold squash which is a cross between Sweet Dumpling (similar to our Sugar Dumpling) and acorn.  This squash resembles acorn squash in shape, but it is a little larger and has beautiful multi-colored exterior. The other big difference that sets it apart is that it is actually a very flavorful, sweet squash while still being able to be stored!  The other acorn-type variety we grow is called Starry Night. This is a new variety on the scene that we trialed last year and really liked because it has very sweet, delectable flesh.  This year’s crop has been a bit more variable with some off-types that look a little funny. We’ll have to eat a few more to decide if it’s something we’d like to continue growing.

Heart of Gold Squash
There are two other varieties I’ll mention.  Jester is a new squash we started growing several years ago as a variety to replace Delicata squash which has a very little shelf life despite being very popular.  In my opinion, Jester is as good or better tasting than Delicata.  It also stores much better, partly because it has a thicker skin. And the last variety we have in our lineup is the Black Futsu Pumpkin! This is a Japanese variety that does resemble a pumpkin but really is a winter squash. In Japan they use the word pumpkin and squash interchangeably. Black Futsu does have the ability to store for a while, despite the fact that it does have thinner skin that is edible!  

Jester Squash
The optimal storage temperature for winter squash is 45-55°F. This may be difficult to achieve in a home setting, so my recommendation is to choose a cool, dry place in your home, if possible, even if it is a little warmer than 55°F.  Many people choose to store winter squash in the garage or basement, which is fine to do as long as these spaces don’t get too cold in the winter and if they aren’t too humid.  In the coldest part of the winter our garage temperature usually dips into the 30’s which is too cold for squash.  We also do not recommend storing winter squash in the refrigerator. As I mentioned, storage at temperatures less than 45°F may cause chill injury which will shorten the storage potential of your squash. 

Black Futsu Pumpkin
As you store your squash, check them periodically if you’re keeping them for an extended time.  Look for any spots starting to form that may indicate the start of deterioration. If you do see a problem spot, don’t automatically throw it out!  I repeat, do not throw it out! If you catch it early, the problem may only affect a very small portion that may be cut away.  If that’s the case, don’t delay, it’s time to cook the squash before the issue gets bigger!  As far as uses, there are so many different ways you can use winter squash.  You can include it in soups, stews, sauces, casseroles, hot dishes, pasta dishes, baked goods, desserts, or just eat it with a little butter, salt, and pepper. Don’t be afraid to create tasty pizzas, tacos, quesadillas, curry dishes and anything else you might dream up!  Winter is long and we’re going to be eating quite a lot of squash over the next months, so pull out your old favorite recipes and start looking for new ones to keep things interesting!


Winter Squash Turmeric Granola 

Photo From amychaplin.com
Yield:  10 cups

5 cups rolled oats
1 cup raw pumpkin seeds
1 cup raw unhulled sesame seeds
1 cup raw walnut pieces (or other nut of your choice)
2 tsp cinnamon
2 tsp ground ginger
1 tsp freshly grated nutmeg
1 tsp ground cardamom
½ tsp allspice
1 cup steamed or baked red kuri, kabocha or butternut squash
½ cup extra virgin coconut or olive oil
½ cup brown rice syrup or maple syrup
1 tsp ground turmeric
1 Tbsp vanilla extract
½ tsp salt
  1. Preheat oven to 325°F.  Line 2 rimmed baking sheets with parchment paper and set aside.
  2. In a large bowl, combine oats, seeds, nuts, cinnamon, ginger, nutmeg, cardamom, and allspice.  Set aside.
  3. In an upright blender, combine squash, oil, brown rice syrup or maple syrup, turmeric, vanilla and salt.  Blend until completely smooth.  Add to the dry ingredients and stir to combine.  
  4. Divide between the two baking sheets and spread out evenly.  Bake for 20 minutes, rotate trays and cook for another 15-20 minutes.  Remove from oven and allow to cool before storing in jars.  Granola will store well for 3-4 weeks.
Recipe adapted slightly from Amy Chaplin’s “Pumpkin Turmeric Granola” recipe found at amychaplin.com.

Wednesday, September 21, 2022

September 22, 2022 - This Week's Box Contents Featuring Celeriac


Cooking With This Week's Box

Photo from www.tastesoflizzyt.com
Green Top Celeriac:  
Celeriac and Hash Brown Cake (See Below)
Quick Celeriac Remoulade (See Below)

Leeks:  

Orange Carrots:  

Purple Viking Potatoes:  

Photo from www.debraklein.com
Orange & Red Italian Frying Peppers:

Mini Sweet Peppers:  

White, Purple or Yellow Cauliflower or Broccoli Romanesco:  

Broccoli:  

Jalapeño Pepper:   

Poblano Peppers:  

Italian Garlic:  

Salad Mix:  

Head Lettuce:  

Guajillo Peppers:  

Sugar Dumpling Squash:  

Hello!

I can hardly believe we are two-thirds of the way through this CSA year, but this week will mark the first day of Autumn and we’re packing the first winter squash in this week’s box!  I told you a shift was coming this week and it’s here.  Leeks, celeriac, and winter squash replace watermelon, sweet corn, and tomatoes. Here on the farm, we can feel the changing of the seasons with the shifts in our work.  We’re starting to whittle away at our long list of root crop harvests.  We’ve harvested about half of our celeriac and burdock crops and we’re bringing in our fall storage cabbages this week!  I guess it’s time to shift back to soups and hearty cold weather fare!

This week’s featured vegetable is the subtle, yet sophisticated, celeriac. I tend to use celeriac in very simple ways, such as with this week’s featured recipes.  The first recipe pairs celeriac with potatoes to make Celeriac and Hash Brown Cake (See Below). The second recipe is for a traditional celeriac preparation, Celeriac Remoulade (See Below).  This is a simple slaw that goes nicely with a variety of things including baked fish and grilled chicken.

There are a lot of peppers in this week’s box! I pulled up a few of my favorite recipes for poblano peppers from past years. Those of you who have been with us for a while will likely remember these recipes, but they are keepers!  I also offered up a few suggestions for how to put one jalapeno to use in recipes for breakfast!

Green salads are back on the menu with the return of head lettuce and salad mix.  This week’s recipe suggestions are for homemade dressings and vinaigrettes you can make yourself to dress these lovely greens! 

I hope you enjoy this transition week as we collectively celebrate the official start of Autumn. Pull out your favorite winter squash recipes and don’t forget to share your culinary creations with us in our Facebook Group!  Happy cooking…and eating!

—Andrea 

Vegetable Feature: Celeriac

by Andrea Yoder

Celeriac, or celery root as it is also known, can be a bit intimidating if you’re encountering it for the first time.  However, as with all vegetables, there’s really no need to be intimidated…it’s just a vegetable!  Celeriac is in the same family as celery. The difference is that celeriac is grown for its root and celery is grown for its stalks. While this week’s celeriac has tops, we only harvest them with the tops in late summer or early fall. Pretty soon we will mechanically harvest the entire crop to put them into storage. When we do this, the top is cut off and we store only the root. The stalks on celeriac resemble celery and have a lot of delicious flavors in them, however they are more tough and fibrous than celery and are not usually eaten as you would eat a celery stalk.  If you ever get celeriac with the tops still on, don’t throw them away!  Their flavor can add depth to a pot of stock or soup. 

Now for the root bulb. First, scrub the exterior of the root the best you can. Next, thinly slice away the top and bottom of the root so there is a flat side on the top and the bottom. You’ll probably need to take a little more off the bottom to get past the majority of the roots and get into the more usable bulb portion of the root.  At this point, I usually cut the root in half or into quarters, so it is easier to handle. Using a paring knife, carefully trim away the outer skin. Once you’ve removed the outer skin, rinse the remaining piece of celeriac and clean your cutting board if there’s any residual dirt.  The inner portion of the root is white, solid, and entirely edible. 

Celeriac has a subtle celery flavor that provides a background to soups, stews, and root mashes. It also makes a delicious soup or gratin on its own or combined with potatoes or other root vegetables. It can also be eaten raw in salads and slaws paired with other fall fruits and vegetables. There is a classic French preparation called Celeriac Remoulade which is basically a creamy celeriac slaw.  I like to make a slaw based on this concept, but add apples and fresh, chopped cranberries as well as parsley when available. I’ve also noticed more “paleo” recipes are encouraging the use of celeriac as a substitute for starchy potatoes, noodles, etc.  

Celeriac stores quite well, thus it is an important part of our seasonal winter diets. It can actually be stored for up to 6 months!  Keep it in your refrigerator loosely wrapped in plastic or in the crisper drawer until you are ready to use it.


Quick Celeriac Remoulade 

Photo from bbcgoodfood.com
Yield: 4 servings

7 Tbsp good quality mayonnaise
3 Tbsp Dijon mustard
1 lemon, juice only
1 celeriac 
  1. In a large bowl, mix the mayonnaise, mustard and lemon juice together thoroughly with a generous sprinkling go salt and some freshly ground black pepper, so it all becomes one sauce.
  2. Peel and quarter the celeriac, then, working quickly, coarsely grate it and stir into the sauce until evenly coated.  It will keep in the fridge for up to 2 days.

Recipe borrowed from www.bbcgoodfood.com

Celery Root and Hash Brown Cake 

Yield:  2 to 4 servings

1 pound potatoes
1 celeriac (about 12 ounces or more)
4 Tbsp sunflower seed oil, butter, or a mixture
2 large shallots or 1 yellow onion, finely diced
Sea salt and freshly ground pepper, to taste
A few pinches of celery seeds
½ cup Gruyere cheese, Gouda, or a medium cheddar
Finely chopped celery leaves or parsley, to finish

  1. Scrub the potatoes, and then peel them or not as you wish. Coarsely grate them on a hand grater or in a food processor, then peel and grate the celeriac as well.
  2. Heat the oil and/or butter in a 10-or 12-inch nonstick or cast-iron skillet over medium heat. Add the shallots and cook for about 1 minute. Add the potatoes and celeriac and season with ¾ tsp salt, a few grinds of pepper, and the celery seeds. Stir to coat the vegetables with the oil, then let the mixture sit undisturbed for 5 minutes or so. Fold the browned and crisp outside into the center, then pat the mixture down again. Continue in this fashion, allowing the vegetables to brown and crisp before folding them together, until all are cooked and nicely browned, about 20 minutes. Now, pat the mixture into the pan one more time, forming a nice even cake, and cook a few minutes longer so that it develops a golden crust. Scatter the cheese over the surface and leave to melt into the cake. 
  3. Season with pepper and add the celery leaves or parsley. Cut the cake into wedges (or scoop it out of the pan) and serve.

Recipe sourced from Deborah Madison’s book, Vegetable Literacy.

Wednesday, September 14, 2022

September 15, 2022 - This Week's Box Contents Featuring Carrots


Cooking With This Week's Box

Photo from halfbakedharvest.com
Talon Yellow Onions:  

Orange Carrots:  
Indian-Style Butter Carrots (See Below)

Gold or Red Prairie Potatoes:  

Sweet Corn:  

Photo from themodernproper.com
Sweet Peppers:  

Mini Sweet Peppers:  

Jalapeño Pepper:  

Italian Garlic:  

Baby Arugula:  

Red or Green Boston Head Lettuce:  

Tomatillos:

Green Top Gold or Red Beets:  

Photo from themodernproper.com
We are down to the final week of summer and next week we will officially usher in the first day of Autumn! This week we’re delivering what will likely be the last hurrah of sweet corn along with the last of the watermelons.  Sadly, we won’t have enough watermelons for the entire week, but we’ll include them in as many boxes as possible.  As we straddle the seasons, sweet peppers continue to shine. You’ll find quite a few recipes in this week’s list of suggestions that include peppers.  But before I get ahead of myself, lets talk about this week’s featured vegetable—Carrots! Come on Andrea, we’ve been getting carrots for quite awhile now and everyone knows what to do with a carrot!  Tis true, carrots are one of the most common, staple vegetables and we do set out to include them in a majority of the boxes over the course of the season.  But do you ever get in a rut and week after week they start to accumulate in your crisper drawer? I often overlook carrots and use them more as an accessory vegetable instead of the featured component in a recipe. So, this week’s featured recipe of the week brings carrots front and center.  I sourced this recipe for Indian-Style Butter Carrots (Gajar Makhani is the name in Punjabi and translates to “Carrot” and “Butter”) from Alice Zaslavsky’s recently published book, In Praise of Veg:  The Ultimate Cookbook for Vegetable Lovers. It’s a vegetarian curry dish that has some richness from coconut milk and toasted cashews.  Serve it alongside roti or naan bread with steamed rice.

This is our second time including tomatillos in the box this year. As the nights start to get cool, one of my favorite late summer/early fall soup recipes is for this Spicy Pork and Tomatillo Soup which is a recipe we’ve featured previously and dates all the way back to 2007 when I used to cook lunch for the crew!  If you want to stick with making a traditional salsa verde, you can do so and use it to make Roasted Salsa Verde Chicken Nachos

If you do “Taco Tuesday” in your household, I have a taco recipe suggestion for you this week. Check out these Peach & Pepper Tacos which utilize the mini sweet peppers.  You could also go with Taco Stuffed Peppers and make use of this week’s colored bell peppers.  

This week we’re reintroducing some salad greens after a long summer off of green salads.  Use this week’s bag of arugula to make this Autumn Pear Salad with Candied Walnuts and Balsamic Vinaigrette.  If you don’t use the Boston lettuce to make lettuce wraps, then consider making this Roasted Red Pepper Salad with Butter (Boston) Lettuce and Creamy Dressing.

You may find an item or two in your box this week that is not included in this list as we weren’t able to include them in all the boxes.  If you’re looking for a way to use cauliflower, broccoli or watermelon, refer to some of the previous weeks’ articles.  Ok, I’m going to wrap it up there.  Get ready to shift into soup mode next week. We’re planning to harvest celeriac and leeks for next week’s boxes! 

-Chef Andrea

Vegetable Feature: Carrots

by Andrea Yoder

While we often use this space to feature a new item in the box, this week we’re going to give this space to the humble carrot.  We consider carrots to be a staple vegetable, which is why we strive to include them in as many boxes as we can starting in early summer and going through the end of the season. However, since they are such a common vegetable, I think sometimes they get overlooked and if you are like me, I forget to use them, and they start piling up in the refrigerator.  So, this week’s feature article is more about reminding you of all the different ways carrots can be used!  
Before we talk about using carrots, I want to mention that there are many different types and varieties which may be best suited for growing at different times of the season.  Early season varieties of carrots we grow are characterized by being more tender and juicier than our storage carrots. They also take fewer days to mature and are often harvested with the tops intact. Storage carrots, as the name suggests, are able to be stored for months if you keep them in a plastic bag in the refrigerator.  You’ll notice they are more dense (some may say hard), which lends to their ability to be stored longer.

So, what can you do with carrots? Carrots are versatile in their uses and may be eaten raw, roasted, boiled, baked, and even fried! They can be added to soups, stews, braised meats, curries, root mashes, pancakes, bread, cookies, and a whole host of other uses. Heck, where I come from Carrot Jello Salad is a mainstay at all the church potlucks! You can make a very simple, quick, and easy salad with just a few ingredients or add shredded carrots to lettuce salads, slaws, etc.  Soup is another great way to use carrots---either as the main ingredient or as part of a mélange of vegetables in say, chicken soup.  Carrots are also delicious in baked goods such as carrot cake, carrot cookies, apple-carrot muffins, and carrot pancakes. Additionally, carrots pair well with a variety of herbs and spices as well as fruits such as apples and citrus. We’ve even featured recipes in previous years for including carrots in oatmeal for breakfast!  Of course, carrots are also a great item to keep on hand when you just need a crunchy, quick snack to hold you over until dinner is ready! I often will wash and trim some carrots and have them ready to go in the refrigerator for those times when I want a quick, healthy snack!

We are moving into storage carrot season, so it is ok if you don’t eat all your carrots each week as they will store for several weeks.  Keep them in a plastic bag in the refrigerator to keep them crispy. If your carrots do get a little dehydrated, soak them in ice water for at least 30 minutes to crisp them up again or just use them in a soup or stew where they are going to get soft anyway! Do carrots need to be peeled? Well, that’s up to you.  The peel is edible, and I seldom peel them. In fact, most of the mineral content lies close to the surface and removing the skins strips them of their healthful goodness. Just give them a rinse and light scrub to remove any dirt. 

In closing, carrots are packed with important nutrients, specifically beta carotene which is an important antioxidant and vitamin for our bodies. It’s important for vision, immunity and a whole host of other health benefits which make them a great vegetable to eat regularly!


Gajar Makhani - Indian-Style Butter Carrots

Yield:  4-8 servings

1 ¾ oz butter
2 Tbsp vegetable oil
1 cup raw cashews
2 garlic cloves, finely chopped
1 Tbsp finely grated fresh ginger
1 Tbsp brown mustard seeds
4 curry leaf branches, leaves picked (about 35-40 leaves)—SEE NOTE BELOW
1 bunch cilantro, washed well 
3 tsp garam masala
1 tsp ground turmeric
1 tsp ground cardamom
1 tsp mild chili powder
1 ½ cups Greek-style yogurt
1 ½ pounds carrots, cut into 1 1/4-inch pieces on the diagonal (peeling optional)
1 Tbsp brown sugar
1 lb 9 oz tomato passata (tomato puree)
1 cup coconut cream, plus extra to serve
Steamed basmati rice, to serve
Naan or roti bread, to serve
  1. Heat butter and oil in a wide saucepan over medium high heat.  Add the cashews and toss for 3 minutes, or until toasted and golden.
  2. Add the garlic, ginger, mustard seeds and curry leaves and cook, stirring, for 2 minutes, or until aromatic.  Set aside half the cashew mixture for serving.
  3. Separate the cilantro leaves and stems.  Finely chop both and keep them separate.  Add the cilantro stems and spices to the pan and cook, stirring constantly, for 1 minute, or until fragrant. 
  4. Stir in the yogurt until combined, then add the carrot and stir to coat.  Stir in the sugar, tomatoes, coconut cream and 1 cup water and bring to a simmer.
  5. Partially cover the pan with a lid.  Simmer over low heat for 30--45 minutes, or until the thickest piece of carrot you can find is fork-tender, and the gravy has thickened and reduced slightly.
  6. Serve drizzled with extra coconut cream and sprinkled with the reserved cashew mixture and cilantro leaves, with rice and naan or roti bread.
Note from Chef Andrea:  Fresh curry leaves may not be readily available, but that’s not a reason to forego making this recipe!  At the very least, forego the curry leaves or any substitute and this dish will still have a lot of flavor.    That being said, some food co-ops or grocery stores may have dried curry leaves available in the bulk spice/herb section.  I have purchased them at the Wedge Co-Op in Minneapolis before.  If you can’t find fresh leaves, substitute half the amount called for in the recipe with dried curry leaves.  Curry leaves impart a citrusy flavor, so if you can’t find fresh or dried curry leaves you can also just use some fresh lemon or lime zest to add a little brightness to the dish.  If using fresh zest, I recommend adding it at the end of cooking for the best flavor.

Recipe borrowed from Alice Zaslavsky’s book, In Praise of Veg:  The Ultimate cookbook for Vegetable Lovers.

Wednesday, September 7, 2022

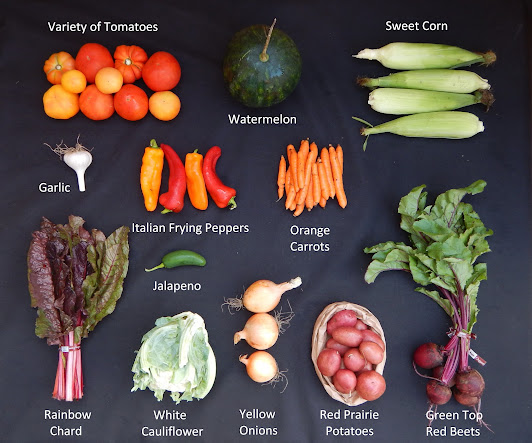
September 8, 2022 - This Week's Box Contents Featuring Sweet Peppers


Cooking With This Week's Box

Red and/or Orange Italian Frying Peppers:  

Yellow Onions:  

Photo from crunchycreamysweet.com
Orange Carrots:  

Red Prairie Potatoes:  

Variety Bag of Tomatoes:  

Sweet Corn:  

Red Seedless Watermelon:  

White, Purple or Yellow Cauliflower or Broccoli Romanesco or Broccoli:  

Jalapeño Pepper:  

Porcelain Garlic:  

Green Top Red Beets:  

Rainbow Chard or Broccoli Raab:  

Hello! 

This week we have a burst of color in the box with sweet peppers! Peppers are one of my favorite crops and the ways you can incorporate them into meals and recipes are endless. This week’s featured recipe is very simple, but make sure you use good ingredients as this is the factor that makes this recipe shine.  This recipe for Penne Pasta with Roasted Peppers and Almonds is very quick. While you boil the water and cook the pasta you can roast the peppers. Serve it on its own as a simple, light pasta dish or serve it alongside grilled beef, fish, or chicken. I also included links to two of my favorite sweet pepper recipes from the past, Sweet Pepper and Cheddar Clafoutis and Creamy Roasted Sweet Pepper Dressing.  This dip is nice to have on hand. I use it to dip vegetables in, such as carrot sticks, but I also use it as a sauce on a variety of things including sandwiches and wraps.

I included several recipe collections for you this week to expand the possibilities. If you’re looking for ways to use the pile of tomatoes this week, check out 17 Ways To Build a Better Tomato Sandwich.  If you receive broccoli raab and do not know what to do with it, check out 14 Broccoli Raab Recipes We’re Not Bitter About.  And lastly, we don’t want those beet greens to go to waste, so check out this recipe entitled,  15 Ways to Eat Beet Greens (And Why You Should).

I also pulled up a few French classic recipes. Check out this Basque Piperade (Spicy Tomato-Pepper Sauce) or Pommes Boulangére (French Layered Potato and Onion Bake). While the names sound much more flashy in French, they are really quite simple preparations.

We have just a few more weeks of summer remaining! Keep your fingers crossed that we may continue to pick tomatoes for a few weeks, and I’m looking forward to just a little more sweet corn before the season is over.  Pretty soon we’ll be harvesting leeks to go along with the celeriac, and we’ll be sending more cabbage.  Of course, it’s almost time to start eating winter squash and just a few more weeks until we dig sweet potatoes!  

Have a great week and enjoy all your delicious late summer creations!

-Chef Andrea 

Vegetable Feature: Sweet Peppers

by Andrea Yoder

Mini Sweet Peppers
As we continue our progression through the seasons, we are approaching another transition point. Within the season of “Summer,” I feel like there are sub seasons. Zucchini and cucumbers mark the beginning of summer. Tomatoes take center stage in mid-summer, and peppers close it out. For me, the peak of the pepper season is one of the markers that late summer is upon us and will very soon be colliding with fall. Peppers are one of my favorite vegetables to grow and eat and they so gracefully represent this unique point in our growing season. They pair well with all of the summer vegetables we still have available, such as tomatoes and eggplant.  They also pair nicely with fall cauliflower, winter squash, sweet potatoes, potatoes and fall greens such as broccoli raab. 

Ukraine Peppers
This week we’re focusing on sweet peppers, of which we grow several different types.  Before I go on, I want to mention that all peppers start out as green peppers when they are immature. While we eat green peppers, peppers are actually fully ripe and at their peak of sweetness and flavor if we let them turn color to be fully red, yellow or orange.  Most people are familiar with the standard bell pepper, which holds an important place in our pepper lineup as an early season green pepper.  Once we start seeing some color in the field as peppers ripen, we move on to more interesting varieties such as Italian frying peppers. Italian frying peppers are long, slender peppers that, despite their name, may be eaten either raw or cooked. We have both red and orange varieties, and both have pretty good pepper flavor and sweetness.  One of our other unique sweet pepper varieties is the Ukraine pepper.  This is a pepper for which we have saved our own seed for several decades. It’s actually not available commercially and we got the seed from someone who brought it from Ukraine.  We like this pepper because it’s a heavy producer, often with as many as twelve peppers per plant. This pepper resembles a bell pepper, but they are smaller and have a pointy bottom instead of a blocky bottom. They also ripen to more of an orange red color instead of bright red. They have a thick wall which makes them a good candidate for roasting.  They’re also a good pepper to use for stuffed peppers.

We also grow mini sweet peppers which are our all-time favorite sweet variety. While there are many snack peppers available in the marketplace today, we believe our peppers are more flavorful than commercial seed varieties. We’ve been saving our own seed for well over 15 years and our variety is not just carefully selected, but also well adapted to our area.  

Orange Italian Frying Peppers
While sweet peppers are delicious eaten raw, they may also be sautéed and roasted. You can roast peppers, whole, over an open flame such as on a grill or just on your stovetop if you have gas burners. Otherwise, peppers may be roasted under a broiler in the oven. When roasting peppers, you want to blacken nearly the entire exterior of the pepper.  Once blackened, put them in a bowl and cover them so they steam for about 10 minutes. Remove the cover and once they are cool enough to handle you can peel away the black skin.  Once you have roasted the pepper, it’s ready to use however you’d like.  Slices of roasted red pepper are a nice addition to sandwiches, grain, or lentil salads, or use them to build an antipasto platter. You can also use roasted sweet peppers to make a delicious cream sauce, dressing or soup.

While pepper season usually lasts several weeks, peppers are one of the easiest vegetables to preserve and it's worth putting some away to use throughout the winter. I use them quite often in winter stir-fries, as a pizza topping, added to soups and stews, and scrambled eggs, etc. Even if I am limited on time, I know I can always successfully freeze peppers as they do not need to be cooked before freezing. At a minimum, freezing peppers requires the time it takes to wash the pepper and put it in a bag. If I have a little extra time, and to save some freezer space, I’ll actually remove the stem and seeds and cut them into smaller pieces.  Really, it’s that simple and you’ll really appreciate having them in the dead of winter!

Peppers are high in vitamins A & C as well as a whole host of other phytonutrients, so munching on a sweet pepper also has nutritive benefits. As far as storage goes, peppers are best held at a warmer temperature of 45-60 degrees. We recognize very few homes have this perfect storage environment, so we recommend you do your best. Personally, I choose to store them at room temperature. If you choose to put them in the refrigerator, I’d encourage you to use them within a few days as they can get cold injury with prolonged time at cold temperatures.  Sometimes my peppers start to dehydrate and get soft and wrinkly. This does not mean the pepper is bad, it may have just lost some moisture. If this happens to you, don’t throw it out, rather use it in a cooked preparation such as soup or if you want to use it raw, do so to make a pepper puree or pepper sauce. 

Penne Pasta with Roasted Red Peppers and Almonds

Yield:  4 servings

¾ pound penne pasta 
4 colored sweet peppers, halved and seeded*
¾ cup pitted kalamata olives
½ cup coarsely chopped roasted almonds
¼ cup extra-virgin olive oil
1 Tbsp fresh thyme leaves
Salt and black pepper, to taste 

  1. Cook the pasta according to the package directions. Reserve ½ cup of the cooking water; drain the pasta and return it to the pot.
  2. Meanwhile, heat broiler. Place the peppers, skin-side up, on a baking sheet and broil until blackened, 8-10 minutes. When the peppers are cool enough to handle, scrape away the blackened skins with a knife and discard.  Cut the flesh into 1-inch pieces.
  3. Add the peppers, olives, almonds, olive oil, thyme, 2 Tbsp of the reserved cooking water, ½ tsp salt and ¼ tsp black pepper to the pasta and toss to combine. Add more cooking water if the pasta seems dry and adjust the seasoning to your liking. Serve while warm.

*Note:  If you have a gas stove, you can leave the peppers whole and char them directly over a high flame, turning them frequently with tongs until they are blackened. 

Recipe borrowed from Real Simple:  Easy, Delicious Home Cooking.