Wednesday, November 4, 2020

November 5, 2020 - This Week's Box Contents, Featuring Baby Ginger!

Cooking With This Week's Box


Fresh Baby Ginger: Ginger Syrup (see below); Homemade Pickled Ginger (see below); Butternut Squash & Lentil Curry; Curried Beet Soup with Tandoori Chickpeas; Garlic Ginger Brussels Sprouts


Butternut Squash & Lentil Curry
photo from makingthymeforhealth.com
Many people think we start winding down after the first frost, everything is harvested and we’re ready to close up for the winter.  WRONG!!!  We’re still going strong and have more fun vegetables to send your way, such as this week’s fresh baby ginger!  If you’ve never had fresh ginger, you are in for a treat.  There are many things you might do with fresh ginger, but this week we’re featuring two simple recipes that will serve as a means of preserving the fresh ginger flavor and making it go further.  The first is a tasty Ginger Syrup (see below) that can be used to make homemade ginger ale or add it to lemonade, hot or cold tea, cocktails or just take a spoonful as an immune booster to stay healthy this winter!  The other recipe is for Homemade Pickled Ginger (see below).  Pickled ginger is traditionally made with fresh baby ginger, so this is a very fitting application.  If you think pickled ginger is only for eating with sushi, think again.  This is a tasty condiment to eat with stir-fry, rice, mixed into salad dressing, marinades and so much more!  You can also use fresh ginger in a variety of recipes such as this Butternut Squash & Lentil Curry.  This recipe also calls for cauliflower.  If you have one hanging out in your refrigerator from last week, add it in!

Butternut Squash Enchiladas
photo from makingthymeforhealth.com
We know butternut squash is a popular variety of winter squash and we’ve gotten a few inquiries from members wondering if we didn’t have a good crop this year since we’ve only delivered it once or twice.  Actually, the butternut squash did very well and they’re storing remarkably  which is why we have not delivered them yet!  This week though we’re packing Butternut, Butterkin or Autumn Frost squash.  We grew lesser amounts of the latter two, both of which are spin-offs of butternut squash.  All of this week’s varieties are appropriate to use in any recipe calling for butternut such as this Butternut Squash & Kale Risotto.  This is a perfect recipe to make with this week’s lacinato kale.  It also calls for sage, so I’ll interject a reminder here to harvest the rest of the sage from your herb garden if you have not already done so!  Another recipe I want to mention is for Butternut Squash Enchiladas.  This is a vegan version devoid of cheese and utilizing a cashew sour cream.  Of course, if you eat dairy you could also use dairy sour cream.  The fun thing about this vegetable-centric enchilada recipe is that it includes Brussels sprouts!  This recipe also calls for a jalapeno and salsa verde.  This is a great example of a recipe that blends vegetables from different seasons of the year.  So, if you stashed some jalapenos in your freezer and/or preserved tomatillo salsa, now’s the time to pull them out!  If you did not, but you have a Korean chili pepper still lingering, you could use that instead of the jalapeno.   These are the kind of recipes that come together and are very rewarding to enjoy when you can pull from different parts of the local seasons!

Italian Wedding Soup
photo by Maria Siriano for thekitchn.com
When you open this week’s box you will be greeted by a gorgeous head of escarole!  Escarole is not lettuce, it’s actually a chicory and is a cold-hardy bitter green.  It pairs well with sausage, garlic and beans to name a few other ingredients.  Italian Wedding Soup is a classic recipe featuring escarole. You can also go in the direction of pasta with this simple recipe for Orecchiette with Sausage and Escarole.

Have you ever used red onions to make a jam or chutney?  I don’t do it enough, but my goodness it’s so delicious!  Here’s a recipe for Red Onion & Chili Chutney.  This is a lovely condiment that really highlights the sweetness of the red onions.  Serve it as a condiment alongside roast chicken, lentils or bean dishes.  You can also serve it on toast or crostini with goat cheese or cream cheese.

We eat a lot of carrots throughout the year, but the beauty of this root vegetable is its versatility.  This week lets turn our carrots into pancakes!  I have two suggestions, the first being this savory approach for Carrot Pancakes with Salted Yogurt.  Serve these as a main dish with a salad or use them as an accompaniment to a grilled steak, roast chicken, etc.  The second suggestion is for Carrot Breakfast Pancakes!  You know I love starting the day off with vegetables, but I also love pancakes!  It’s a perfect combo!

Herbed Goat Cheese & Root Vegetable Galette
photo by Bobbi Lin for food52.com
Thanksgiving is coming soon and bloggers and foodie websites are starting to post their Thanksgiving recipe suggestions and collections.  I love these collections because it’s a great way to collect recipes you can prepare all winter!  I took a look at a few sites this week and have already found some good recipes.  Lets start with Food52’s collection entitled “50 Best Thanksgiving Appetizer Recipes.”  While these are appetizer recipes, that doesn’t mean you have to serve them as an appetizer.  This recipe for Ricotta Crostini with Kale Pesto could be served for breakfast or a light lunch or dinner along with scrambled or fried eggs.  This Herbed Goat Cheese & Root Vegetable Galette could also serve as a vegetarian main dish for any meal of the day.  It calls for sweet potato, carrot and turnip, but really you can use any root vegetable you have available.  The third recipe I pulled from this appetizer ensemble is for Bright Red Beet Hummus.  Serve this with raw vegetables or crackers for a snack or spread it on pita bread or a wrap and stuff it with vegetables for lunch.

Mashed Potatoes with Caramelized Onions & Goat Cheese
photo by James Ransom for food52.com
I also looked through Food52’s “Best Thanksgiving Side Dish Recipes Collection” where I found a few recipes I want to try.  This week’s Asterix and russet potatoes are both good selections for mashing, so we might as well try these Mashed Potatoes with Caramelized Onions & Goat Cheese!  This recipe does call for 3 pounds of potatoes, but your box only contains 2 pounds, so plan accordingly.  While stuffing is associated with Thanksgiving and the turkey, you can eat it any time of the year!  So lets try this Butternut Squash, Brussels Sprouts & Bread Stuffing with Apples, an interesting and flavorful alternative to the traditional stuffing recipe.

Thanksgiving Root Vegetable Pie
photo by Eric Moran for food52.com
There are a few more side dish recipes I pulled from the aforementioned collection.  This recipe for an Autumn Root Vegetable Gratin with Herbs and Cheese is a good recipe to keep handy as it is a great way to utilize root vegetables and you can change up the vegetables you use to make it depending on what you have available.    The same is true for this Thanksgiving Root Vegetable Pie, a vegetarian main dish built on root vegetables which serve as the “pie filling” and a sweet potato topping.

I also found one more recipe possibility for escarole.  This recipe for Stewy White Beans with Escarole, Garlic and Sizzled Rosemary.  This sounds like a cozy dish of comfort for a chilly winter night!

Curried Beet Soup with Tandoori Chickpeas
photo from minimalistbaker.com
We’re nearly at the bottom of the box, but before we finish I want to share this recipe for Curried Beet Soup with Tandoori Chickpeas.  The ingredient list for this recipe is pretty lengthy, but don’t be intimidated by that.  The different spices and ingredients are what build flavor in this recipe, so take a little time and invest in this interesting soup recipe!

Have a great week and remember, we change to every-other-week deliveries for the remainder of the season.  We’ll have another delivery the week before Thanksgiving and then we’ll return after the holiday to finish up our final two deliveries in December!  See you back here in two weeks!---Chef Andrea


Vegetable Feature: Baby Ginger

By Chef Andrea

This week we’re featuring Fresh Baby Ginger, a tropical plant we have been growing for nearly a decade!  Our growing season is much different than Hawaii and other ginger-producing regions, however it is possible to grow ginger in this climate!  Ginger is actually a rhizome, which is a stem that grows horizontally underground.   It produces roots to anchor it and sends up shoots to grow into foliage above ground as it grows and expands.  Ginger grows best in an ideal soil temperature of about 65°F.  In our northern climate, we have best results growing ginger in a greenhouse as we just don’t have a long enough growing season to get any kind of appreciable yield when grown in the field.  The ginger we produce is actually referred to as baby ginger as we don’t have enough warm days, even when grown in the greenhouse, to produce fully mature ginger.

Ginger sprouts emerging in trays of soil
Ginger is a sterile plant and does not produce actual seed like other crops.  It is vegetatively propogated meaning you plant a piece of the ginger rhizome and it grows and spreads to produce more ginger.  We receive our ginger “seed” pieces in February or March.  The first thing we do is put the ginger in trays of potting soil in our warmest greenhouse.  We water the trays once or twice a week and keep them warm.  This is the pre-sprouting phase which can take 3-4 weeks.  During this pre-sprouting phase, the ginger piece starts to swell and produce shoots.  Once we have established some good sized plants, we prepare trenches in the greenhouse, load them up with plenty of compost and then transplant the ginger into the soil.

Lupe transplanting Ginger sprouts
As the ginger gets established and grows, it continues to send out more shoots from the main rhizome.  Throughout the growing season we manage weeds by hand weeding and deliver water through underground irrigation lines.  As with any crop, ginger has its own set of diseases it is susceptible to.  Some of the diseases live in the soil and can persist from year to year, making them a real challenge to manage.  One of the keys to organic ginger production is to prevent the onset or spread of disease by using “clean” seed.   We get our seed stock from Puna Organics in Hawaii.  They have a process for producing certified organic, disease free seed.  It isn’t a quick process, and can take up to 5 years to produce actual seed.  As with many other crops, good quality seed is an important first step to producing a healthy crop.  Crop rotation is also an important part of disease management, which is why we don’t grow ginger every year.

Baby ginger is different than fully mature ginger, which is what you have likely purchased if you’ve bought ginger from the store.  Baby ginger has a very thin skin with some pink coloring, especially at the points where the stems have grown from the main rhizome.  If you store baby ginger for a few weeks it will start to develop more of a brown skin similar to fully mature ginger, but it will never quite offer the same coverage as when fully matured.  Baby ginger is more tender, juicy and has a bright and perhaps a bit more mild flavor than some fully mature ginger that can be quite spicy.  In many ways, young ginger versus fully mature ginger is very similar to the differences you experience with using fresh garlic harvested in late June versus mature garlic that has been cured.

Ginger, Apple & Cardamon Compote
Ginger is used as both medicine and food.  As a medicine, it has anti-inflammatory properties, can sooth a whole host of gastrointestinal maladies, and can also be an effective pain reducer.  It is a common ingredient in many Asian cultures, often pairing with garlic and scallions in Chinese stir-fry or combine it with chiles, lemongrass and a variety of other ingredients to make Thai curry pastes.  Ginger has a spicy, warm flavor which also makes it an excellent ingredient to pair with other spices and rich, comforting foods such as sweet potatoes, winter squash, mushrooms, broccoli, etc.  It can be used extensively to make beverages, teas, baked goods, stir-fry, salad dressings, vegetable dishes, curries, and much much more!

To use baby ginger, simply cut a piece from the main chunk and peel if necessary.  Because it doesn’t have much of a protective skin, we recommend you use fresh ginger within a week of receiving it for the full fresh baby ginger eating experience.  If you’re looking for ways to preserve ginger, consider trying one or both of the recipes featured in this week’s newsletter.  The first is a recipe for Ginger Syrup that can be used as a base to add to beverages or just eat a spoonful each day for an immune boost.  The second recipe is for Pickled Ginger.  Traditional Japanese Pickled Ginger that is commonly served with sushi is made with baby ginger.   The pink hue of pickled ginger comes from that pink color you see on the skin of baby ginger.  This is also the preferred form of ginger to use as it’s more tender and delicate compared to fully mature ginger.  Pickled ginger is very easy to make and will keep for up to six months in the refrigerator.  You can use it as a condiment for more than just sushi.  I like to chop it finely and add it to salad dressing, mix it into vegetable salads, layer it onto sandwiches or eat a little alongside rice or fish.

We’ve come to appreciate this crop over the years and hope you enjoy this little taste of the tropics! 

Ginger Syrup

Yield:  1 cup
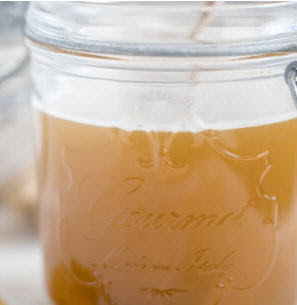
photo from theharvestkitchen.com
¾ cup water
1 cup fresh ginger root, peeled and sliced
¾ cup honey
  1. Peel ginger if necessary and cut into pieces.
  2. Bring ginger and water to a simmer in a small saucepan over medium-low heat.
  3. Simmer uncovered for 20 minutes
  4. Strain through a sieve and reserve ginger for another use or discard.
  5. Set ginger water aside to cool for 5 minutes
  6. Add honey, ¼ cup at a time, and mix with the ginger water until honey dissolves and you achieve the desired sweetness.
The author offers the following suggestions for how to use this ginger syrup:
  • Ginger Water:  Add 1-2 tsp ginger syrup to a glass of water and serve over ice.
  • Lemon Ginger Water:  Stir the juice of ¼ to ½ of a lemon with 1-2 tsp ginger syrup in a glass of water and serve over ice.
  • Hot Ginger Tea:  Heat a cup of water and stir in 1-2 tsp ginger syrup.
  • Hot Tea:  Instead of using honey, stir in 1-2 tsp ginger syrup to a cup of your favorite hot tea.
  • Ginger Lemonade:  Use this simple ginger syrup instead of a simple syrup when making homemade lemonade.
  • Homemade Ginger Ale:  Mix ¼ cup ginger syrup and ¾ cup sparkling water.  Serve over ice.
Recipe borrowed from www.theharvestkitchen.com.

Homemade Pickled Ginger

Yield:  1 pint

photo from loveandoliveoil.com
8 ounces fresh baby ginger
1 cup unseasoned rice vinegar
¼ cup sugar
1 tsp kosher salt
  1. Wash and scrub ginger well to remove any remaining bits of dirt or soil.  Use a spoon or the back of a paring knife to scrape off any papery bits of skin.  
  2. Thinly slice ginger across the grain using a vegetable peeler, mandolin or a sharp knife.  You want the ginger to be as paper thin as possible.
  3. Place sliced ginger in a bowl.  Pour 2 cups of boiling water over ginger and let set for 5 minutes.  
  4. Drain well, then pack ginger into one pint jar.  Be sure the jar is thoroughly washed or, even better, sanitized in boiling water prior to using. 
  5. In a saucepan, bring vinegar, sugar, and salt to a simmer, stirring until sugar is completely dissolved.
  6. Pour hot liquid over ginger in the jar.  Secure the lid and allow the jar to cool to room temperature, then refrigerate.  The pickled ginger, which is ready to eat after several hours, will keep in the refrigerator for up to six months.
Recipe borrowed from www.loveandoliveoil.com.

Wednesday, October 28, 2020

October 29, 2020 - This Week's Box Contents, Featuring Brussels Sprouts!


Cooking With This Week's Box


German Butterball, Peter Wilcox or Purple Majesty Potatoes: How To Freeze Potatoes; Easy Vegan Scalloped Potatoes; Steamed Carrot Pudding


Brussels Sprouts: Hoisin Glazed Brussels Sprouts (see below); Creamy Brussels Sprout Slaw with Apple and Toasted Almonds (see below); Brussels Sprouts with Caramelized Onions


Korean & Jalapeno Peppers: Salt-Cured Chilies


Purple Daikon Radish: Soy-Pickled Daikon Radish

Jester, Festival or Butterscotch Butternut Squash: Stuffed Winter Squash; 17 Stuffed Winter Squash Recipes

Hello Everyone and welcome to the last week of October!!  After this week we have four more CSA boxes remaining.  Don’t forget our delivery schedule changes a little bit in November and December so we can dance around the holidays.  Make sure you check your HVF calendar and know when you have a delivery.  This week we’re excited to be packing tasty Brussels sprouts in your boxes!  I turned to two of my favorite cookbook authors for Brussels sprout recipe inspiration this week.  First, Hoisin Glazed Brussels Sprouts (see below) from Andrea Bemis which could make a nice meal along with some steamed rice and grilled beef.  The second recipe is from Sarah Britton and is for a raw slaw.  Her recipe for Creamy Brussels Sprout Slaw with Apple and Toasted Almonds (see below) is light and refreshing, but also packed with nutrient dense ingredients.  This slaw is substantial enough to serve as a vegetarian main dish, or you can eat it as a side dish.  

Brussels Sprouts with Caramelized Onions
photo from eatgood4life.com
Caramelized onions have been on my mind this week.  Have you ever had them or made them?  They are so sweet, silky and delicious and I just don’t make them enough!  Tis the season though because I love eating caramelized onions with Brussels sprouts!  If you’ve never had this combo, give it a try.  Here’s a recipe for Brussels Sprouts with Caramelized Onions to guide you.  If you’re caramelizing onions for the first time, consider this tutorial on How To Caramelize Onions.  It’s not difficult, you just need a little time and some patience.  You can make them on the stovetop, or check out this article, How to Make Caramelized Onions in the Slow Cooker.  If you don’ know what to do with caramelized onions, here’s an article entitled: Top Five Ways to Use Caramelized Onions.  If the suggestions in that article don’t appeal to you, consider making this over the top, to die for French Onion Grilled Cheese Sandwich!

We’re coming down to the last of our potatoes.  We have enough for the next two boxes and then we might be finished for the season.  If you’re looking to put something in the freezer now so you can enjoy it later in the winter when you aren’t picking up a CSA box, consider freezing potatoes.  Now, you can’t just stick a raw potato in the freezer and walk away.  If freezing potatoes is new to you, check out this article, How To Freeze Potatoes.  If you don’t have storage space or the desire to freeze potatoes, then try this recipe for Easy Vegan Scalloped Potatoes.  It’ll be a nice alternative to the traditional rich dairy based scalloped potatoes.

Charred Cauliflower with Garlic Tahini Sauce
photo from saltandwind.com
We may be coming into the home stretch with cauliflower.  It’s been a heck of a year and we hope you’ve enjoyed cooking with it.  If you’re looking for something new to try this week, check out this article for 15 Cauliflower Recipes Disguised as Comfort Food.  This collection includes a link to this recipe for Charred Cauliflower with Garlic Tahini Sauce.

This may be our last week for lettuce as well.  We’re crossing our fingers that the escarole and radicchio will make it to harvest.  In the meantime, use this week’s Magenta Red Summercrisp lettuce to make a main dish salad such as this Waldorf Chicken Salad.  If you want to go for a beef salad, consider making this Beef Steak Salad with Dried Cherries.  If neither of these recipes appeals to you, check out the selections in this collection of 40 Great Steak Salads.

We’re moving into the heart of root vegetable season, so get ready!  Carrots aren’t new, but they will continue to be a mainstay vegetable in our diets throughout the winter.  Some boxes this week will receive orange carrots while others will receive the mysterious Black Nebula carrot.  If you receive the black nebula carrots, please check out our 2019 Black Nebula Vegetable Feature article.  This article will tell you all about this unique carrot and you’ll find two delicious recipes.  Have you ever had purple soup?  Check out this recipe for Roasted Purple Carrot Soup with Curried Lentils.  It has the most beautiful purple color!  The other recipe is for Carrot Parsley Salad, an insanely easy salad to make!  Carrots can be used in sweet and savory dishes and you can eat them any time of the day, even for breakfast!  Try this Carrot Cake Oatmeal.  You could also turn them into dessert with this Steamed Carrot Pudding, which interestingly contains a potato!

Roasted Parsnips with Caramel and Sour Cream
photo by Julia Gartland for food52.com
This week’s boxes also have parsnips!  This recipe for Roasted Parsnips with Caramel and Sour Cream came through my inbox earlier this week.  Check it out—making parsnips for dessert!  There’s a video on this link if you want the visual.  Please note this recipe calls for two pounds of parsnips, but this week’s boxes only have 1.25#, so you’ll need to adjust the recipe.  You could also use the parsnips to make Parsnip Biscuits.  In this recipe you will cook and puree the parsnips before incorporating them into the biscuits.

We didn’t know if they’d make it, but we did one final picking of Korean chili peppers.  If you haven’t made Salt-Cured Chilies yet this fall, this is your last chance!

Moroccan Spiced Warm Red Cabbage Salad
photo from food52.com
And what are you going to do with the dense, compact heads of gorgeous red cabbage?  Travel to the other side of the world and make this Moroccan Spiced Warm Red Cabbage Salad.  You could also make this Turkish Red Cabbage Salad which is easy to make and is a great accompaniment to Chicken Kebobs!

Lastly, lets lay out our plans for this week’s winter squash.  All three varieties we’re pulling from this week seem to be storing very well and all three are also appropriate for stuffing!   Here’s a tasty Stuffed Winter Squash recipe, but if this one doesn’t appeal to you, Check out this recipe article entitled: 17 Stuffed Winter Squash Recipes.

We’re at the bottom of another box!  Get ready, we’re going to be delivering sweet potatoes and baby ginger next week!

Have a great week!---Andrea

Vegetable Feature: Brussels Sprouts

By Chef Andrea

Brussels sprouts are a popular crop many members have come to adore when they realize how delicious they are when harvested fresh, in the peak of their season AND cooked properly.  Brussels sprouts are another selection in the family of Brassicas which include cauliflower, broccoli and cabbage. They resemble little cabbages and grow on stalks with leaves similar to collards.  We start Brussels sprouts from seed in the green house in the spring and then plant the transplants to the field where they require a 4-6 month period to reach their full potential.  Brussels sprouts are a hearty vegetable and can take cold temperatures.  In fact, we like them to be “kissed by the frost” a few times before we even think about harvesting them.  This year they were more than kissed, they were actually frozen solid!  The cold exposure changes the flavor making them more sweet, which contributes to a better tasting sprout overall.  While they can tolerate some frost, there is a point when the temperatures drop into the teens and the plants become susceptible to damage.  Knowing we were going to see temperatures in the low twenties to high teens this week, we decided to make harvesting all the Brussels sprouts a priority.  If we had tried to pluck them all off the stalk in the field, we never would’ve finished harvesting them!  So, the crew stripped the leaves, cut the stalk at the base and brought them in on the stalk.  By the end of the day Saturday we had 50 bins of Brussels sprouts in the cooler containing about 6,800 stalks!  Now, on frosty mornings we work in the warmth of the greenhouse popping them off the stalks.

Now that you know fresh, frosted Brussels sprouts are going to taste the best, lets talk about proper cooking.  In my youth I did not adore the drab, olive green little cabbages that made the house smell funny when Mom cooked them.  In my adult life I realized that it was not the Brussels sprouts I disliked, but rather my mother’s overcooked approach to preparing them!  For just a moment lets talk about the science of Brussels sprouts.  As with other vegetables in this family, Brussels sprouts are packed with phytonutrients that make them nutritional powerhouses!  One nutrient compound they contain are glucosinolates, a sulfur containing nutrient that protects and benefits our bodies in many ways including protecting our cardiovascular system and providing anti-cancer effects.  These sulfur containing compounds also contribute to their flavor, but this is where we need to talk about the fine line between a delicious tasting Brussels sprout and one that has crossed the line because it is overcooked.  As you cook Brussels sprouts these sulfur compounds are released.  When overcooked the flavor becomes strong, pungent and, in my opinion, just not very enjoyable.  Brussels sprouts may be roasted, boiled, steamed, sautéed.  Regardless of the cooking method you choose, it’s important to cook them just until they become bright green and are tender, but still with a little bit of firmness remaining.  The next stage after this is where they turn olive green, get soft and mushy and develop a strong smell from all the sulfur compounds volatilizing into the air!  The other important thing to remember when cooking Brussels sprouts is to let them breathe.  It’s best to cook them uncovered as it lets the sulfur compounds dissipate into the air instead of building up in the pan under the lid.

Sheet Pan Chicken with Sweet Potatoes, Apples
and Brussels Sprouts, photo from wellplated.com
To prepare sprouts for a recipe, use a paring knife to trim a little bit off the base of each sprout which will allow a few outer leaves to fall off.  If the sprouts are small, you may cook them whole.  If they are a little larger you may want to cut them into halves or quarters.  I should mention that Brussels sprouts may also be eaten raw in slaws and salads.  In their raw form they are generally sliced very finely.  Brussels sprouts are a natural pairing with other vegetables including garlic, onions (especially caramelized onions), winter squash, root vegetables, sweet potatoes and mushrooms.  They also pair well with fall fruits including apples, cranberries, pomegranate, and lemons.  In my kitchen, they also have an attraction to butter! They also pair well with other dairy products including Parmesan, feta and blue cheese as well as cream.  Their strong flavor goes well with salty, cured meats such as bacon and sausage as well as toasted nuts.  A drizzle of maple syrup, honey or even balsamic vinegar is also a nice way to finish off a Brussels sprouts recipe.

Store Brussels sprouts in the refrigerator in the plastic bag we’ve portioned them in for you.  They will keep for several weeks, but we recommend you eat them within a week or two.  We are grateful to share the bounty of this year’s harvest with you and plan to pack them in the next few CSA boxes!  Enjoy! 

Creamy Brussels Sprout Slaw with Apple and Toasted Almonds

Photo from Naturally Nourished by Sarah Britton
Yield:  2 as a main dish or 4 as a side dish

⅓ cup raw almonds
1 packed cup flat-leaf parsley, leaves and stems
½ pound Brussels sprouts
1 apple
2 tsp freshly squeezed lemon juice

Creamy Maple Vinaigrette
2 Tbsp cold-pressed olive oil
4 tsp Dijon mustard
4 tsp apple cider vinegar
2 tsp pure maple syrup
¼ cup plain yogurt
2 pinches fine sea salt
2 pinches freshly ground black pepper, plus more as needed
  1. Prepare the slaw:  Preheat the oven to 300°F.  Spread the almonds on a rimmed baking sheet in a single layer and roast until fragrant and slightly darker in color, 20 to 25 minutes.  Remove from the oven and let cool completely.  Roughly chop the almonds and the parsley leaves, finely mincing the stems.
  2. While the almonds are roasting, wash and trim the Brussels sprouts, removing any damaged outer leaves.  Slice them as thinly as possible using a knife or a food processor with the shredding attachment.  Place in a large bowl.
  3. Core and slice the apple into thin sections.  In a small bowl, immediately toss the apple sections with the lemon juice to prevent browning. 
  4. Make the dressing:  Whisk together the olive oil, mustard, apple cider vinegar, maple syrup, yogurt, salt, and pepper.
  5. Add the apples, almonds, and parsley to the shredded Brussels, pour the dressing over top, add a generous amount of black pepper, and fold to combine.
Recipe borrowed from Sarah Britton’s book, Naturally Nourished.

Hoisin-Glazed Brussels Sprouts

Photo from Dishing Up the Dirt by Andrea Bemis
Yield:  4 to 6 servings

Hoisin Sauce
2 Tbsp grapeseed oil (or other neutral cooking oil)
3 cloves of garlic, minced
⅓ cup low-sodium soy sauce
3 Tbsp pure maple syrup
2 Tbsp rice vinegar
2 Tbsp tahini
2 tsp sriracha hot sauce

Brussels Sprouts
1 ½ Tbsp grapeseed oil (or other neutral cooking oil)
1 pound Brussels sprouts, trimmed and sliced in half or quartered if large
  1. Make the sauce:  Heat the oil in a large skillet over medium-high.  Add the garlic and cook, stirring often, until fragrant, about 2 minutes.  Add the soy sauce, maple syrup, rice vinegar, tahini, and sriracha.  Cook, whisking occasionally until the mixture is thick and smooth, about 5 minutes.  Pour the hoisin sauce into a jar and set it aside.
  2. Prepare the Brussels sprouts:  using the same skillet (no need to clean it), heat the grapeseed oil over medium-high.  Add the Brussels sprouts and cook until they are a deep golden brown and lightly crisp on all sides, about 8 minutes.  Stir in half of the hoisin sauce and continue to cook for an additional 2 or 3 minutes, stirring often.  Serve warm or at room temperature with additional sauce on the side.
  3. Store any extra sauce in an airtight container in the fridge for up to 5 days.
Recipe borrowed from Andrea Bemis’ book, Dishing Up the Dirt.


Wednesday, October 21, 2020

October 22, 2020 - This Week's Box Contents, Featuring Black Futsu Pumpkins!


Cooking With This Week's Box


Peter Wilcox OR Purple Majesty Potatoes: Rosemary and Garlic Roasted Potatoes; Beef Roast with Potatoes


Black Futsu Pumpkins: Baked Black Futsu Pumpkin with Cranberry-Orange Maple Butter (see below); Soy Glazed Black Futsu Pumpkin with Honey & Sesame (see below)

It’s really feeling more like fall and even winter this week with frosty mornings and snow flurries!  Thanksgiving is right around the corner, soup season is officially here, and it’s time to really start getting serious about eating winter squash.  So this week we’re kicking off our chat with this week’s featured vegetable, the unique Black Futsu Pumpkin.  This vegetable originates in Japan where they use the terms “squash” and “pumpkin” interchangeably.  This is our second year growing this beauty and it’s met all of our expectations this year for yield, flavor, ability to store and unique appearance!  You can read more about this little pumpkin in this week’s vegetable feature, but lets talk about what you can do with it!  This week I’m sharing two very simple recipes with you, and lets keep it simple because this tasty squash really doesn’t need much added to it.  The first recipe is for Baked Black Futsu Pumpkin with Cranberry-Orange Maple Butter (see below).  Baking the pumpkin is super easy and the butter comes together in just a few minutes, so if you’re short on prep time this is a good recipe to use.  The second is for Soy Glazed Black Futsu Pumpkin with Honey & Sesame (see below).  I wanted to use flavors that go back to the Japanese roots of this pumpkin, so that’s how this recipe unfolded.  Again, this is pretty easy to make and this pumpkin is so delicious when roasted!

Roasted Garlic Ice Cream
photo from saveur.com
Our amazing crew is making the most of every moment and we’re finishing the season strong as we try to balance harvest with washing and packing vegetables while at the same time we’re preparing for 2021!  We’re happy to report we finished planting garlic this week!  This is a reason to celebrate, so lets do so with some garlic-centric recipes!  Perhaps you’d like to make something delicate like these Roasted Garlic Custards to serve alongside roasted chicken or beef.  If you want to celebrate in a more traditional way, stick to Rosemary and Garlic Roasted Potatoes.  Either of this week’s potato varieties will work great in this recipe.  I also like this post for Garlic Butter Sauce recipe.  The author of this blog post tells you how to make garlic butter sauce, but then provides a list of various ways you can use it with steak, salmon, vegetables and more!  You could also make this tasty Garlic Butter Mashed Cauliflower, or you could save the garlic for dessert.  That’s right, I said dessert---Roasted Garlic Ice Cream!  You may not believe me, but it’s really good!  We were served garlic ice cream at one of Harvest Restaurant’s garlic dinners some time ago and I still remember how tasty it was served with a butter cookie and ligonberry jam.  Try it—it could be fun!

Keto Cauliflower Mac & Cheese
photo from healthyfitnessmeals.com
It has been a great fall for cauliflower, so it’s time to get creative.  I stumbled across the next two recipes on a new website, healthyfitnessmeals.com.  They have a lot of great recipes, but these recipes for Sweet & Spicy Baked Cauliflower and Keto Cauliflower Mac & Cheese caught my attention.  Sweet & Spicy Baked Cauliflower has a bit of an Asian flair featuring a sauce made with honey, garlic, and soy along with some red pepper heat.  Just before serving you finish it off with toasted sesame seeds.  It may be a vegetarian main dish or serve it as a side dish.  The second recipe for Keto Cauliflower Mac & Cheese uses cauliflower in place of pasta.  You get all the creamy goodness of mac & cheese, but without the pasta!

We’re coming into the home stretch for broccoli this season.  We do have a bit more remaining, but it’s still on the small side so this week we decided to move forward on harvesting some of the kohlrabi in our late planting.  Whether you get kohlrabi or broccoli, you can use it to make the Kohlrabi Custard recipe we featured earlier this year.  Of course, you could also use either in one of my favorite kohlrabi  salads—this Kohlrabi & Herbed Yogurt Salad from DishingUpTheDirt.com.

Marinated Beet & Bread Salad
photo from dishingupthedirt.com
I’ve been trying to hold off purchasing another cookbook, but darn it—I’m going to have to buy Andrea Bemis’s new book, Local Dirt.  Last week on her blog she shared a recipe from her book for Marinated Beet & Bread Salad.  This is a fall twist on the classic Panzanella which traditionally is a tomato and bread salad.  Of course, you could also use your beets to make Andrea’s recipe for Carrot & Beet Morning Glory Muffins with Honey & Hazelnuts.  This is a great way to eat your vegetables in the form of a treat and these muffins are healthy enough to enjoy for breakfast or an afternoon snack!

As I looked at my list of recipes curated for this week’s box, I realized I selected a lot of vegetable salad recipes!  While we have options for green lettuce salads this week, don’t forget there are lots of salads you can enjoy throughout the winter months such as carrot salads!  This week take advantage of some of the last fresh cilantro of the season and make this Carrot Salad with Lime & Cilantro or keep it simple with this French Grated Carrot Salad featuring a Dijon dressing.  If you’re looking for ways to enjoy the last few weeks of our fall lettuce selections, I have a few ideas for you.  Make a simple Romaine and Radish Salad with Buttermilk Lemon Dressing which would be a nice accompaniment to a traditional Beef Pot Roast with Potatoes.  You could also make a tasty Herbed Onion Salad Dressing to serve with a simple lettuce salad.  Or, make the salad the main dish with this Ramen Noodle Salad with Romaine Lettuce & Broccoli.  This recipe makes 8 servings, so you might want to scale it back if that’s too large for your household.  By the way, if you do make that Beef Pot Roast you can use the leftovers along with this week’s radishes and lettuce to make this Beef & Radish Salad Sandwich.  I love leftovers!

One Pan Cilantro Lime Chicken and Rice
with Black Beans, photo from cookingclassy.com
We’re getting closer to the bottom of the box, but I wanted to share this recipe for One Pan Cilantro Lime Chicken and Rice with Black Beans.  This is a simple main dish dinner and would go great served with any of the salad selections we’ve mentioned earlier in this article.  Lastly, since we are in soup season, I want to share this recipe for Blonde French Onion Soup.  This is a great way to use those onions piling up on your counter and it’s a great way to boost your immune system.

Ok friends, we’re at the bottom of the box!  Have you ever stopped to reflect on all the wonderful things you’ve created with your vegetables this year!  I bet you’ll be surprised by the variety of food you’ve created and the amount of vegetables you’ve eaten this season already!  But we’re not done yet.  We still have Brussels sprouts (which look quite nice) and sweet potatoes yet to come.  The sweet potatoes are officially finished curing, so it’s time to cook some and see how they taste.  According to Richard’s refractometer measurements, the sugars have developed.  Get your recipes ready, we still have a lot more cooking to do!  See you next week—Chef Andrea

Vegetable Feature: Black Futsu Pumpkins

By Chef Andrea

This week I’m excited to introduce you to the beautiful, unique Black Futsu Pumpkin!  This is a heirloom Japanese squash variety that caught my attention in the High Mowing Seed catalog two winters ago.  What was this odd looking pumpkin shaped vegetable with skin that was a grayish, charcoal color mixed with tan?  After a little research indicating it had good flavor and is revered by chefs, I convinced Richard we needed to try it.  Our trial last year was a success so we planted more this year and, once again, we’re very impressed with this unique little pumpkin!  In case you’re wondering if this is a pumpkin or a squash, it’s a squash.  In Japan they use the terms “pumpkin” and “squash” interchangeably.

Maple-Sage Roasted Black Futsu Pumpkin
When we first harvest these, their skin is more of a charcoal gray to green and some are just starting to show some signs of changing to a buff tan color.  They continue to ripen in storage until they are entirely buff colored.  I mention this because you may never see that charcoal gray stage, which I suspect is the reason they are called “Black Futsu.”  One of the other qualities we really like about the Black Futsu is that they store very well.  So, eat them now or keep them on your counter and enjoy their beauty for a bit before you eat them.

Now that you know a little bit about the background on these, lets talk about the eating quality.  The flesh is dense and holds up well to roasting and pan-frying.  When baked, either whole or cut in half, the flesh is moist, smooth, creamy and sweet.  The other unique attribute is that the skin is edible.  It does have a very thin skin and given the bumpiness of the exterior, I would not suggest you attempt to peel it.  When pan-fried or roasted the skin gets nice and crispy and offers a contrast to the soft, smooth flesh.  When baked, I do not find the skin as delectable, however it’s easier to scrape the flesh out of the skin if you bake it whole.  If you don’t care to eat the skin, simply discard it.

Creamy Cider & Black Futsu Pumpkin Soup
So what are you going to do with these cute things?   As I mentioned before, this variety is delicious when roasted.  You can either cut them into wedges or chunks, toss them with oil, then roast them on a sheet tray.  I’m not usually a fan of pan-frying squash, however this one is a candidate for this method.   I would recommend cutting thin slices about ⅛ - ¼ inch thick.  Cooking them on a griddle or in a cast iron pan in butter yields a nice crispy, golden final product.  You can also cut them in half and bake them in the oven.  Honestly, if you don’t want to mess with anything else, just bake them and eat the flesh seasoned with a touch of salt and pepper and a pat of butter.  It’s delicious just like that, however you could also stuff the pumpkin halves with a filling of your choosing.  Of course, you can scrape the cooked flesh out of the shell and use it to make a wide variety of things.  In addition to the two recipes we’re featuring this week, you might also want to check out last year’s recipes for Maple-Sage Roasted Black Futsu Pumpkin and Creamy Cider & Black Futsu Pumpkin Soup.  Both received positive member feedback last year!

Store your black futsu pumpkins at room temperature and use them as a decoration until you’re ready to use them.  I forgot to mention that the seeds are also edible.  Before cooking, extract them from the flesh, rinse them and lay them out on a tea towel (the seeds will stick to the towel, so don’t use paper or anything fuzzy) or a plate to dry.  Once dry you can toss them with a little oil and season them with salt and pepper or seasonings of your choosing before toasting them in a 350°F oven.  These seeds really are tasty and, in my opinion, worth the effort to extract them.  One more tidbit of information you may find useful is that one medium sized black futsu pumpkin will yield about ¾-1 cup of cooked flesh.  Enjoy!


Baked Black Futsu Pumpkin with Cranberry-Orange Maple Butter

Yield:  3-4 servings

1 large or 2 medium Black Futsu Pumpkins
1 stick unsalted butter, softened to room temperature
¼ cup fresh cranberries
Zest from one orange, finely chopped
1 ½ Tbsp maple syrup
Salt, to taste

  1. Preheat the oven to 375°F.  Cut the pumpkins in half and scrape out the seed cavity.  Save the pumpkin seeds to clean and toast.  If you choose to do so they are a nice garnish to add to this dish!  Place the pumpkin pieces in a baking dish, cut side down.  Add enough water to the pan so it’s about ½ inch deep.
  2. Bake for 45-60 minutes or until the pumpkin is tender when poked with a knife or fork.  Remove the pumpkin from the oven and carefully turn the pieces over.  Set aside for 5-10 minutes to allow the pumpkin to release steam before serving.
  3. While the pumpkin is baking, prepare the butter.  Using a food processor, finely chop the cranberries. Add the softened butter, orange zest and maple syrup.  Blend to combine well, scraping down the sides of the bowl periodically.  If you do not have a food processor, you can also just chop the cranberries finely with a knife and blend all the ingredients in a bowl using a spoon.
  4. When you’re ready to serve the pumpkin, you can either use one half of the pumpkin as a serving, or you may choose to cut them in quarters if they are large.  Serve the pumpkin with a generous serving of butter and a little salt if desired.  Make sure the pumpkin is still warm so the butter will melt.  Garnish with toasted pumpkin seeds if you wish.  

Note:  If you have extra butter remaining, either freeze it for use later or use it within a few days of making it.  You could spread it on toast or a biscuit.  You could also melt it over other vegetables such as sweet potatoes or Brussels sprouts!


Soy-Glazed Black Futsu Pumpkin wiht Sesame & Honey


Yield:  4-6 servings

2-3# Black Futsu Pumpkin (1 large or 2 medium)
1 ½ Tbsp sunflower or vegetable oil
2 tsp mirin
2 tsp soy sauce
2 tsp toasted sesame oil
Salt, to taste
Honey, just a drizzle
2 Tbsp toasted black sesame seeds

  1. Preheat the oven to 375°F.  Cut the black futsu pumpkins in half and scrape out the seed cavity.  Reserve the seeds to toast and enjoy as a snack!  Cut the pumpkin halves into slices about ½ inch thick, or into larger bite-sized chunks.  Place in a large mixing bowl and set aside.
  2. In a small bowl, combine sunflower oil, mirin, soy sauce and toasted sesame oil.  Stir or whisk to combine well so the oil is fully incorporated with the other ingredients.  Pour over the pumpkin slices/chunks.  Using a spoon or your hands, mix or toss the pumpkin to ensure all pieces are well coated with the soy mixture.
  3. Spread the pumpkin pieces on a large baking pan or cookie sheet.  Sprinkle with a little salt.  Roast for 45-50 minutes, stirring to turn all the pieces about halfway through the cooking time.  Once tender and lightly golden, remove the pan from the oven.  
  4. Drizzle lightly with a little honey and sprinkle the sesame seeds over all the pieces.  Put the pan back in the oven and roast for an additional 5-10 minutes.  Remove from the oven and serve while still warm.
      Recipe created at Harmony Valley Farm by Chef Andrea Yoder