Thursday, June 16, 2022

Alliums – Good for Us and Always in Season!

Garlic Scapes growing from the center
of Hardneck garlic plants
By Richard de Wilde

Alliums encompass a wide variety of species including garlic, green garlic, garlic scapes, fresh garlic, as well as dried garlic for winter use.  This class of vegetables also includes onions and the relatives thereof!  Many years ago we set the lofty goal of including at least one vegetable from the allium family in every CSA box throughout the season!  This year you have already received ramps – which had a typically short season – chives, green garlic, and this week, garlic scapes.  

In what we classify as “onions” we have gone through the ‘potato’ onion and are moving into the green and purple scallions, which are grown from seed in the greenhouse starting in February, then transplanted in the spring as early as possible, this year being transplanted later than usual. We did not harvest and delver our overwintered Egyptian Walking Onions this year because we are trying to find a better way to propagate them.  Heretofore we have been trying to propagate them from the bulbils, which are the tops the plant forms, rather than from the set it produces. The bulbil tops that we harvested and replanted in fall – when we plant garlic and potato onions – have failed to produce a consistent crop for several years. So, in wanting to keep this onion in our seasonal line-up, we dug up all we had from last year’s planting and replanted the bulbs for a harvest next spring.  This is a propagation technique we previously used but tried to replace because of the hassle factor of replanting at a very busy time of year. But we like them so much as an early scallion-type onion that we managed the transplant this week! This gives us all something to look forward to for next year!   We’re always thinking ahead, with your interest in mind, and our own desire to produce seasonal onions throughout the year!
Yellow Onions Drying 
in the Greenhouse

Many of our long-term members understand the very high degree of management of detail that is involved in a long season, local diet. Yes, as farmers, we live and plan around the weather, but as managers of a detailed enterprise you would be challenged to suggest that there is any business that requires more detailed management than our diversified, focused business of feeding people locally, and in season as much as possible. While of course doing it in a manner that builds soil, captures carbon, and protects and enhances wildlife and pollinators. A win-win for our local economy, seasonal eating, and food security!

Sorry, I digress, back to alliums. I am thankful for the advice given by many people about allium production. When we experienced disease problems many years ago, we consulted with experts, and they recommended raised beds to prevent water damage to small plants. We responded, and now almost all our crops are on raised beds to minimize being damaged with flowing or standing water. Onions can experience damage to only one layer of a developing seedling, which does not show up until the onion is mature and develops ‘soft rot’ or neck rock when cured. Considering this, we have taken raised beds to a higher level in covering them with plastic and a thin sheet of aluminum foil that deters the ‘onion thrip,’ an insect that causes most of the onion disease and storage problems. Also, based on a tip from a former Seedway rep, we harvest the mature storage onions with some green in the top, and dry them in our greenhouse with 80% shade coverage to prevent sun scald and excess temperatures. This has resulted in a consistent supply of onions in even the worst weather conditions.

Onions coming in from the field where they 
are laid out on tables to dry, one crate at a time!
With the use of plastic bed covers, if we prepare them two weeks in advance of poking the hole that our transplant goes into then in those two weeks most of the weeds will germinate and die before we plant. However, onions are the exception in that we do not have two weeks of warm weather to germinate weeds as we plant them very early in the spring.  We have tried making the beds in the fall, but there were problems with that, so now we continue to plant into freshly laid plastic in spring and know that we will need to weed the holes which the onions are transplanted into. This year, as most, we have already hand weeded twice!

This whole system, developed over 20+ years and adapted yearly, has produced the most consistent onions and long-term storage onions for many years!

2022 Onion Field with Erosion Proof Aisles of 
Cover Crop In Between Raised Beds of Onions
Plastic disposal is still a process. We have had promises of plastic recycling, but the most recent company has suspended pick-up since the pandemic started. We do make extensive use of rye straw that we bale from winter cover crops. However, mulch cools the soil – which is great for garlic and strawberries – but for onions, the reflective mulch with onions planted directly into a black strip has proved far superior to any other system. For onions we plant low growing White Dutch Clover with Red Fescue to provide an erosion-proof aisle between the raised plastic beds. We manage any weeds that come through the Clover and Fescue with a weed trimmer. See photo of a recently trimmed aisle which transports excess water away without causing any soil erosion, while in fact contributing to soil improvement.

Juan Pablo & Alfredo hand weeding onions
With our allium crops, as with all our crops, we employ technology, experience, and observation, while also artfully managing the many hands which do the hard work. This allows us to grow a nutritionally superior crop without the use of any synthetic chemicals which would destroy our health and which would have wreaked unimagined destruction on our bird, bat, and pollinators. Our use of organic methods ensures that the local ecosystem will remain healthy and in balance, and that we will be able to provide delicious produce long into the future.

Wednesday, June 15, 2022

June 16, 2022 - This Week's Box Contents Featuring Kohlrabi


Cooking With This Week's Box

Purple Scallions:

Garlic Scapes:  

Baby Spinach or Sauté Mix or Baby Arugula:  

Salad Mix:    

Baby Bok Choi:  

Broccoli:  

Kohlrabi:  
Lemon Dill Kohlrabi Fritters (See Below)
Take a moment to read this week’s vegetable feature article that follows below.  You’ll find links to 17 more recipes at the end!

Green Curly Kale: 

Green Top Radishes:  

Mini Red Romaine or Red Oak Lettuce and Mini Green Boston Lettuce:  

Dill:  

Roasted Garlic Scape Hummus
Welcome back for another week of cooking!  This is our last CSA box of the spring as next week will mark the official start of summer!  This week you may notice a transition in the box contents a bit.  We’re moving into some of our mid-season greens such as kale, while finishing up our spring planted baby greens.  We’re also starting to see more of our more “durable” vegetables such as broccoli and kohlrabi!  With this week’s heat wave, the crops are really starting to take off so get ready as we’ll have more new items coming over the next few weeks including zucchini, beets, fennel and before too long the first crop of carrots!
This week we’re featuring kohlrabi and I’ve given you a lot of options for how to use this unique vegetable!  Read on in the vegetable feature article that follows and you’ll find a long list of kohlrabi recipe ideas.  I’ve also included a simple recipe for Lemon Dill Kohlrabi Fritters as our featured recipe this week.  This is a tasty recipe that you could make for breakfast, lunch or dinner!  These fritters are a great accompaniment to eggs for breakfast or brunch, but would also be a great side dish for grilled pork chops, steak or roasted chicken.  If you are looking for a light lunch or dinner option, they could also serve as a main item for a light meal accompanied by a green salad!

In addition to the extravaganza of kohlrabi recipes, I’ve tried to give you a mix of different recipe inspirations for the other vegetables this week ranging from salads to smoothies, tea sandwiches and quiche, or if you want to get a little more adventurous you can try your hand at wonton soup or spring rolls!

Have a great week and next week we’ll officially transition to summer, complete with strawberries and a few other surprises! 

---Chef Andrea

Vegetable Feature: Kohlrabi

by Andrea Yoder

Kohlrabi in the field
Richard and I re-learned an important lesson this week.  Never underestimate the growth potential of a vegetable!  We had planned to include kohlrabi in this week’s boxes, but last  Saturday we both went to the kohlrabi field and both agreed it was just too small.  The crop needed more time.  So I revised the list of box contents and we set up our harvest schedule for the week.  And then on Monday morning Richard returned to the office just before lunch with three sizeable kohlrabi and a report that most of them were that size and we needed to start harvesting them!  Really?  In less than 48 hours those little kohlrabi took off and grew!  I wish now I had stayed in the field a little longer.  Perhaps I may have actually seen them expanding!  So it’s clear these kohlrabi were determined to keep their place in this week’s box and as such we’ve designated them as our featured vegetable this week! 

While kohlrabi bears resemblance to other vegetables with some of its characteristics, it’s really just uniquely its own thing.  It is a member of the Brassica family, and the name is derived from “khol” meaning stem or cabbage and “rabi” meaning turnip.  But it doesn’t resemble cabbage or turnip in appearance, rather it has its own unique identity.  While many people think kohlrabi is a root vegetable, it is actually a swollen stem that develops above ground!  The stems and leaves shoot up from the bulbous lower portion.  

So what part of kohlrabi do you eat?  Well, the bulb is the part of the plant most commonly eaten, but the leaves are also edible and should not be overlooked.  The leaves have a thicker texture more similar to kale or collard greens.  They are best eaten cooked and can be substituted for collard greens or kale in many recipes.  I usually strip the leaves off the main stems before using them.  If you are a fan of kale chips, you can do the same thing with kohlrabi leaves.  I tried this concept earlier this week and they were excellent!  The bulb does need to be peeled before eating as the outer skin is fairly tough.  I find it easiest to cut the bulb in half or quarters and then peel the skin away using a vegetable peeler or paring knife as if you’re peeling an apple.  Once the skin is peeled away you’ll find a solid, crispy, juicy, tender flesh inside with a sweet, mild cabbage flavor.  The bottom of the bulb where it is cut from the stem when it is harvested can also sometimes be a bit tough.  I usually just trim the very bottom of the bulb off and use the remainder.  To store kohlrabi, separate the stems and leaves from the bulb and store both in a plastic bag in the refrigerator.  The leaves will keep for about 1 week, and the bulbs will last up to several weeks if stored properly.

Now, kohlrabi has gotten a bad rap at times in the past.  Several years ago, pre pandemic, when I was doing CSA fairs, I had several people complain about kohlrabi.  While they had not yet participated in our CSA, they voiced similar generalizations that kohlrabi is a difficult vegetable that people in CSAs get way too much of.  Contrary to urban myth, kohlrabi is a very cool vegetable!   I can’t speak for other farms, but we plant kohlrabi in two specific places in the season.  In the spring, kohlrabi is ready for harvest before other brassicas such as cabbage and cauliflower.  In the fall we grow a different variety of kohlrabi intended to be stored well into the winter.  So kohlrabi is not a filler vegetable, but rather we grow it intentionally because it’s part of our progression through the seasons and it’s delicious!  What is there to not love about kohlrabi!?!  It’s sweet, mild flavored, crispy, crunchy, versatile and unique.  You can eat it raw, roasted, baked, pan-fried and stir-fried.  You can use it in salads, on pizza, to make risotto and soup as well as a whole host of other dishes from all around the world!  

Over the years we’ve featured a variety of kohlrabi recipes in our newsletters, which are archived on our website.  If you ask Farmer Richard what his favorite way to eat kohlrabi is, I guarantee he’ll always say “Creamy Kohlrabi Slaw!” While we will enjoy kohlrabi in this way, it may be used in more ways beyond creamy slaw!  Even though I’ve been searching for kohlrabi recipes for years, I hit a landmine of some ideas this week!  Maybe it’s just becoming more popular, or maybe I just wasn’t looking in the right place to find the gems of recipes.  Check out the list of recipes below and hopefully you’ll find something intriguing to make week!

As with other vegetables in this family, kohlrabi is rich in nutrients.  It is an excellent source of vitamin C, fiber, potassium and antioxidants.  It is low in calories and sodium, and contains indoles, which are believed to be potentially significant anti-cancer compounds. 


Lemon Dill Kohlrabi Fritters

Yield:  8-10 fritters

2 heaping cups grated kohlrabi
1 cup finely chopped scallions or onions
⅓ to ½ cup all-purpose flour or oat flour
2 Tbsp fresh dill, finely chopped 
2 garlic cloves or 2 Tbsp garlic scapes, finely chopped
1 tsp lemon zest
¾ tsp salt
Freshly ground black pepper
2 eggs lightly beaten
Olive oil for cooking

  1. Remove the skin from the kohlrabi with a paring knife.  Grate the kohlrabi using a hand grater, box grater, or julienne peeler.  Transfer to a clean dish towel and squeeze as much water as possible out of it over the sink.  You may also put the kohlrabi in a colander and press out the liquid.
  2. Add the drained, grated kohlrabi to a mixing bowl with the scallions or onion, flour, dill, garlic or garlic scapes, lemon zest, and salt.  Pour in the lightly beaten eggs and mix until the batter comes together.  You may want to start with just one egg to see if that is sufficient to bring the batter together.  The batter will be a little loose, but if it appears too wet, add one or two more tablespoons of flour.
  3. Place a medium to large skillet on the stove and heat over medium to medium-high heat.  Add enough oil to generously cover the pan and heat just until it simmers.  Using two serving spoons, take a scoop of batter from the bowl and form a fritter by patting the batter into the bowl of one spoon with the other spoon.  They should be about ½-inch thick and 2 inches wide.  Slide the fritter directly off the spoon and into the hot oil.  
  4. Cook the fritters in batches for 2 to 3 minutes on each side until golden brown, then flip it over and cook the second side until golden brown.  You may need to adjust the heat so they cook evenly and through to the center.  A bit of patience is helpful here.  If the pan is too hot the fritters will blacken and the centers will not be cooked.
  5. Once cooked, either serve them immediately or place them on a sheet tray with a rack and hold them in the oven at low heat until you are ready to serve them.  
  6. Serve them warm with a dollop of sour cream, yogurt, a pat of butter and/or applesauce, or just plain!

Recipe sourced from https://itsavegworldafterallcom/kohlrabi-fritters.....with a few minor adaptations by Chef Andrea.

Wednesday, June 8, 2022

June 9, 2022 - This Week's Box Contents Featuring Cilantro


Cooking With This Week's Box

Potato Onions:  

Spinach:  

Asparagus:  

Green Garlic:  

Hon Tsai Tai:  
Savory Miso Oatmeal with Greens & Jammy Egg (substitute hon tsai tai for kale)

Pea Vine:  

Sorrel:  

Baby White Turnips:  

Mini Green & Red Romaine Lettuce:  

Cilantro:  
Red Lentil & Coconut Milk Soup with Spinach, Rice and Spiced Yogurt (See Below)

Baby Bok Choi:  

Sauté Mix: 

This week crops in the fields have really started to change and grow.  We are still heavy into spring greens with this week’s box, but that will be shifting pretty soon.  This is our final week for green garlic, hon tsai tai, pea vine and asparagus.  Next week we are planning to start harvesting strawberries, kohlrabi, broccoli and zucchini!  Our first crop of beets are still small, but we’ll be including them in your boxes within the next few weeks along with fennel.  Every moment of the season gives us something to enjoy and something else to look forward to!  


Spinach Quesadilla Photo from naturallyella.com
Lets dive into this week’s box starting with the featured vegetable, cilantro!  The featured recipe this week, Red Lentil & Coconut Milk Soup with Spinach, Rice and Spiced Yogurt (See Below), is a recipe I adapted from a Deborah Madison recipe.  The ingredient list for this recipe is a little long, but it comes together pretty quickly.  You just need to have a little patience while it simmers and the red lentils soften.  This soup is very flavorful with an interesting combination of spices that provide a nice background flavor for the soup.  This is also a very nutrient-dense soup as fresh cilantro and spinach is blended in towards the end of preparing this soup.  You can eat the soup on its own, but it becomes a more substantial dish when served with hot cooked rice and a dollop of the spiced yogurt.  While the recipe calls for spinach, you can use any cooking green in this recipe such as pea vine, bok choi, sauté greens, chard, amaranth, kale or even tat soi.  The versatility of this recipe makes it a great CSA greens recipe as you can prepare it at any time of the year with whatever greens are available!  I also think it would be good garnished with some fresh chopped tomatoes in the summer or maybe add some sweet peppers in late summer/early fall.  I hope you enjoy it as much as we did!

While we have a lot of greens in this box, there are many different ways you can put them to use.  The mini heads of romaine lettuce are the perfect size for making Korean Steak and Noodles Lettuce Cups and Grilled Thai Chicken Lettuce Wraps.  The bok choi can be used to make these tasty Soba Noodles with Mushrooms & Bok Choi or use it to make Stir-Fried Bok Choy with Peanut Sauce, a recipe that would pair nicely with these Cilantro Pesto Chicken Skewers.

Mixed Greens Spread photo from twistsandzest.com
For those of you who are into smoothies, I have to mention the Frosty Sorrel and Banana Smoothie recipe one more time.  This is one of my personal favorite spring recipes, but others have offered a lot of positive feedback on this recipe over the years and again this spring.  It’s a great way for kids and adults to enjoy greens!  Some members also posted in our Facebook Group that they used last week’s pea vine in smoothies, so I had to give it a try this week.  It is so delicious!  Mild flavored, fresh and invigorating are the words that come to my mind.  Both sorrel and pea vine are packed with vital nutrients and energy that you can really feel when you eat them, especially if you start your day off with them in a smoothie!  Go ahead, give it a try!  By the way, how are you doing with that challenge I posed last week to try to incorporate more vegetables into breakfast?  If it’s going well and you want to try something a little outside of the box, consider making Armenian Cold Yogurt & Sorrel Soup or  Savory Miso Oatmeal with Greens & Jammy Egg.  These savory recipes are actually appropriate for any meal of the day, breakfast included!  The oatmeal recipe calls for kale, but you could easily substitute hon tsai tai, sauté mix or even turnip greens.

Alright, I’m going to wrap it up for this week.  As always, let us know what you’re cooking by posting your creations in our private Facebook group.  We have new members joining every week and it’s a great way to engage with a like-minded community!  Have a good week—Chef Andrea 


Vegetable Feature: Cilantro

by Andrea Yoder

Cilantro is a very important crop on our farm and is one of our top “bread and butter” crops that we supply to our major wholesale distributors in this region.  Last year we planted 370 pounds of cilantro seed starting in April and planting nearly every week through the end of August.  This strategy allows us to move right from one crop into the next as we harvest cilantro starting in mid to late May through October or the first part of November.  Over the course of the season we will end up planting 16-18 acres of cilantro total!  Each crop has the potential to yield as many as 18,000 to 24,000 bunches!  Some of our experienced crew members can make more than 100 bunches of cilantro an hour when they are harvesting.  That is a lot of cilantro and, as you can see, it’s a big deal for us!

Our first crop of cilantro this spring
Cilantro, also sometimes called coriander, is used extensively in a wide variety of cultures and cuisines across the globe ranging from Mexico to Asia.  While we often think of it as an herb which is used more sparingly as an accent to other foods, don’t be afraid to use cilantro in more bold ways where it is a main ingredient.  With many herbs, recipes tell you to pick the leaves off the stems and only use the leafy part.  I am an advocate for using stems as well, especially for herbs with tender stems such as cilantro.  There’s a lot of flavor in those stems, so it seems like such a waste to throw them out!  

Cilantro is often used in salsas, fresh vegetable salads and as a condiment for tacos, curries, soups and more.  It’s also a delicious ingredient to incorporate into spreads and sauces such as chimichurri (with cilantro in place of traditional parsley), pesto, vinaigrettes, etc.  You can also incorporate it into smoothies and green drinks because of its contributions to health related to detoxifying the body. 

Cilantro in harvest totes,
ready to be washed & packed!
Some people love cilantro, others are learning to like it and some have an aversion to it because to them, it tastes like soap.  This latter group is actually a pretty small subset of the population.  To them, a natural chemical compound in cilantro has an unpleasant soapy taste.  If you experience this, we’ll let you take a pass on eating this vegetable.  But for everyone else, eat your cilantro as it has some valuable health benefits!  It is an excellent source of zinc as well as vitamins A, C, E and K.  It also works as a chelator and detoxifier for our bodies removing toxins, heavy metals, molds, yeast and fungi.  It’s on the green cleaning team, which is why it’s a common ingredient in green smoothies and drinks!

For the longest shelf life, we recommend you remove the twist tie and wash your cilantro in a sink of clean, cold water.  If you have a salad spinner, use it to remove excess water from the cilantro before storing it in a plastic bag or container.  If you don’t have a spinner, just blot or shake off as much excess water as you can.  Before storing, remove any damaged or spotty leaves.  It may also be helpful to put a dry paper towel in the bag or container you’re storing it in.   For best results, use within 7-10 days.


Red Lentil & Coconut Milk Soup with Spinach, Rice and Spiced Yogurt

Yield:  6 servings 

2 Tbsp butter, coconut oil, or sunflower oil
1 cup minced green onion and/or green garlic (see note)
1 ½ tsp ground turmeric
1 tsp ground cardamom
½ tsp ground cinnamon
Pinch of hot red pepper flakes
2 cups red lentils, rinsed
6 cups water or vegetable stock
2 bay leaves
3 cloves
Sea salt and freshly ground pepper, to taste
6-8 ounces (4-6 cups) spinach or other seasonal greens, roughly chopped 
¾ cup chopped cilantro (stems and leaves)
One 15-ounce can coconut milk
Juice of 1 large lime or lemon, or to taste
Steamed rice, 6 servings (optional)
Spiced Yogurt (recipe follows)


Spiced Yogurt
½ cup plain yogurt
½ tsp ground turmeric
½ tsp ground paprika
¼ tsp ground cumin 
¼ tsp freshly ground black pepper
A pinch of salt

  1. Place a 4 quart saucepot on the stove with medium heat.  Add the butter, coconut oil or sunflower oil and heat until it just starts to shimmer.  Add the minced green onion/green garlic and sauté for 2-3 minutes.  Next, add the turmeric, cardamom, cinnamon and red pepper flakes.  Stir to combine and sauté for about 30 seconds more.  Immediately add the lentils and 6 cups of water to the pan.  Increase the heat to medium high and bring the soup to a rapid simmer.  Add the bay leaves, cloves and 1 ½ tsp salt.  Cover and adjust the heat to hold it at a simmer.  
  2. Simmer for 10-20 minutes or until the lentils are soft and breaking down.  Remove from the heat and carefully extract the bay leaves and cloves.  Stir in the chopped cilantro and spinach or other greens until they start to wilt down in the hot soup.
  3. Now it’s time to puree the soup using either a stand blender or an immersion blender.  If using a stand blender, carefully transfer the soup to the blender.  You may need to work in batches depending upon the size of your blender.  You may choose to blend it completely smooth, or blend it a little less and leave some of the texture of the greens in the soup.  
  4. Return the soup to the pan and put it on the stove over low heat.  Stir in one can of coconut milk along with lemon or lime juice.  Taste the soup and season with salt and black pepper as needed.  You may also need to add more lemon or lime juice until the flavor is balanced to your liking.  Heat the soup just enough so it is hot, but do not cook it too much more or the greens and cilantro will lose their fresh flavor.
  5. Prepare the spiced yogurt by putting all the spices, a pinch of salt and the yogurt in a small bowl.  Mix until well combined.  
  6. To serve, put a portion of hot, cooked rice in each bowl and ladle the hot soup over it.  Serve with a dollop of spiced yogurt.

Note:  This is a great CSA “greens” recipe that may be adapted over the course of the season to include whatever seasonal greens are available.  Some options may include spinach, bok choi, pea vine, nettles, chard, amaranth, kale or tat soi.  While this version of the recipe calls for green onions and/or green garlic, you may substitute whatever type of onion is available throughout the season.  You may wish to create some variations of your own along the way such as adding some fresh chopped tomatoes as a garnish in the summer or sautéing some sweet peppers along with the onion in late summer.  Have fun with it!

Recipe inspired by and adapted from Deborah Madison’s recipe for Yellow Pea and Coconut Milk Soup with Spinach, Rice and Spiced Yogurt as published in her book, Vegetable Soups From Deborah Madison’s Kitchen.

Wednesday, June 1, 2022

June 2, 2022 - This Week's Box Contents Featuring Pea Vine


Cooking With This Week's Box

Asparagus:  

Rhubarb:  
Rhubarb Braised Beef with Rhubarb Kimchi

Green Garlic:  

Green Top Red or Diana Radishes:  

Hon Tsai Tai:  

Pea Vine:  
Green Curry with Pea Vine & Rhubarb (See below)
Pea Vine Cream Cheese (See Below)

Baby White Turnips:  

Photo from 5boysbaker.com
This week’s box of vegetables is packed with all kinds of possibility!  What am I saying?  Every box is packed with possibility!  I have to admit I have some seasonal favorite recipes that I look forward to every year such as Pea Vine Cream Cheese (see below) and White Turnip Salad with Miso Ginger Vinaigrette.  I also know we have some members who look forward to making this Sesame Soy Hon Tsai Tai & Chicken Salad every year.  With specialty greens such as pea vine and hon tsai tai, you have to seize the moment and make your favorites because they are only available for 1-3 weeks at most!  This week we are featuring the delicate Pea Vine.  While I have my favorite recipes from past years, I was also excited to create a new way to use pea vine.  This week’s featured recipe for Green Curry with Pea Vine & Rhubarb (See below) was a recipe I came up with as Richard and I were doing our Sunday afternoon tour through the fields to check on crops.  I wanted to challenge myself to use both pea vine and rhubarb in the same recipe in new ways.  

We are excited that our rhubarb field is producing so well this year and we’re able to include it in your boxes for a third week!  I went kind of crazy finding new recipes and ways to use rhubarb in hopes that perhaps you’ll find a new favorite rhubarb recipe.  If you want a simple recipe, try this Rosemary Lemon Rhubarb Spritzer.  If you’re up for a bit more fancy recipe, try either the Cardamom Crème Brûlée Tarts with Roasted Rhubarb or Rhubarb Braised Beef with Rhubarb Kimchi.  If you need something in between, go for the Rhubarb Raspberry Bread Pudding.  If none of those appeal to you, invite a few friends to hang out with you on the patio and use the rhubarb to make these Rhubarb and Rose Ramos Gin Fizz cocktails!

What are you going to do with those pretty little, pristine baby white turnips?  Well, I often don’t get past sautéing them with butter, salt and pepper.  They are so tasty on their own they don’t need much added to them!  That being said, two of my favorite recipes from past years include Turnip Greens Pesto Pizza and of course the White Turnip Salad with Miso Ginger Vinaigrette.  I also found this recipe for Radish & Turnip Hash with Green Garlic.  This is the perfect CSA Box recipe for this week and will be on the menu for Sunday brunch!  

Photo from thekitchn.com
Speaking of brunch, if you are not already including vegetables in your breakfasts throughout the week, I challenge you to find some creative ways to do so.  It’s a great way to start your day and will help you successfully eat through the CSA box each week.  Try something like the  Radish & Turnip Hash with Green Garlic or Tartine Style Roasted Asparagus and Spring Onion Croque Monsieur.  If those recipes require more time than you have in the morning, just keep it simple and add vegetables to scrambled eggs.  This week’s box has lots of options for doing this including asparagus, green onions, green garlic, spinach, arugula, turnip tops, radish tops or pea vine!  You can also blend some greens into a smoothie or spread Pea Vine Cream Cheese on a bagel.   See what you can come up with and share your ideas with us in our private Facebook Group.  I can’t wait to see how you start your day!

Ok, that’s a wrap for this week.  As we turn the page on the calendar to June, we have a lot to look forward to.  Of course, June is the month for strawberries, but we’re also looking forward to kohlrabi, salad cabbages, garlic scapes and the first zucchini & cucumbers!  Have a good week and I’ll see you next time.

Chef Andrea 


Vegetable Feature: Pea Vine

by Andrea Yoder

This week we continue our spring leafy greens extravaganza with pea vine!  This is another unique green that holds a very specific spot in our seasonal greens line up.  Pea Vine is an immature pea plant that is harvested before the vine starts to develop blossoms.  It is more of a delicate green with a mild, sweet pea flavor.  It may be eaten raw or lightly cooked and is packed with nutrients that will leave you feeling invigorated!

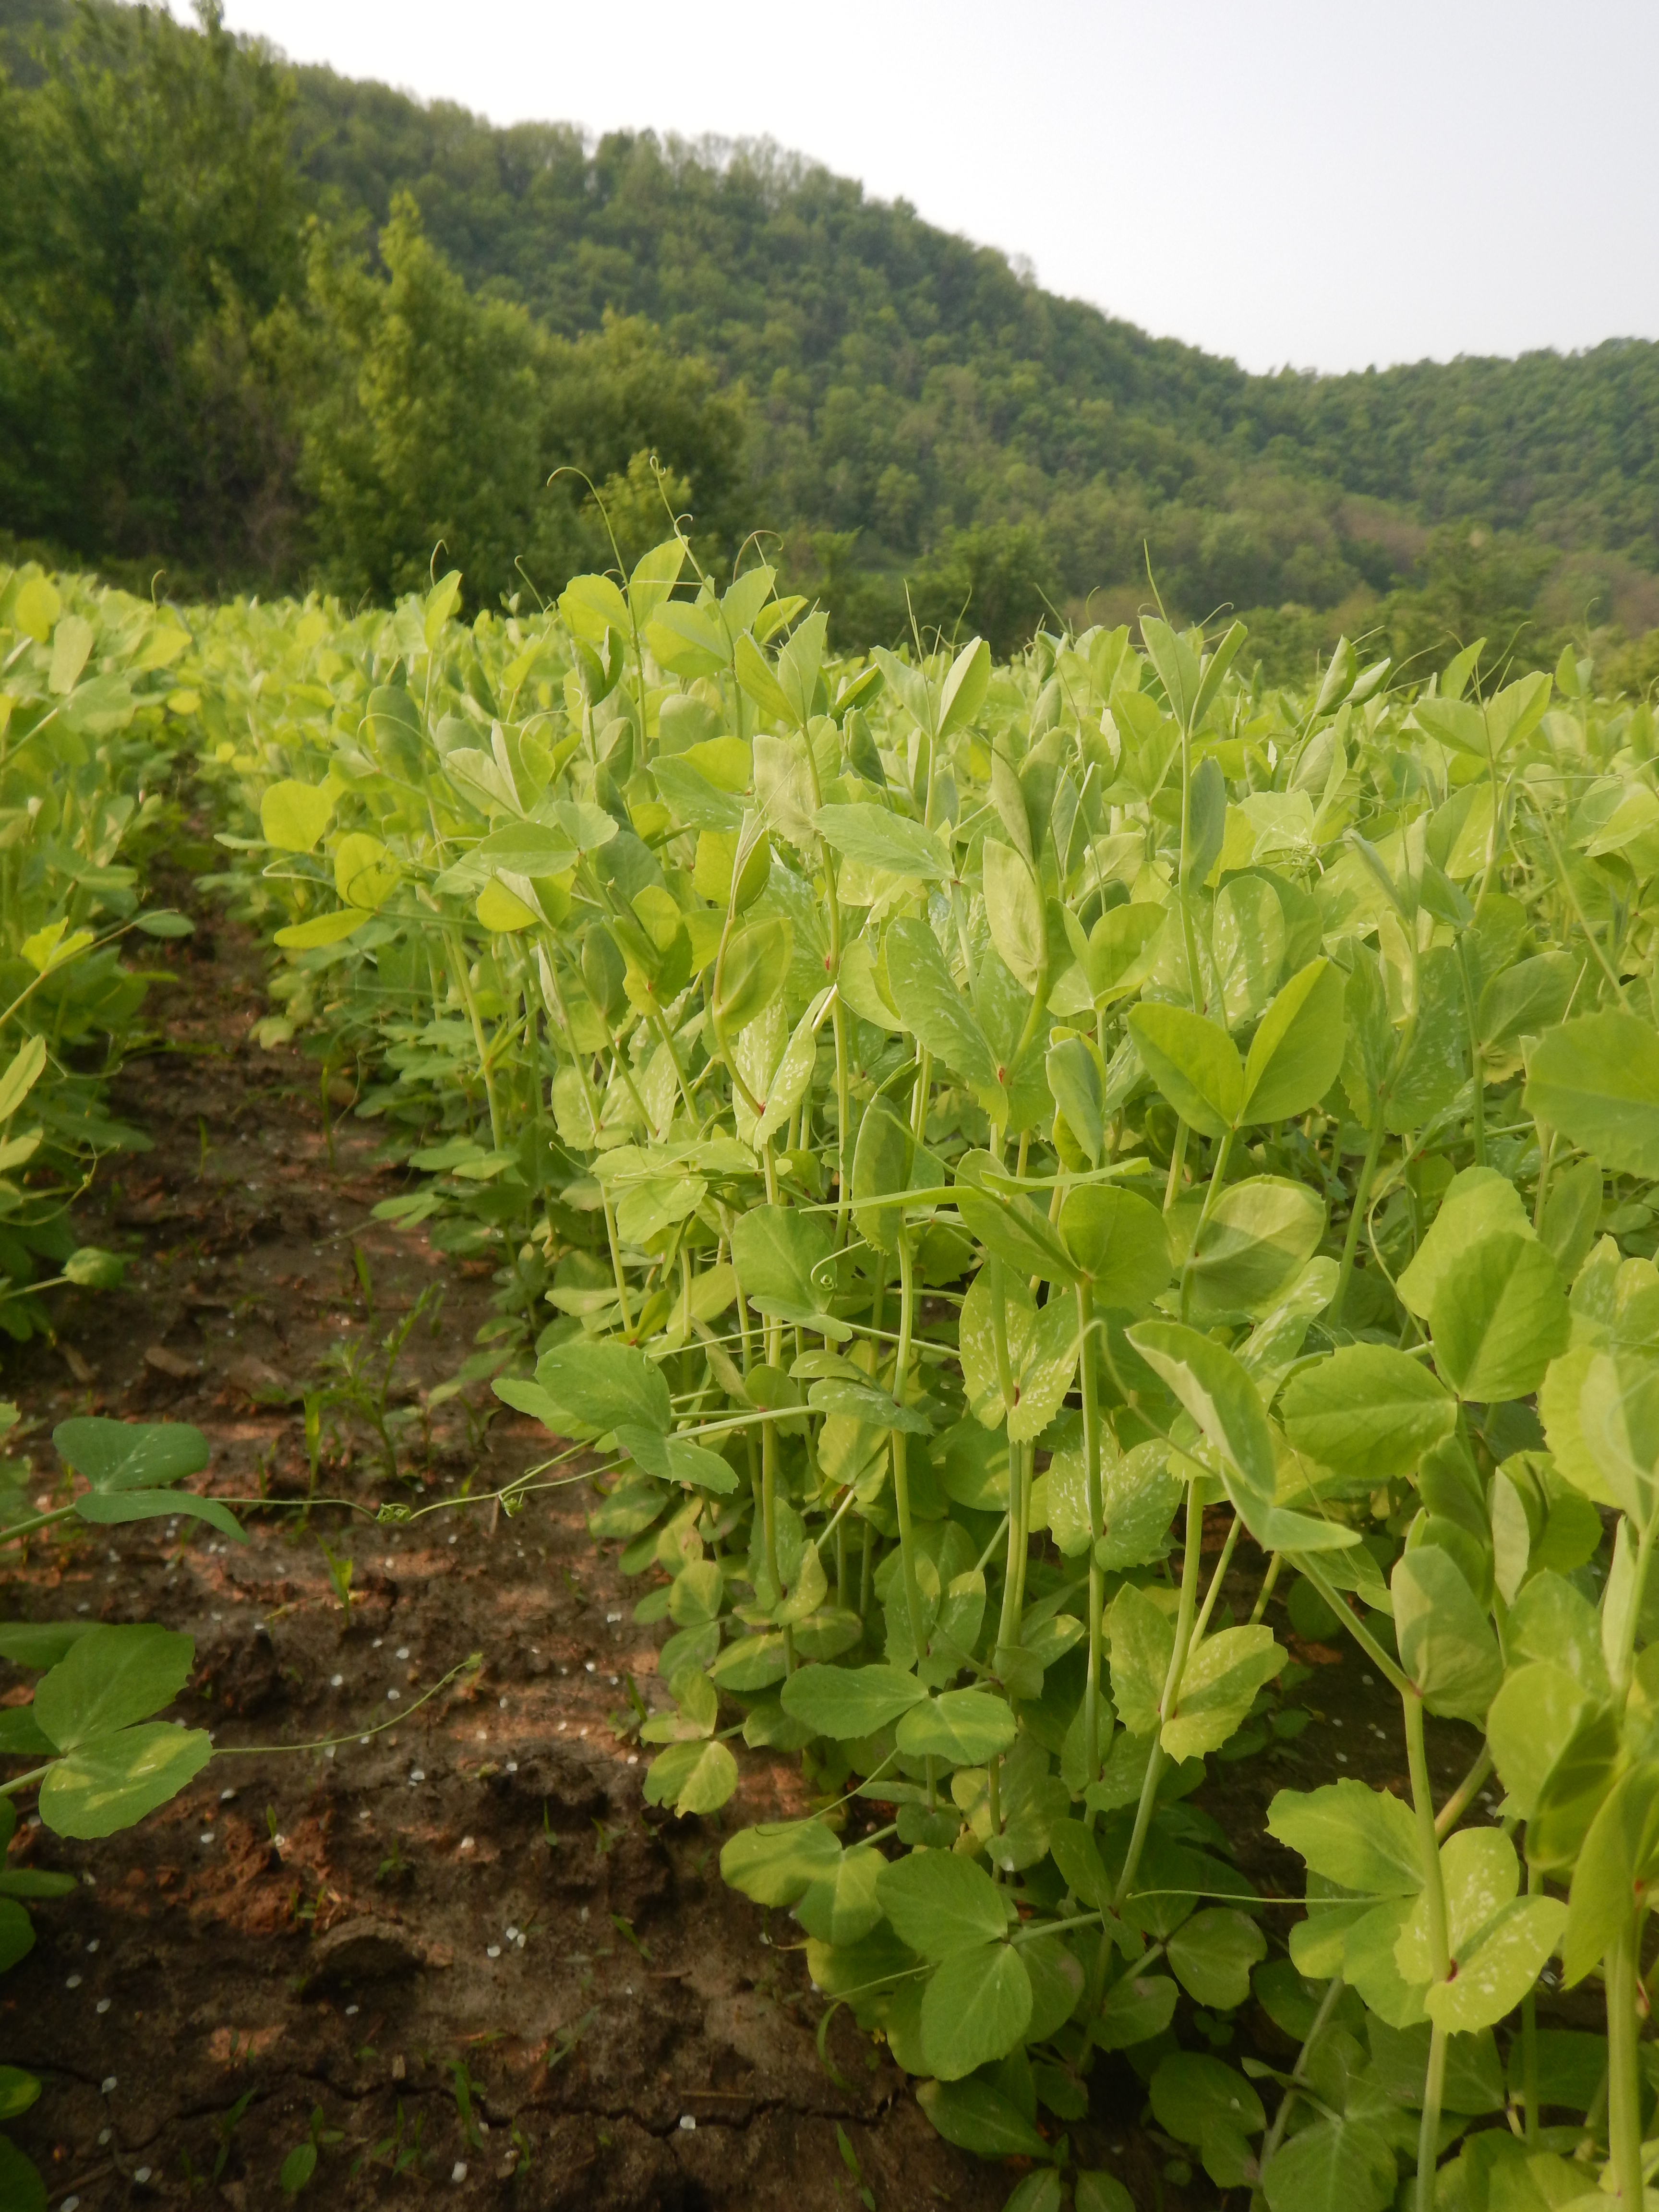
Pea Vine in the field
Unless you go to a regional food co-op that carries our products, you will seldom find pea vine in the grocery store.  You may find pea shoots that are more like a sprout.  While our pea vine is still an immature plant, it is more developed than pea shoots.  The tendrils and leaves are tender, but the main stem of the plant can sometimes get tough depending on how mature the plant is at harvest.  Most of the upper stem is still tender while the mid to lower portion may be a little more coarse.  In past years we’ve had members comment that the pea vine is “stringy.”  There are several ways to deal with this issue and still extract full flavor and benefit from the pea vine.  The first option is to pick the tender leaves, tendrils and thin stems off the main stem.  You can use those in salads, lightly cook them, or add them to fresh beverages like smoothies or green juice drinks.  Do not throw the stem away as it still has flavor that can be extracted!  Simmer the stems in hot broth, sauces, or soups to extract the flavor, then discard the stems. 

Another alternative is to use pea vine in some way where you blend or chop the leaves and stems in a food processor or blender.  This is not only a quick way to prepare pea vine, but it also maximizes the yield and benefit you get from this green.  I typically still discard the lower few inches of the bunch if that portion of the stem is more tough, but I utilize the remainder of the plant.  If it is chopped very finely using a blender or food processor, you can turn it into pesto, add it to smoothies, incorporate it into soups, or make Pea Vine Cream Cheese (one of our favorite farm recipes!).  

If you are using pea vine in sauces, soups or broth, I recommend rough chopping the pea vine into smaller pieces and adding it to hot broth or a sauce base.  Let the pea vine simmer briefly to extract the flavor, but don’t overcook it or you’ll lose the bright pea flavor.  When I say simmer briefly, it only takes a few minutes to wilt the pea vine in a hot liquid or a hot pan if you are using the leaves.  The stems may take a few minutes more.  Once you’ve infused the flavor of the pea vine into the sauce or broth, you can strain it out to remove it.  If you’d like to extract just a little more flavor, blend the mixture before straining it.  

Pea vine goes well with cream, butter, cheese, pancetta, prosciutto, bacon and ham, eggs, lemon, lime, mint, parsley, chives, spring onions, green garlic, radishes, asparagus, and mushrooms.  You may use it in fresh salads, pasta, or rice dishes, brothy soups like miso soup or a ramen bowl, or creamy soups.  This week I decided to turn it into a green curry dish, inspired by Thai cuisine, but by no means an authentic Thai recipe!  Sometimes Thai recipes call for tamarind, a tropical ingredient with a sweet and sour flavor.  While we can’t grow tamarind in Wisconsin, we can get the same effect with rhubarb!  In this recipe rhubarb is cooked in coconut milk and then the hot mixture is blended with raw pea vine.  The cooking time once the pea vine is added is minimal which helps to maintain the bright, subtle flavor of peas.

Store pea vine loosely wrapped in a plastic bag in the crisper drawer of your refrigerator until ready for use.  Wash it in a sink of cold water before using.  If you are going to sauté it in oil or use it in a fresh greens salad, shake off the excess moisture or put it in a salad spinner first.


Green Curry with Pea Vine & Rhubarb

Yield:  6 servings

2 Tbsp Sunflower Oil
16 oz Chicken Breast*
3-4 pieces Green Garlic or Green Onions
1 Tbsp Fresh Ginger, minced
1 ½ cups Asparagus, cut into bite-sized pieces
1 cup Baby White Turnips, medium dice
1 jar (4 oz) Green Curry Paste
2 cans (13.5 fl oz) Coconut Milk
2 cups Rhubarb, medium dice
1 bu Pea Vine
2 Tbsp Soy Sauce
1-2 Tbsp Maple Syrup
Salt and Black Pepper, to taste
Cooked Jasmine or Basmati Rice or Rice Noodles

*Note:  If you prefer to make this dish vegetarian, substitute firm tofu or mushrooms in place of the chicken.
  1. Place coconut milk in a medium saucepan over medium heat.  Stir in the green curry paste then add the rhubarb.  Bring the mixture to a simmer and cook until the rhubarb is soft, approximately 10-15 minutes.
  2. Remove from heat and set aside for a moment.  Roughly chop the washed pea vine and place it in a blender or food processor.  Depending upon the size of your machine, you may need to work in two batches.  Carefully pour the hot coconut milk mixture over the pea vine.  Blend until the mixture is smooth.  If you have a powerful blender that is able to process the pea vine and rhubarb into a smooth mixture, you may choose to use it just as it is.  If your mixture is more coarse than you like it, pour it through a strainer.  Set the coconut milk mixture aside.
  3. In a large sauté pan, heat oil over medium high heat.  Add chicken and cook until browned on one side, then stir to release the pieces from the bottom of the pan and brown the other side.  
  4. Finely mince the lower white portion of the green garlic or green onions.  Thinly slice the green tops and set aside.  Once the chicken is browned, add the minced white portion of the green garlic/onions and ginger to the pan with the chicken.  Sauté for another 2-3 minutes.  
  5. Add the quartered turnips and asparagus.  Sauté for 2-3 minutes, then add the coconut milk mixture along with soy sauce, 1 Tbsp maple syrup, salt, and pepper.  Bring to a gentle simmer and cook until the vegetables are tender and the chicken is thoroughly cooked.  Remove from heat and adjust seasoning to your liking with additional salt, pepper, soy sauce and/or maple syrup.
  6. Serve over hot cooked rice or rice noodles.
  7. Garnish with the sliced green garlic or green onions.
Recipe by Andrea Yoder


Pea Vine Cream Cheese

Yield: 2 cups

4 cups pea vine, roughly chopped and packed (approximately 1 bunch)
3 Tbsp sunflower oil
2 Tbsp apple cider vinegar
1 tsp salt
8 oz cream cheese, softened
½ cup green onion, minced
  1. Roughly chop one bunch of pea vine and put it in the bowl of a food processor.  Add the oil, vinegar, and salt.  Pulse the food processor a few times to start chopping the pea vine.   Continue to run the food processor until the pea vine is processed to a very fine texture.  
  2. Cut the softened cream cheese into cubes and add it to the food processor.  Process briefly, just enough to gently incorporate the cream cheese into the pea vine mixture.  
  3. Scrape the cream cheese mixture into a bowl.  Fold in the minced green onion.  Refrigerate the cream cheese mixture for 1-2 hours or overnight to allow the flavors to develop before you use the cream cheese.
**Note**  Any extra cream cheese mixture can be used in a variety of ways.  A few ideas include:  Spread it on your morning bagel;  Serve it with grilled chicken breast;  Spread it on a grilled flat bread and top with raw, fresh vegetables for a raw pizza.

Recipe by Andrea Yoder

Late Spring Farm Update

By:  Richard de Wilde

2022 Cilantro Planting #1
Ok, I promised Andrea this would not be a farmer “whining” about the weather.  So, this is a report about what we and our crew have done with the hand Mother Nature has dealt us.  The facts only. Unlike last spring which was record-setting cold and dry, this spring was record-setting cold and wet.  This spring we set a new record for my 40 plus years of vegetable farming as the latest first planting date which was April 20.  We are now harvesting those first planted radish, greens, white turnips, and very soon dill and cilantro.  In fact, we have accomplished a total of 6 plantings for our line up of these crops that we plant every week.  

Row covers protecting strawberries and melon plants from frost

Because of the cool spring, we have made extensive use of row covers for heat gain and to protect plants from wind.  Row cover is spun bonded polyester.  It is light weight and transmits 85% of the sunlight.  Under the covers, the temperature is on average 4 degrees higher both day and night.  After several weeks you can really see a difference in the rate of crop growth and, unfortunately, weed growth as well.  

Zucchini plants thriving underneath a row cover
to protect from frost and promote heat gain

So, our heat-loving summer plants, i.e., zucchini, cucumbers, tomatoes, melons, watermelons, and winter squash were all safe in the greenhouses during the cold weather in April, and then in early May we had 4 days of unseasonably hot weather with temperatures in the 80’s and 90’s!  Those heat-loving crops thrived and made quantum leaps in maturity overnight, literally!  So, it is only the 10th of May and Andrea says the zucchini and cucumbers must get transplanted before they get too big and “leggy.”  Despite some cold days and nights in the forecast, we gambled and put them out in the field.  We immediately covered them with row cover draped over wire hoops that we put over the beds with a string strung between them to help float the row cover above the plants. Putting giant blankets on fields requires a lot of sandbags to hold them in place and is most easily accomplished with low wind speed.  But that was only the beginning as we were still faced with the threat of low temperatures and even frost almost daily.  Despite the forecast, we kept planting.  The tomatoes went next and were also hooped and covered.  Then the eggplant, our first melon planting and watermelons, all with covers for protection.  We still had the whole winter squash crop remaining and the plants were getting very tall, so we put them out as well along with some basil and covered it all.

First crop of tomatoes nicely mulched with rye straw
We had the extra covers on hand, but by this time we had run out of sandbags!  Not only did we have a lot of covers out in the field, but we have also been having record-setting wind speeds this spring!  We rushed to fill over 1,000 more sandbags!  We checked covers daily and replaced them as needed, adding additional sandbags to keep them in place.  We think the danger of frost is passed now, but only after it “nipped” our first bean planting, which was not covered.  Thankfully, the covers did their job, and all those warm-weather crops survived the frost!  The investment of time and resources paid off.

This week we will plant our third crop of beans and sweet corn.  Sweet potato slips from North Carolina are scheduled to arrive on Thursday morning and we have plans to plant them Thursday afternoon.    We have peas to trellis and started staking the first crop of tomatoes.  Peppers are also going out to the field this week.  Aside from our second planting of melons and more basil, this will complete the plantings of our summer transplant crops.

Early variety of strawberries with 
blossoms!
Due to the cold start to the season, it looks like strawberries will be delayed a bit.  However, the plants are full of blossoms and there are even some thumbnail sized berries!  In addition to laying out covers, transplanting, etc., we have also been harvesting vegetables for our early CSA boxes, we have spread 90 4’x 5’ bales of mulch for tomato and pepper crops and Luis, Nestor and Joel have done an excellent job of cultivating!  Thanks to these guys, the sunchokes, horseradish and potatoes are 4-6 inches high and weed free.  

Thankfully, we’ve had time to stay on top of hand weeding and the crew has gone through all the parsnips and beautiful carrots as well as kohlrabi, broccoli, cauliflower, and Kale.  All these crops are looking good, and the kohlrabi is already the size of a 50-cent piece!  Last weekend we finished planting ginger in the cold frame greenhouse, so we have that to look forward to harvesting in late October or early November!


Did I mention that we have a fantastic crew?  They never hesitate to stay late to finish a job and are ready to start again the next day.  Andrea’s right, we have nothing to whine about.  We’re positioned for a great season!
Using the Kult to cultivate weeds in the rows of parsley plants