Wednesday, July 21, 2021

July 22, 2021 - This Week's Box Contents, Featuring Thai Basil!


Cooking With This Week's Box

Porcelain Garlic:
Homemade Garlic Butter Rolls
Creamy Garlic Herb Chicken

Sweet White Onions:
Onion Sandwich
Cucumber Sweet Onion Salsa

Zucchini and/or Sunburst Scallopini Squash:
Savory Zucchini Pies: 5 Easy Recipes
Cinnamon Sugar Zucchini Coffee Cake

Broccoli:
Instant Pot Broccoli Cheddar Soup (made summer style with zucchini & carrots)
Sicilian Broccoli & Cauliflower Pasta

White Cauliflower:
Pesto Roasted Cauliflower
Cauliflower Risotto

Green Top Carrots:
Carrot Salad with Thai Basil, Lime and Toasted Sesame Oil
Easy Carrot Fritters

New Red Potatoes:
Crispy Garlic Butter Parmesan Smashed Potatoes
Sheet Pan Garlic Herb Butter Chicken & Potatoes

Thai Basil:
Thai Basil Lemonade (See Below)
Thai Basil Pesto with Peanuts (See Below)

Yellow OR Green Beans:
Roasted Green Beans and Mushrooms
Yellow Beans with Garlic, Dill and Parsley

Eggplant:
20 Eggplant Recipes for the Weekend
Eggplant Caviar on Grilled Bread

Green Top Red Beets:
Peach and Beet Salad
Roasted Salmon, Beets & Potatoes with Horseradish Cream

Hello Everyone!

The contents of the box are shifting to some of our peak summer selections including beans and eggplant this week.  The tomatoes are just starting to ripen alongside the tomatillos that are starting to fill out their husks.  A hop, skip and a jump down the field we have some nice bell peppers set on.  Within the next couple of weeks you’ll start seeing these items in your box along with sweet corn!  That’s just a little glimpse of what’s to come, but this week we’re excited to be featuring a unique summer herb, Thai Basil!

Carrot Salad with Thai Basil, Lime and Roasted Sesame Oil
photo from plantydelights.com
In our end of season survey last year some members requested that we grow different varieties of basil in addition to the traditional Italian basil.  So, in response to that request we added Thai basil to our planting plan this year.  I’ve included two simple recipes using Thai basil.  The first, Thai Basil Lemonade (See Below), is a fun way to enjoy the subtle, yet complex flavor of Thai basil.  The second recipe for Thai Basil Pesto with Peanuts (See below) is a bit more of a bold recipe, but it’s so delicious!  The recipe is scaled for the quantity of Thai basil in your box this week and will yield about ½ cup of pesto.  This is plenty to toss with noodles for 3-4 servings, or you can serve it as a condiment with grilled fish, chicken or steak.  It would also be delicious tossed with roasted cauliflower or carrots.  If you need a larger quantity of pesto, you could double the recipe and use cilantro, Italian basil, mint or any combination of these along with the Thai basil to complete the quantity.  All of these herbs are complementary and are often used together in recipes coming from southeast Asian cuisine.  If you aren’t interested in either of these recipes, take a look at this week’s vegetable feature article where I’ve included more recipe links!

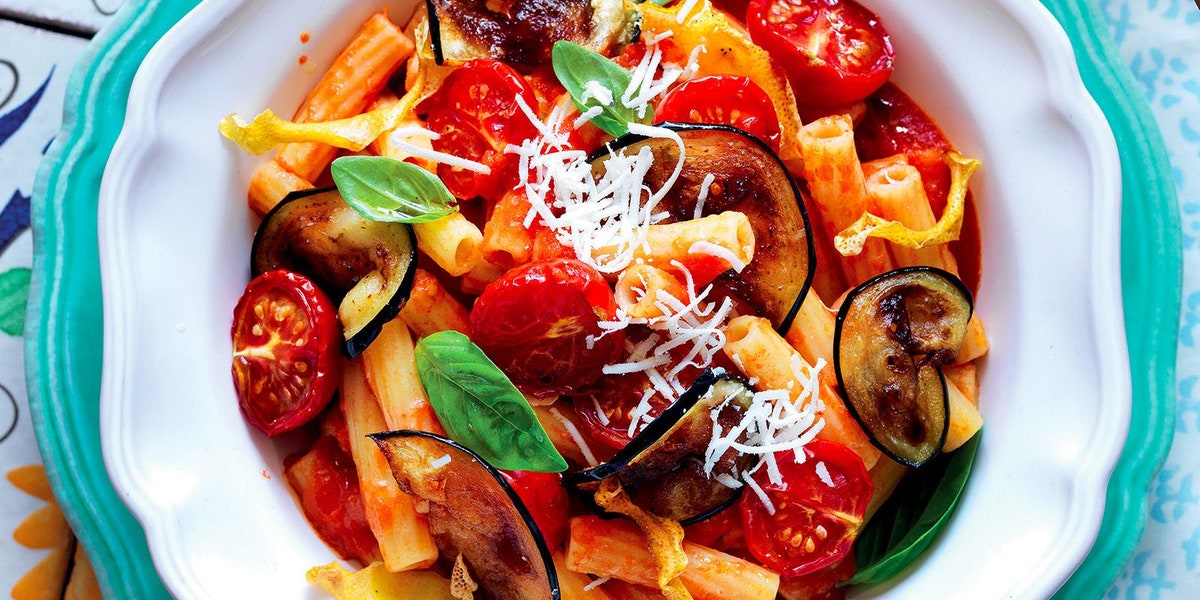
Pasta alla Norma, photo from lacucinaitaliana.com
Eggplant is making it’s entrance this week and I wish you could see this field!  The plants are big, beautiful and healthy with vibrant blossoms in a variety of shades of purple.  The fruit is gorgeous and glossy in appearance right now making it a stunning crop to walk through.  The key to eggplant is making sure you cook, bake or roast it until it’s not just tender, but silky and smooth.  To get you started, take a look at this article for “20 Eggplant Recipes for the Weekend."  You could also make this super simple recipe for Eggplant Caviaron Grilled Bread, a recipe concept credited to Alice Waters and Chez Panisse Restaurant.

photo from azestybite.com
This past week I whipped up a batch of pesto with the bag of Italian basil from last week’s box.  It had been sitting on my counter for a few days and was starting to get pretty wilted.  You would never have known what it looked like after I turned it into the most delicious pesto along with a lot of fresh garlic!  I’ve used the pesto in a variety of ways including as a spread on chicken sandwiches and as a snack on crackers topped with a piece of gouda and a sliver of salami.  Earlier this week we needed a quick dinner so I decided to toss cauliflower florets with some oil and a few spoonfuls of pesto and popped it in the oven to roast it.  After Richard and I finished off the entire head of cauliflower for dinner we found ourselves wishing there were more!  Why haven’t I done this before!?  Trust me, it’s simple and delicious and thankfully someone else thought about doing it too so I’ve included their recipe for Pesto Roasted Cauliflower to guide you!

Savory Zucchini Pie with Stracchino
photo from lacucinaitaliana.com
Our second crop of zucchini is kicking into production this week.  Hang on as we ride the second wave of zucchini!  If you think you’ve made everything you can possibly make with zucchini, think again!  This week I’ve included a link to an article featuring “Savory Zucchini Pies:  5 Easy Recipes."  If you’re feeling more like something on the sweet side of the fence, check out this recipe for Cinnamon Sugar Zucchini Coffee Cake.

Ok, I’m going to wrap it up for this week.  I hope you enjoy working with the Thai basil this week.  We hope to include it in another box, possibly even next week if there’s some remaining after this week’s harvest.  If you find more than one or two recipes you’d like to try with the basil, tuck them away and make them with the next round.  Have a great week and I’ll see you back here next week!---Chef Andrea

Vegetable Feature: Thai Basil

By:  Chef Andrea Yoder
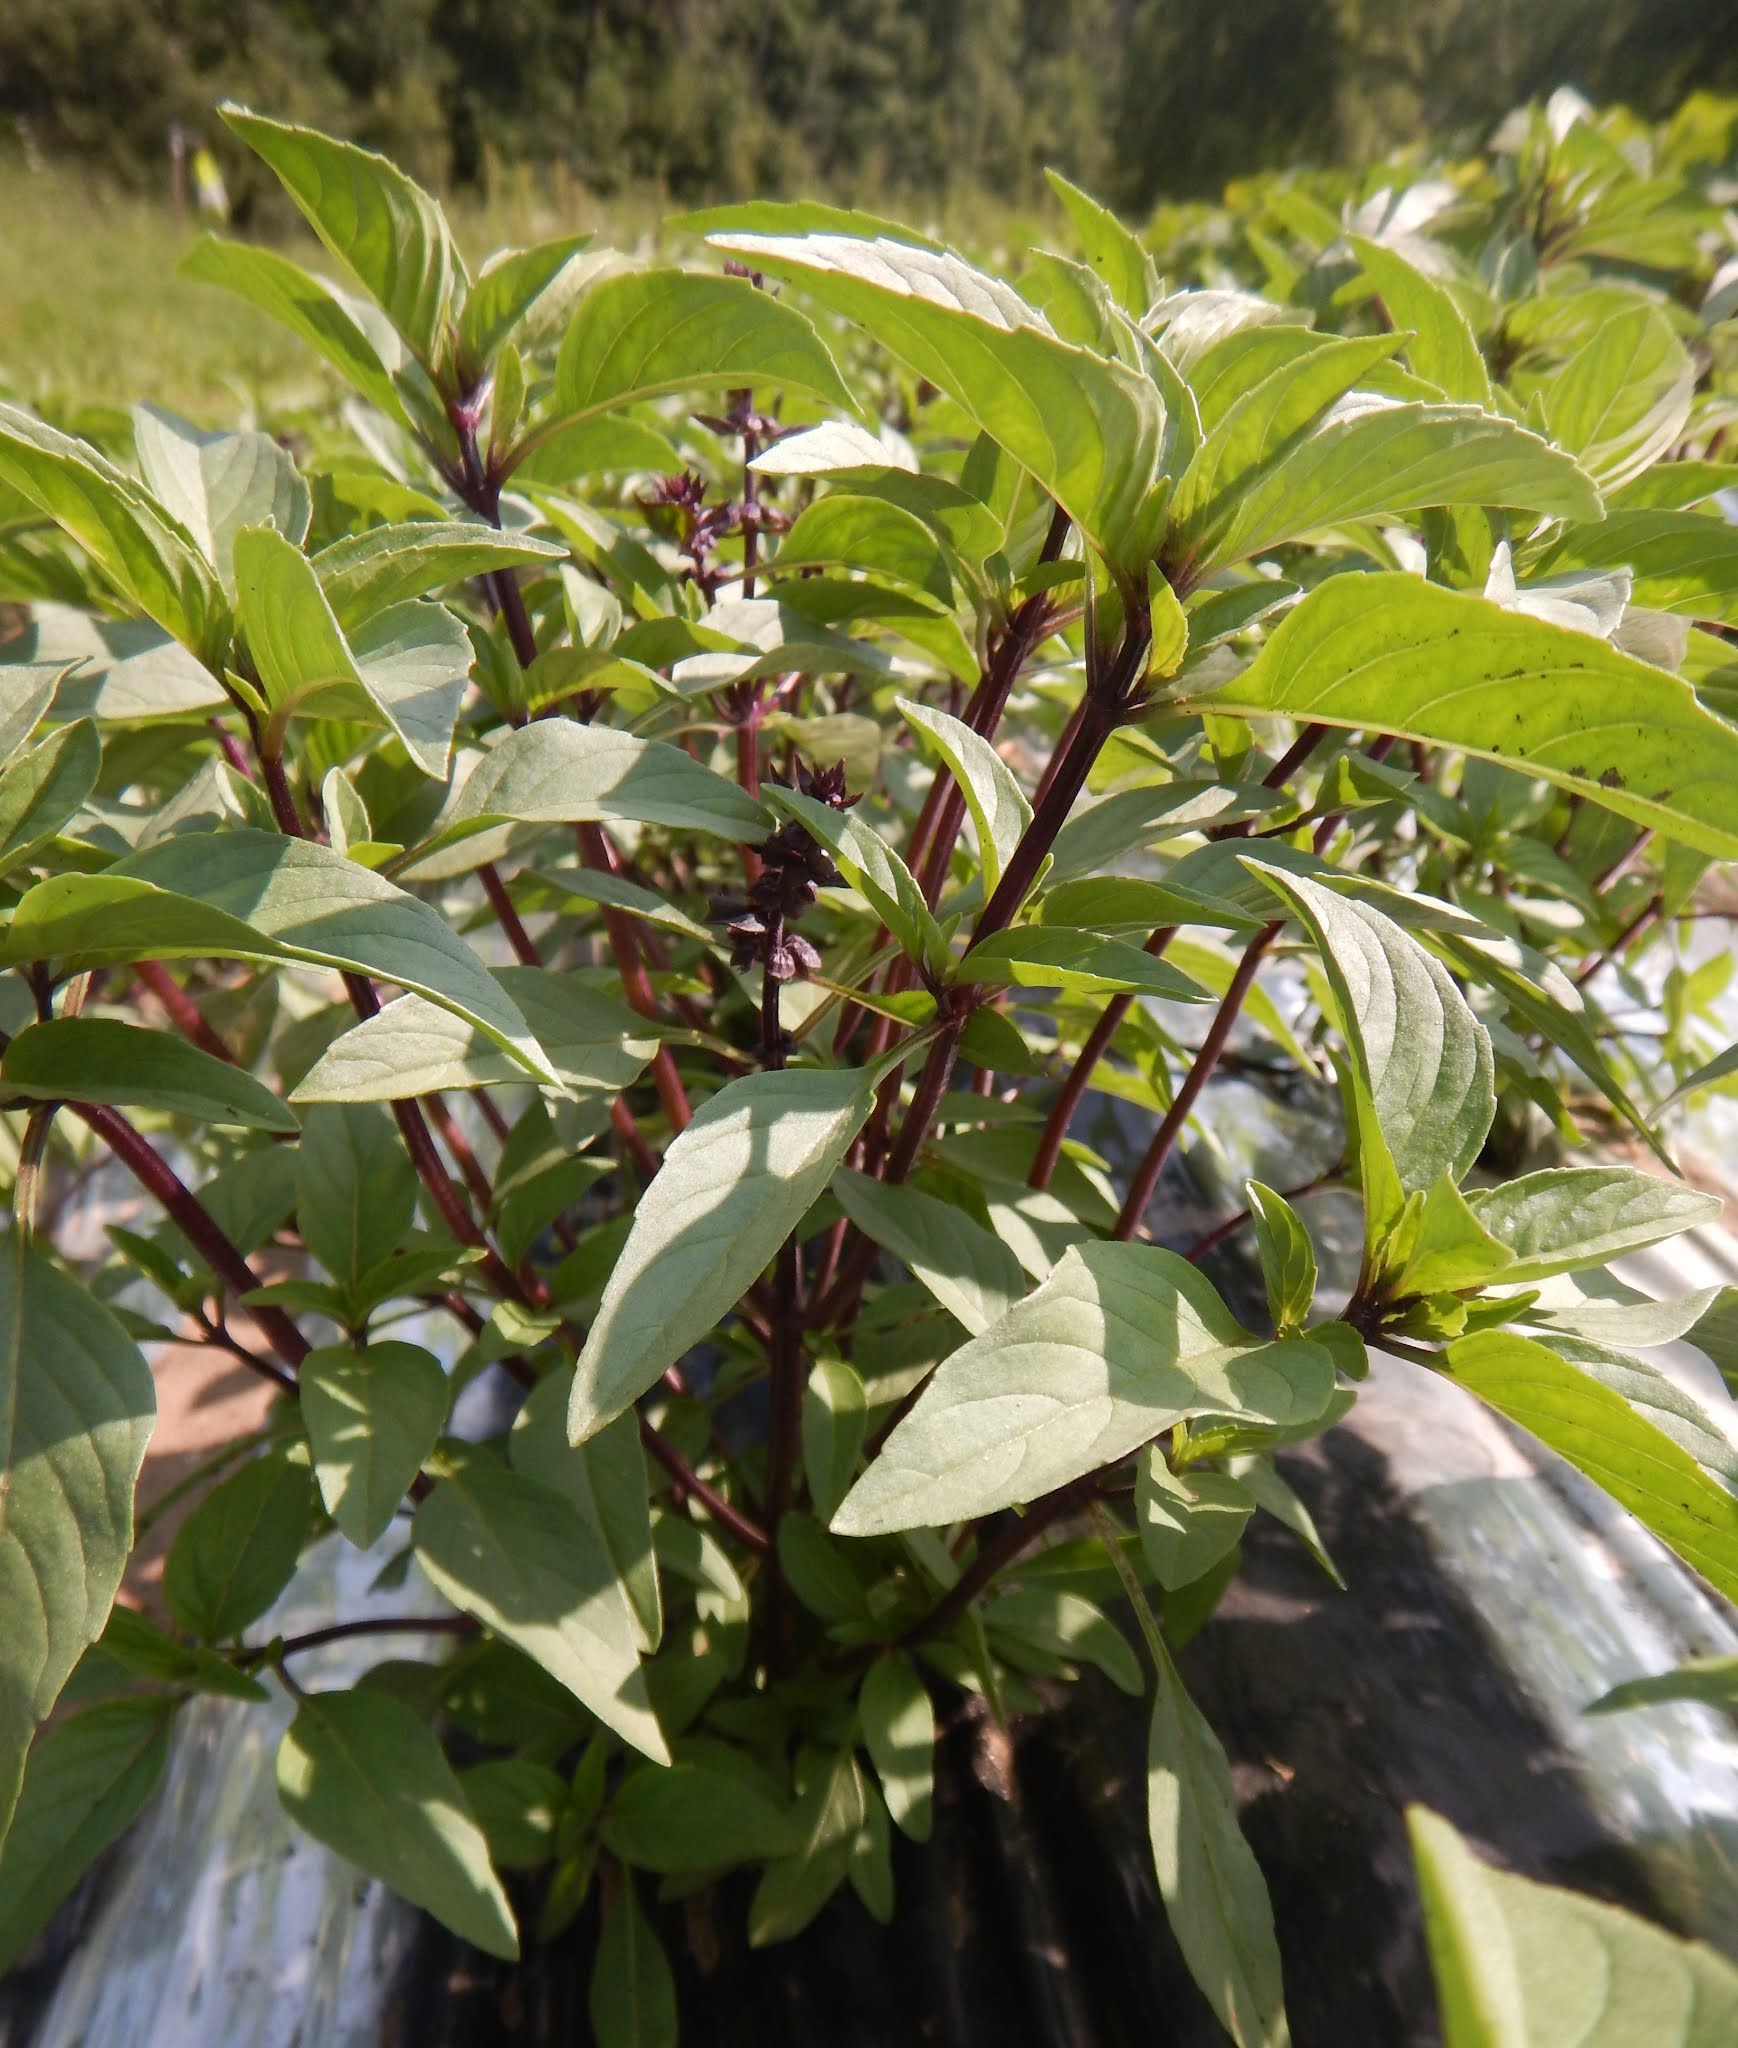
Description: Thai basil is a unique herb that is actually a member of the mint family.  It’s characterized by thin, slender, pointy green leaves that grow on dark purple stems.  The plants also have purple flowers which are edible and usable when they are young and tender.  Thai basil has a flavor that is kind of a combination of basil along with a subtle anise or licorice flavor.

Preparation & Use: To use Thai basil, pluck the leaves and tender flowers off the stem.  The stems are not very fragrant, so you can discard the stems.  Thai basil is often used in the cuisine of southeast Asian countries including recipes and dishes from Thailand, Vietnam and Laos.  You’ll often see it used along with a variety of other herbs including cilantro, sweet basil, and mint.  Whole or roughly torn leaves are often used in fresh vegetable salads, but are also used in spring rolls or added at the end of cooking to stir-fries and curries.  You may also add it to dishes such as a traditional Vietnamese Pho as well as soup, noodle or rice dishes.  You can also use it to make fragrant beverages such as lemonade, hot or cold tea or cocktails.

Thai Basil Chicken Stir Fry
photo from recipetineats.com
In addition to the herbs listed previously, Thai basil also pairs well with garlic, ginger, lemongrass, chiles, limes, coconut, curry, eggplant, winter and summer squash, peppers, cucumbers, peanuts and cashews to name just a few ingredients.

This week’s box contains a 1 ½ ounce portion which will yield about 1 cup of loosely packed leaves.

Storage: Thai basil is a more perishable vegetable once it is harvested.  For best results, use it within a few days after receiving it.  For optimal storage, put the cut end of the stems in a glass of fresh water and store it at room temperature until you are ready to use it.

If this herb is new to you, here are 15 Thai Basil Recipe ideas to get you started!

Thai Basil Pesto with Peanuts


Yield:  ½ cup

2 cloves garlic
2 Tbsp dry roasted peanuts
1 cup Thai basil leaves, lightly packed
1 ½ Tbsp toasted sesame oil
2 tsp rice vinegar
¼ tsp red pepper flakes (or to taste)
1 tsp maple syrup
½ to 1 tsp soy sauce
2 tsp lime juice
Salt, to taste
  1. Place the garlic and peanuts in the bowl of a food processor and process briefly to coarsely chop the garlic and peanuts.  Add the Thai basil, sesame oil, rice vinegar, red pepper flakes, maple syrup, ½ tsp soy sauce and lime juice.
  2. Process until it is mostly smooth, or to your preferred consistency.  Taste and adjust to your preferences by adding salt, additional soy sauce and/or rice vinegar as needed.
  3. Serve immediately or refrigerate until ready for use.
Serving Suggestions:
  • Toss with cooked rice noodles, soba noodles, ramen or egg noodles.
  • Serve as a condiment with grilled steak, fish or chicken.
  • Toss with vegetables such as cauliflower, carrots and/or mushrooms and roast until tender.
  • Add a spoonful to stir-fried vegetables and serve with rice.
Recipe adapted slightly from Jordan Kenna’s recipe featured at tasty.co

Thai Basil Lemonade


Yield: 6 servings

6 large lemons
¾-1 cup sugar
½-⅔ cup loosely packed Thai basil leaves
6-8 cups of water 
Ice

1. First cut two of the lemons into quarters and remove the seeds.  Place the quartered lemons in a large bowl along with the sugar and basil.  If you like really sweet lemonade, use one cup of sugar.  If you prefer a more tart lemonade, start with ¾ cup of sugar.  Use a muddler or a wooden spoon to smash the sugar, basil and lemons together until the mixture becomes fragrant and the sugar starts to dissolve in the juices extracted from the lemons, about 2 to 3 minutes.  Once muddled, put the basil mixture in a large jar or pitcher.


Before Muddling

After Muddling

2. Juice the remaining 4 lemons.  You will need 1 cup of lemon juice.  If your lemons do not yield one cup, juice more lemons until you have a cup of juice.

3. Add the cup of lemon juice to the jar or pitcher along with 6 cups of water.  Cover and refrigerate for a minimum of two hours or overnight.  

4. Strain the lemonade into a pitcher and taste it.  If it is too concentrated, add 1-2 cups more water.  Serve chilled over ice.

Recipe adapted from rachaelraymag.com

Wednesday, July 14, 2021

July 15, 2021 - This Week's Box Contents, Featuring New Potatoes!


Cooking With This Week's Box

Fresh Porcelain Garlic:
New Potatoes with Garlic & Butter
White Garlic Pizza Sauce

Sierra Blanca Onions:
Crispy Baked Onion Rings 
Caramelized Onion Cheeseburgers 

Zucchini and/or Sunburst Scallopini Squash:
35 Recipes Using Zucchini 
Herb Garden Zucchini Pizza
Basil Zucchini Soup

Green and/or Silver Slicer Cucumbers:
Cucumber and Black Bean Salad
Cucumber Satay Crunch Salad

Broccoli:
Broccoli Quinoa Cakes
Broccoli Manicotti with Burrata Cheese

White Cauliflower:
Spicy Roasted Cauliflower Stir-Fry
Sicilian Cauliflower Salad

Green Top Carrots:
Carrot Top Pesto
Green Top Carrot Soup
Tempura

New Red Potatoes:
Broccoli & New Potato Gribiche (See Below)
Frittata with New Potatoes and Summer Vegetables (See Below)

Italian Basil:
Asian Cabbage Slaw with Basil-Ginger Dressing
Chicken with Lemon Basil Sauce

Rainbow Chard:
Summer Farmer Skillet Dinner
How To Freeze Swiss Chard

Tiara or Sweetheart Cabbage:
Eggroll In a Bowl
Beef & Cabbage Stir-Fry

BONUS LINK:
Farm Share Newsletter from Alexandra Stafford of alexandracooks.com

Hello Everyone!

Photo from Mostly Homemade Mom
We’re really excited to be delivering the first potatoes of the season this week!  We were really pleased with the yield we got from our first digging and I hope you’re pleased with how delicious they are!  If you aren’t familiar with what makes “New Potatoes” special, then take a few moments to read more about them in this week’s vegetable feature article.  This week’s featured recipes come from Heidi Swanson’s cookbook, Super Natural Every Day.  She is also the author behind the blog 101cookbooks.com.  I’ve followed Heidi’s blog for quite awhile and I have to admit, I own three of her four cookbooks.  She is a very talented photographer, in addition to her culinary talents, which makes her cookbooks even more appealing.  The first recipe is for Broccoli & New Potato Gribiche (See Below).  Gribiche sauce is a classical French sauce made with hardboiled eggs, capers, etc.  It’s a simple sauce often used to dress up fresh vegetables.  This is kind of like a warm salad.  The second recipe is for Frittata with New Potatoes and Summer Vegetables (See Below).  In this recipe, Heidi employs a slightly different method for making this frittata, so even if you’ve made frittatas before, you may want to check out her version.

This week we also have fresh, green top carrots for the first time!  Just a reminder that the tops are edible too, so don’t throw away the value they contain!  Use them to make a simple Carrot Top Pesto or Green Top Carrot Soup.  You could also use the green tops when making broth to use in soups and stews.

This week’s “greens” include the gorgeous Rainbow Chard and Spring-Planted cabbages.  If you feel like you have a lot of vegetables to conquer this week and you’d like to preserve some of this week’s box for future use, consider freezing the Rainbow chard.  There’s a great step-by-step explanation for how to freeze chard at Rootsandboots.com.  If you have a collection of cabbage in your refrigerator now, check out our Facebook Group where members did an excellent job of sharing some really good ideas for how to use cabbage.  Two favorite recipe ideas include Eggroll In a Bowl and Beef & Cabbage Stir-Fry.
Photo from Budget Bytes

Before I close out this week’s discussion, I want to share a bonus link with you to Alexandra Stafford’s weekly “Farm Share Newsletter”.  I’ve been following Alexandra’s blog for quite awhile and this year she started putting together this weekly newsletter to highlight some of her recipes for items she’s receiving in her personal CSA box!  She is in a different part of the country, but the contents of the CSA boxes she’s receiving are often quite similar to our seasons.  Each week she highlights recipes using each of the items, so if you like her style you might like to sign up for her newsletter!


Ok, that’s a wrap for this week.  I’ll see you back next week with more potatoes and hopefully some yellow beans to start cooking with!  Have a great week!—Chef Andrea


Vegetable Feature: New Potatoes

By:  Chef Andrea Yoder

Description:  Potatoes are a vegetable everyone’s familiar with, but not all are created equally and this week’s potatoes are, in our opinion, very special.  If you’ve been with us for previous CSA seasons you know we draw attention to this point every year because frankly, we just don’t want you to miss out on this experience!  There is a short period of time early in the summer when we have the opportunity to eat “New Potatoes.”  New potatoes are not a variety, but rather a term used to describe potatoes that are harvested off of a plant that still has green leaves on it.  Our usual practice is to mow down the potato vines about a week in advance of harvest.  In the week between mowing down the vines and actually harvesting the potatoes, changes take place in the plant that help to set the skins and make them easier to handle without damaging the skin.  It also gives them a more durable skin to protect the flesh and make them better for storage.  These potatoes were dug earlier this week from plants with green vines.  Freshly dug new potatoes have a flavor and texture unlike other potatoes throughout the season.  It is a fresh, pure potato flavor and the skin is tender and delicate.  When you cut them you’ll notice they are very crispy and sometimes a little brittle because they have retained all their juiciness!  Once cooked, the flesh is moist, creamy and smooth with a distinctive flavor that’s hard to describe.  Trust me, when you taste it you’ll know what I mean! 

Preparation & Use: 
Tomas with New Potatoes
The new potatoes in your box this week are a variety called Red Norland.  They are an early red-skinned potato with creamy white flesh.  They need to be handled with care so as not to disturb the skin and expose the flesh.  We’ve given them the “white glove treatment” through the harvest and washing processes, but we encourage you to handle them with care as well.  Wash them just before use and just give them a gentle scrub if needed. There is no need to peel them, so my recommendation is to just skip that step.

I encourage you to slow down and really savor the flavor of these new potatoes as these first few weeks will be the only time during the season you’ll be able to have this taste experience of freshly dug potatoes.  You really don’t need to do much to them and, in fact, I’d encourage you to do as little as possible!  Honestly, most often I simply boil or roast them with fresh garlic and top them off with butter, salt, pepper and sometimes fresh herbs.    This week’s featured recipes are also good options.  These recipes are a little more involved, but the flavors and ingredients are still very simple so the potatoes will still shine in all of their fresh-flavor glory!

Storage:  Potatoes should be stored in a cool, dark place, but not in the refrigerator.  We store our potatoes in a warmer cooler at about 48-50°F which is most ideal.  If potatoes are stored in colder temperatures (such as your home refrigerator), the starches will convert to sugars which is not what we want in a potato (save that characteristic for sweet potatoes!)  So in a home setting, it’s best to store them in a cool, dry location outside of the refrigerator where they will not be exposed to light which can cause the potatoes to turn green and bitter.  If the potatoes have set their skins, in general they will store for a few weeks at room temperature in a brown paper bag (never in a plastic bag).  However, because new potatoes are so fresh and we have not allowed them to set their skins, they will not store as well and are best eaten within one week.

Additional Information:  As we progress through the season, you will be receiving more varieties of potatoes.  It’s important to know that some potatoes are classified as “waxy” while others are classified as “starchy,” or possibly a mix of the two classifications which we label “all-purpose.”  These classifications are assigned based on the type of starch that comprises the flesh of the potato and it’s important to choose the appropriate cooking method for each type.  Waxy potatoes are generally more moist and hold together better.  They are best used for roasting, boiling or steaming, and are a good choice for soups and potato salad.  I do not recommend mashing them because they usually become sticky and pasty.  This week’s variety is a waxy potato.  Starchy potatoes tend to be more dry and fluffy.  This is a variety of potato appropriate for mashing as well as for making roasted potatoes, pan frying, etc.  Starchy potatoes are also useful in soups, but they’ll likely fall apart which is actually good for thickening.  As we progress throughout the season, make sure you read the “What’s In the Box” portion of the newsletter each week as we’ll give you information about the specific potato varieties as we deliver them so you’ll know the best ways to prepare and enjoy them.  In the meantime, enjoy the fresh flavor and creamy texture of these freshly dug new potatoes!


Frittata with New Potatoes & Summer Vegetables

Photo from Heidi Swanson's
Super Natural Every Day
Yield:  8 servings

2 Tbsp extra-virgin olive oil or melted clarified butter, plus more for drizzling
2 small onions, chopped 
8 oz new potatoes, unpeeled, sliced into paper thin rounds
2 shallots, chopped
Fine-grain sea salt, to taste
8 oz seasonal vegetables, such as summer squash or broccoli, cut into ½-inch pieces
10 large eggs, well beaten
¼ cup crumbled goat or feta cheese
Small bunch of chives, chopped

  1. Heat the oil in a heavy ovenproof 12-inch skillet over medium-high heat.  Stir in the onions, potatoes, half of the shallots, and two big pinches of salt.  Cover and cook, stirring occasionally, until the potatoes are just cooked through, about 5 minutes.  Stir in the seasonal vegetables and cook for another minute or two, until they soften up a bit.  Set aside half of this mixture on a plate.
  2. Whisk ½ tsp salt into the eggs and pour the eggs into the skillet.  Cook over medium-low heat until the eggs are just set and there isn’t a lot of liquid in the pan, about 5 minutes.  To facilitate this, run a spatula underneath the perimeter of the frittata and tilt the pan so the uncooked eggs run to the underside.  The key is to avoid browning on the bottom.  Top with the reserved vegetable mixture and sprinkle with the cheese and the remaining shallot. 
  3. Place under a broiler (a low setting will give you more control, if you have that option) for a couple minutes, or just until the top or the frittata is puffed up and set.  Resist the urge to walk away---the frittata can go from perfect to burned in just a few seconds.  Remove from the broiler and let sit for a minute or two.  Sprinkle with the chives, drizzle with a bit of olive oil, and serve warm or at room temperature, right out of the pan.

Recipe borrowed from Heid Swanson’s book, Super Natural Every Day.

Note from Heidi Swanson:  “Frittatas.  For years I started them on the stovetop, then finished in a hot oven—a perfectly acceptable approach.  But it wasn’t until I began to finish my frittatas under the broiler that they became exceptional.  The eggs puff up and stay light and the toppings brown and crisp perfectly, while the frittata bottom escapes scorching.  An added bonus is this approach takes less time.”


Broccoli & New Potato Gribiche

Yield:  6 servings
Photo from Heidi Swanson's
Super Natural Every Day

Sauce Gribiche is a classic French sauce consisting of a thin mayonnaise like base accented with capers and sometimes cornichons along with fresh herbs.  It may be served with a variety of dishes and foods, but is often used to dress fresh vegetables such as steamed green beans or new potatoes.  In this recipe, Heidi adapts this classic sauce just a bit and uses it to dress roasted new potatoes and broccoli.

1 ½ pounds new potatoes, unpeeled
½ cup plus 2 Tbsp extra-virgin olive oil
Fine-grain sea salt, to taste
12 oz broccoli florets
4 large eggs, hard cooked and peeled
2 Tbsp red wine vinegar
1 tsp Dijon-style mustard
1 Tbsp capers, chopped
2 shallots, minced*
3 Tbsp chopped fresh herbs including parsley, chervil, chives and/or tarragon

  1. Preheat the oven to 400°F with two racks in the top and middle of the oven.
  2. If the potatoes are small, you can leave them whole, otherwise cut into pieces no larger than your thumb.  Use your hands to toss the potatoes with 1 Tbsp of the olive oil, sprinkle with a big pinch of salt, and turn out onto a baking sheet.  Roast until they are cooked through and starting to brown, about 30 minutes.  About 15 minutes before you think the potatoes are done, toss the broccoli with 1 Tbsp of the olive oil, sprinkle with salt, arrange in a single layer on a baking sheet and place in the oven as well.  You are aiming to have the potatoes and broccoli finish cooking at (roughly) the same time.   
  3. To made the dressing, mash just the yolk of one of the hard-cooked eggs in a medium bowl.  Very, very slowly add the remaining ½ cup olive oil, beating constantly;  the dressing should look smooth and glossy.  Whisk in the vinegar, then the mustard.  Stir in the capers, shallots, herbs, and ¼ tsp salt.
  4. Coarsely chop the remaining eggs and egg white, and fold them into the dressing.  Put the warm potatoes and broccoli in a large bowl and gently toss with three-quarters of the dressing.  Taste, adjust the flavors, and add more dressing, if needed.  Serve turned out onto a platter or in a bowl.

*May substitute any other onion variety for the shallots.

Recipe borrowed from Heidi Swanson’s book, Super Natural Every Day.


Wednesday, July 7, 2021

July 8, 2021 - This Week's Box Contents, Featuring Cucumbers!


Cooking With This Week's Box

Fresh Porcelain Garlic:
Garlic Butter Sauce Pasta
Garlic Naan Bread

Desert Sunrise Cipollini OR Sierra Blanca Onions:   
Fennel, Pickled Onion and Apple Salad
Onion Vinaigrette Salad

Zucchini and/or Sunburst Scallopini Squash: 
Zucchini Ribbon Skewers with Spicy Lemon Butter
Marinated Chicken and Zucchini Kabobs

Green and/or Silver Slicer Cucumbers: 
Cucumber Lime Popsicles (See Below)
Mexican Cucumber Snack (See Below)
Chile-Mint Sauteed Cucumbers (See Below)
 
Broccoli:
Freezer Friendly Broccoli Cheese Soup
How To Freeze Broccoli
Honey Chicken Stir-Fry (using fresh or frozen broccoli)

Snow Peas or Sugar Snap Peas or Fresh Green/Yellow Beans: 
Stir-Fried Snow Peas with Shiitakes and Ginger
Chinese Sugar Snap Pea Salad
Fresh Green Bean Casserole

Summercrisp  Head Lettuce: 
Greens & Lentil Salad with Dijon Dressing
In and Out Style Burger Lettuce Wraps

Cilantro: 
Chimichurri
Cilantro Lime Slaw with Crispy Baked Fish Tacos

Italian Basil: 
Summer Vietnamese Rice Noodle Salad
Nicoise Pasta Salad with Basil Dressing

Fennel: 
Fennel Vegetable Feature 2019 with 25 Recipe Ideas!
Caramelized Fennel and Apple Tart

Sweetheart Salad Cabbage:
Simplest Cabbage Slaw
Coconut Quinoa Coleslaw with Minty Tahini Dressing

OR

White Cauliflower: 
Easy Cauliflower Tikka Masala
Roasted Cauliflower Tacos

Marinated Chicken and Zucchini Kabobs
photo from tasteofhome.com
Happy July!

Now that summer is in full swing, things are happening fast in the fields!  Next week we’re going to be picking the first tomatillos and black eggplant.  The first tomato planting already has sizeable fruit set on and we’re scheduled to dig the first of our potatoes next week!  Next week we’re also planning to start harvesting the first of our green top carrots and hopefully green and yellow beans.  The first crop of sweet corn is also very near on the horizon.  I hope you’re ready for some delicious summer meals because we have a lot of delicious things to send your way!

This week we’re featuring cucumbers, which is a pretty common vegetable.  The thing I like about cucumbers is how simple and refreshing they are in the middle of the summer.  Around here, our crew members take home bags of them from our “take home pallet” and enjoy them as a refreshing snack, eat fresh slices of them with their meals, and put thin slices of them in their water jugs.  So this week’s featured recipes are pretty simple and straight forward because, well that’s just the way cucumbers are!  The recipe for Mexican Cucumber Snack (See Below) is inspired by our crew members who eat cucumbers this way, but also other vegetables like radishes, jicama and kohlrabi.  The recipe for Cucumber Lime Popsicles (See Below) is a fun way to turn cucumbers into a refreshing snack that can be enjoyed on a hot afternoon.  The third recipe is for Chile-Mint Sauteed Cucumbers (See Below) and demonstrates that cucumbers can also be cooked!  This recipe is super simple and quick and would serve as a nice side dish alongside Marinated Chicken and Zucchini Kabobs or served with Summer Vietnamese Rice Noodle Salad.

Fennel, Pickled Onion and Apple Salad
photo from everylastbite.com
We are finishing up the last of our head lettuces this week, which means we’re going to have to rely on other vegetables for our fresh salads until fall!  This week you have a lot of salad options to choose from including a Fennel, Pickled Onion and Apple Salad,  Chinese Sugar Snap Pea Salad, and Nicoise Pasta Salad with Basil Dressing.  Of course the sweetheart cabbage is another excellent base for a “salad” option and can be as simple as a creamy coleslaw.  My favorite creamy cabbage salad recipe is this Simplest Cabbage Slaw
recipe from alexandracooks.com.  I make this all the time!

I am happy to report that all of our garlic has been harvested and is tucked away safely in our greenhouses where it is drying!  This week’s garlic is still considered to be “fresh” garlic and it will be a flavorful addition to this simple Garlic Butter Sauce Pasta.  If you want to try something fun this week, make your own homemade Garlic Naan Bread to serve with this Easy Cauliflower Tikka Masala.  We don’t have enough cauliflower for all boxes this week as it’s just starting to come in, but don’t worry.  If you don’t get any this week it will likely be in your box next week or the following week!

Whether you’re cooking in your kitchen, grilling on the patio or taking your vegetables with you on your summer travels or camping trips, I hope you enjoy all these summer vegetables!  Have a great week!—Chef Andrea

Vegetable Feature: Cucumbers

By:  Chef Andrea Yoder

Jose Luis pausing for a photo-op 
while unloading cucumbers (2018)
Description: Cucumbers are a member of the gourd family along with melons, squash and pumpkins.  They are a fairly mild-flavored vegetable with a high water content which makes them the perfect summer vegetable to counter the heat!  In this country we are most familiar with the American green slicer variety.  However, in addition to green slicers we also grow a few other interesting varieties including silver slicers, our favorite cucumber.  Silver slicer cucumbers are a little smaller than standard green slicers.  They have a pale yellow skin and hold up well after picking without getting soft.  They also tend to have a more tender skin that doesn’t get bitter and it has an excellent fruity flavor that is more pronounced than other varieties.

Preparation & Use: Cucumbers are most often used in salads, on sandwiches or they are pickled.  However, they can also be cooked in stir-fries, turned into cold or hot soups, braised or lightly sautéed.

It’s up to you to decide if you want to peel them or not.  If the skin is tender, I seldom peel cucumbers.  The tenderness of the skin is dependent somewhat upon the variety, but also the maturity of the cucumber when it was picked as well as the point we’re at in the season.  Thus, it’s your judgement call to decide if you want to peel them or not.

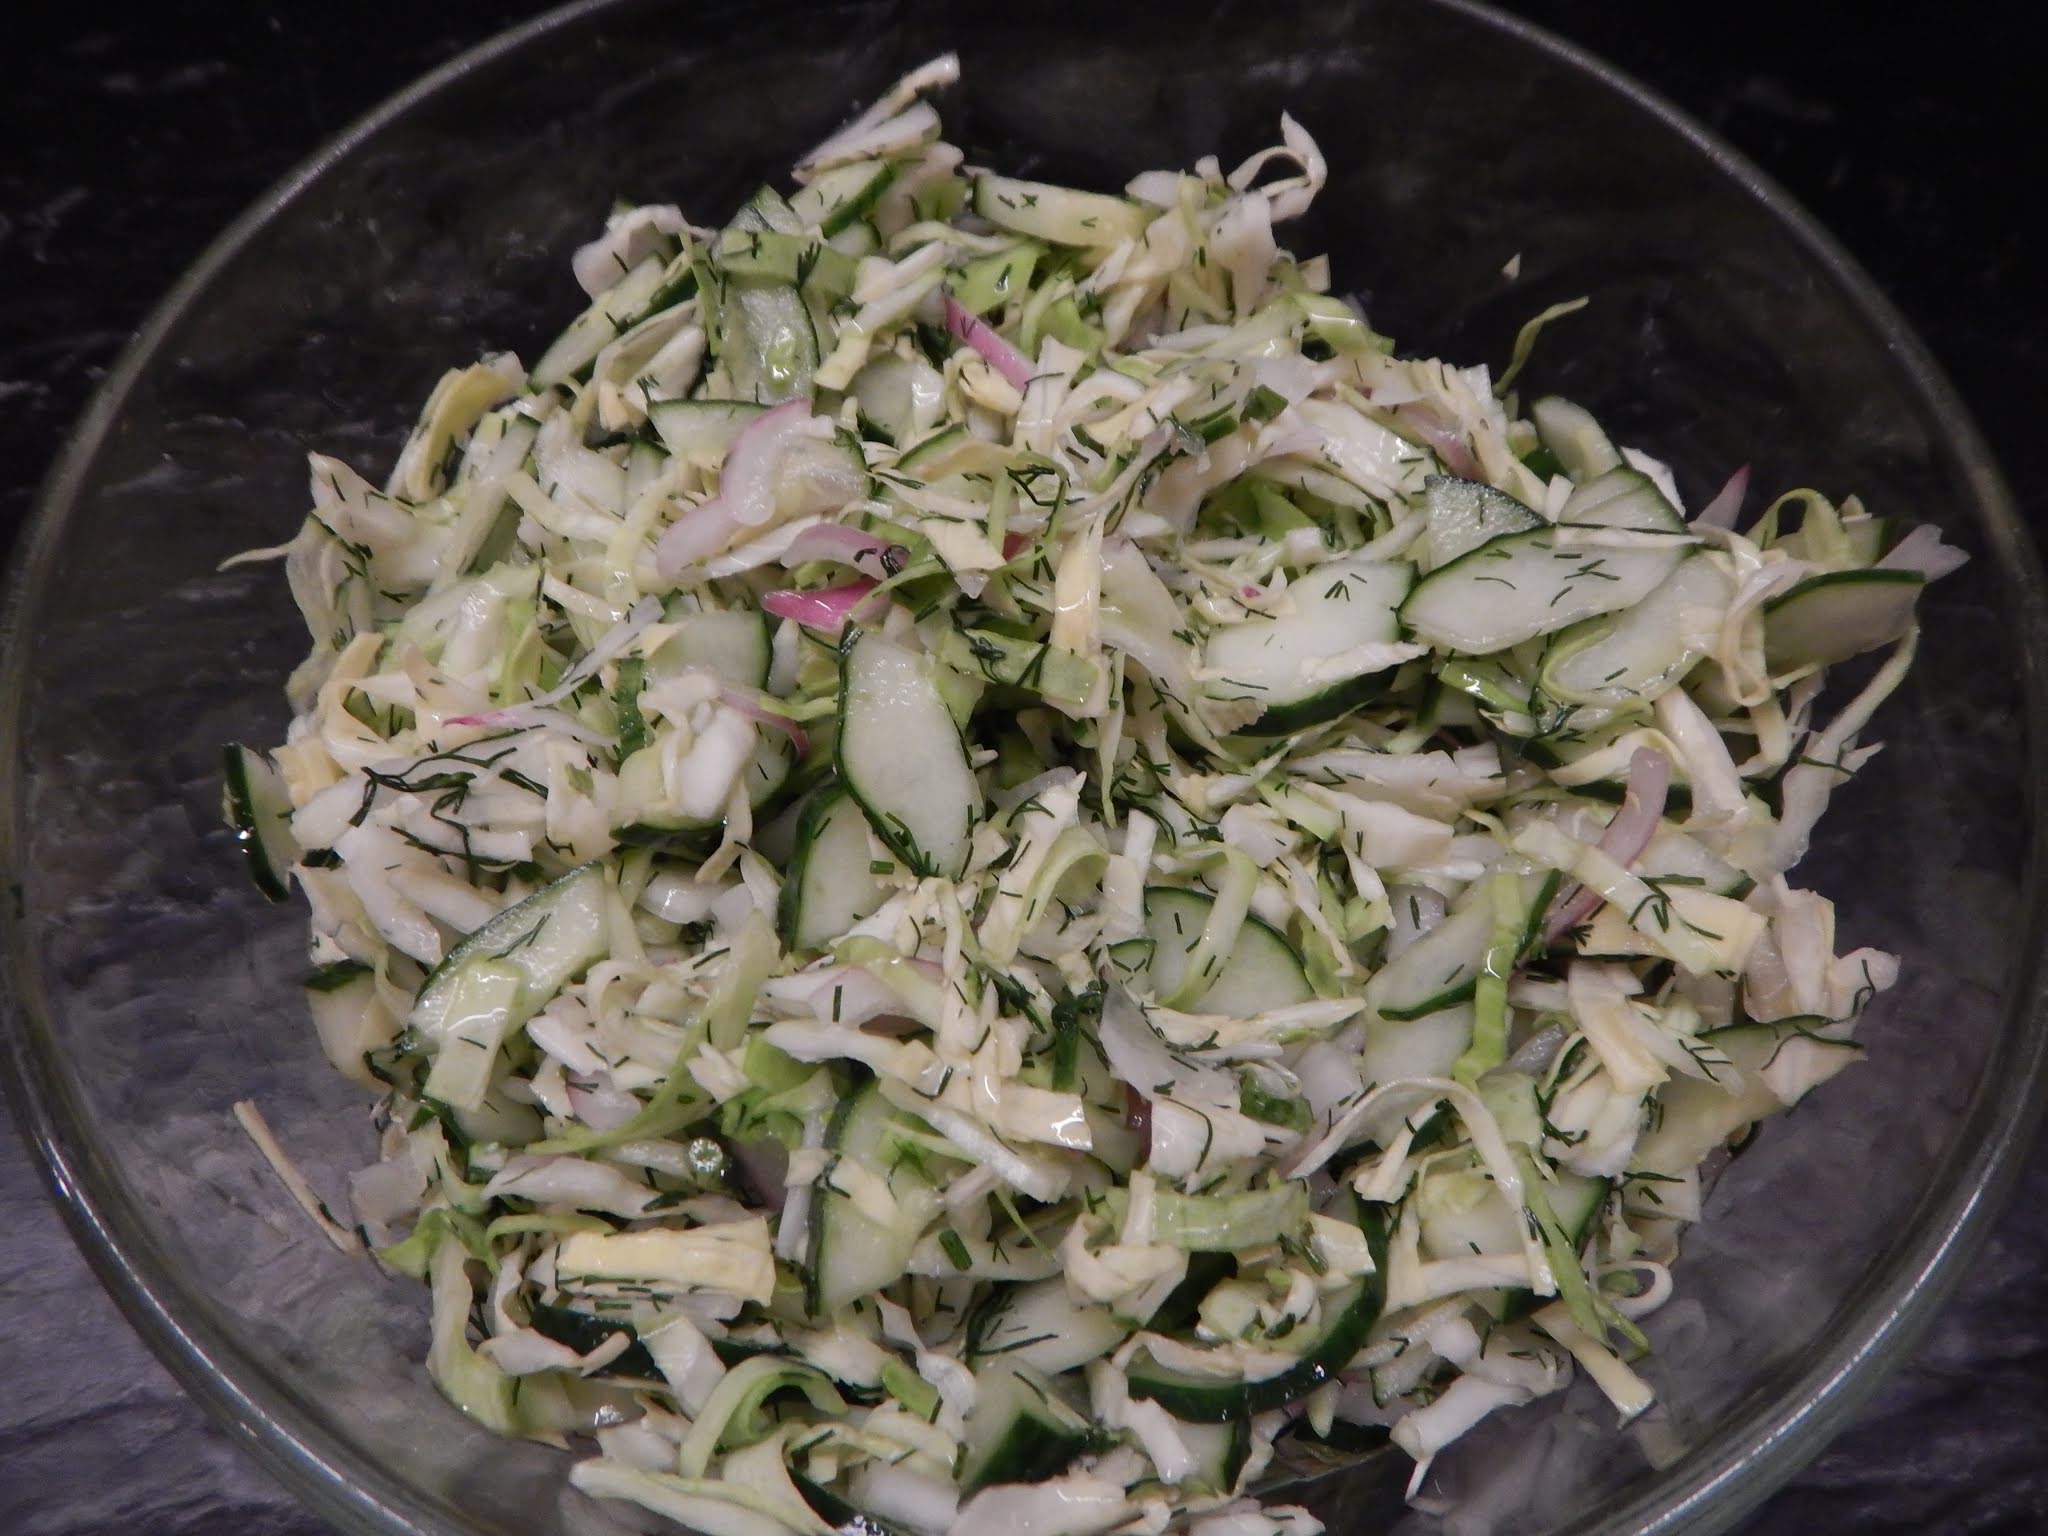
Vinegar Slaw with Cucumbers and Dill
Cucumbers pair well with a wide variety of ingredients including herbs such as basil, cilantro, dill and parsley.  They also go well with garlic, tomatoes, peppers, onions and cabbage.  They are delicious when dressed with tangy vinaigrettes, but also marry well with creamy dressings and sauces made from yogurt, sour cream, cream cheese and buttermilk.   

Storage: Cucumbers store best at 45°F to 50°F, but most refrigerators are set to lower temperatures than this.  Thus, we recommend you store them either in a warmer part of your fridge for just a few days, or just keep them on the counter at room temperature and use within a few days.  Wash cucumbers just before use and note that our cucumbers are not dipped in wax or wrapped in plastic as many are in the retail grocery world.  After several days they may become a little soft.  Don’t throw them out as they are still good!  It is natural for them to feel a little limp, just soak them in an ice bath before you are going to use them or use them in a recipe where they’ll be cooked or softened.

Our expert crew transplanting cucumbers.
Growing Information: Cucumbers may be grown in a variety of growing systems.  We choose to grow our cucumbers the old fashioned way…in the dirt outside in the field!  We do have a unique strategy, though.  We start all of our cucumbers in the greenhouse as a transplant.  They grow very quickly once the seed germinates, so we only have about three weeks from when the seeds are planted to get the field ready!  We plant them on raised beds covered with a reflective silver plastic that has drip irrigation lines running underneath it.  We do this for several reasons.  First, the reflective plastic helps deter pests such as cucumber beetles which can wreak havoc on the plants by chewing the leaves and scarring the fruit.  The plastic mulch also provides some heat gain which helps encourage growth in this heat-loving crop.

We plant an early crop that we put in the field as soon as possible in the spring and then do a second planting to get us through the latter part of summer.  We typically cover the first planting with a row cover draped over wire hoops.  This protects the plants from any chilly nights and also helps trap more heat to help the plants get established and take off.  Once the plants are producing fruit, you can almost predict the volume of a harvest by the temperature.  Ok, not quite, but they are very responsive to changes in temperature and if you have a really warm week you can really see some phenomenal growth and be surprised with harvests that literally double and sometimes triple seemingly overnight!

Chile-Mint Sautéed Cucumbers

Yield:  4 as a side dish

1 pound cucumbers
1 Tbsp olive oil
1 Tbsp unsalted butter
1 shallot or small onion, minced
¼ tsp crushed red pepper flakes
1 Tbsp freshly squeezed lemon juice
2 Tbsp chopped fresh mint leaves
¼ tsp salt
  1. Peel the cucumbers if desired, cut them in half lengthwise, and then remove the seeds by running a small spoon down the seed seam.  Cut the cucumbers into ¼-inch thick half moons and set aside.
  2. Heat the olive oil in a large skillet over medium-high heat. When the oil is hot, add the butter and the shallot or onion and cook for 1 minute, until aromatic.  Add the sliced cucumbers and toss to coat.  Cook for 3 minutes, until the cucumbers are hot and just tender;  then add the red pepper flakes, lemon juice, and fresh mint.  Remove from the heat and season with the kosher salt.  Toss, and place in shallow bowl to serve.
Recipe borrowed from Hugh Acheson’s book, The Broad Fork.

Cucumber Lime Popsicles

Yield: 6

1 pound cucumbers
1 lime, zest and juice
¼ tsp salt
½ cup sugar
½ cup plain, Greek yogurt
  1. Mix together all ingredients in a blender or food processor.  
  2. Blend until nothing but juice remains.
  3. Pour into popsicle molds and freeze for 6 hours or until solid.  Overnight is best.
Recipe borrowed from everydaymadefresh.com.

Note: If you do not have popsicle molds, you can just use small paper cups to freeze the juice mixture in.  Put popsicle sticks in the popsicles when the juice had started to freeze, but is not totally frozen.


Mexican Cucumber Snack

photo from thriftandspice.com
Yield:  2 Servings

1 cucumber
½ tsp chili powder
½  lime
Salt, to taste
  1. Peel (optional) and cut the cucumber into slices and lay out on a plate.
  2. Squeeze the lime juice over the cucumbers.  Sprinkle with chili powder and salt.
  3. Serve and enjoy!
Recipe borrowed from thriftandspice.com


Wednesday, June 30, 2021

Caring for Our Animals

By Richard de Wilde

We realize the decision to include meat in your diet, or not, is a very personal one and may be based on a variety of reasons.  We certainly respect each individual’s decision and do our best to be transparent about our practices so our customers have the information they need to make a fully informed decision when purchasing meat.  Unfortunately, there is a wide array of practices amongst meat producers, so it is important to make sure you know what your purchases are supporting.

Goats enjoying a sunny afternoon in early spring
While our focus is on growing vegetables, animals are an important part of our farm.  At present we have 25 pigs, 18 black Angus cows, 30 ducks, 20 chickens and 37 goats.  Not only do they add ambiance to our farm, they also help us better manage our land.  Given our valley location, we have hillside areas that are too steep for vegetable production and are better managed as pastures.  Without proper management, these hillside pasture areas can quickly be overtaken by undesirable “weed” trees and invasive species such as garlic mustard, honeysuckle and buckthorn which would choke out more desirable pasture grasses.  They also help us by fertilizing the land which keeps the pastures nutrient-rich and lush with vegetation to prevent hillside erosion.  Right now our goats are working on slowly clearing some of the woods on our home farm which are becoming overgrown with some of these invasives.  They don’t realize they are “going to work” each day when they make their way to the upper pasture.  They just think they’re going for a leisurely walk in the woods!  It’s a lot of fun to watch them interact with each other as they munch away on plants and tree branches.  This spring we had more than 20 baby goat kids which have kept us entertained as they zip around the pasture and through the woods jumping on trees and playing with each other!

Piglets drinking from Spring Creek
We choose to raise our animals in an environment that allows them to exhibit their natural behaviors and characteristics.  We treat them gently and with respect so they do not live in fear of human touch or presence.  This creates a much more pleasant environment for them to live in and allows us to work amongst them more safely.  Our pigs have a 20 acre pasture which they cover daily eating grass and clover as well as digging up roots with their amazingly strong snouts!  We often only see glimpses of them moving through the woods throughout the day, but rest assured they return to their home base for dinner at night and they are front and center for breakfast in the morning!  We feed them a modest ration of organic corn, barley and flax seed, but they also enjoy a wide variety of vegetable trimmings that we take to them from the packing shed every day.  It’s particularly amusing to watch them eat things like tomatoes and melons, but it’s also cute to see their bright red lips after munching on red beets!  In the fall they enjoy checking on the wild apple trees in their pasture where they gobble up the dropped fruit.  They also fill up on hickory nuts, acorns and hazelnuts.  They have a pretty good life, eat well, and from time to time they appreciate a little scratch behind their ears.  We’re still working on their manners, but then again, perhaps that’s just part of their natural behavior and we have to be satisfied understanding why our mothers’ may have told us to “stop eating like a pig!”

Our Black Angus cows grazing
on summer pasture
Our black Angus beef come to us each fall from John and Denise Hilgart who farm in Auburn, Wisconsin.  They are set up more appropriately than we are to raise calves.  The young animals come to us when they are fully weaned and weigh about 500 pounds.  Their farm and animals are also certified organic, but the thing we really appreciate about John and Denise is that they are excellent animal caretakers.  The nature of their animals clearly demonstrates they have been raised with love, care and gentleness.  While they are very large animals, they are also very gentle and calm.  In the course of a conversation I was having with Denise about how well-mannered the cows were, she disclosed to me that she often brushes them when she has a little spare time.  Well, no wonder they aren’t afraid of human touch!  Our cattle are on pasture their entire lives.  They eat only pasture grass and clover during the summer months and in the winter we feed them hay that we bale from our hillsides.  They also get a free ration mix of kelp meal and natural mineral salts mixed with garlic and diatomaceous earth (DE).  This mix is kind of like their daily “multi-vitamin,” plus the DE acts as a natural wormer.  I recently read some research demonstrating that the trace minerals in the kelp almost totally eliminate the methane gas that cows naturally emit.  We provide this mix in a feeder which also serves as a means of treating them for face flies.  When they stick their head in the feeder their face gets wiped with a blend of organic sunflower oil mixed with citronella which helps to keep the flies away from them.  They also meander down to the creek bottom each day to get water.  They are large creatures to be respected, but we also appreciate how they contribute a serene vibe to our farm.

Healthy animals that are allowed to live in a natural environment seldom have health problems.  However, sometimes in the cold of winter or during the changing of seasons they may get a little sniffle or a cough.  During these vulnerable times, we feed them pellets containing aloe, garlic and molasses.  Sometimes we put them in a feeder, but some of the cows really like them and are tempted to take more than their fair share which leaves us feeding them by hand.

Muscovy duck with her ducklings
While we do enjoy living amongst our animals and they serve an important role in helping us manage our land, we do also raise our pigs and cows with the intention that they will be harvested for meat.  I know this may be a sensitive topic for some, and we do respect that.  However, the issue of respect for the animals continues through the slaughter process as well.  We feel very fortunate to work with Crescent Meats in Caddott, Wisconsin, a family-owned and operated meat plant that is both certified organic and USDA inspected.  Wayne and Stacey Lautsbaugh are the owners and run the business along with their two children, Vance and Samantha.  Vance has a degree in Food Science and has completed the Master Meat Crafter course from UW Madison.  He is the plant manager and manages day to day production.  Samantha went to college to pursue a degree in Business Management and is now the store manager and mastermind behind all things happening on the office side of the operation.  Together this family runs a very efficient, professional operation with careful attention to many details.  Andrea had the opportunity to visit the plant when we first started working with them.  Wayne didn’t hesitate at all when Andrea asked to see the area where the animals are received and held prior to slaughter.  Their system is set up so that the animals remain calm through the entire process and are humanely slaughtered without fear or stress.  It’s very important to us to ensure our animals are respected through the end of the process and we feel confident that is happening at Crescent Meats.

Our "little" Angus cows shortly
after their arrival in late fall
When the pandemic hit back in 2020 and meat was in short supply, we were flooded with orders and quickly sold out.  It takes awhile to increase production, so there wasn’t much we could do immediately.  We did slightly increase our production of cows and pigs for this year and do still have meat available for our November and December 2021 deliveries.  However, we are nearing our sold out point for November and December is not too far behind.  So if you are interested in purchasing meat for this fall, we encourage you to order very soon.

In closing, we just want to reiterate how important it is for consumers to be well-informed with their purchases.  Not all meat is produced similarly and there are some practices in the industry that are, in our opinion, unacceptable.  We appreciate our animals, the value they add to our farm and our lives, and we will continue to do our best to treat them with the respect they deserve.  If ever you have a question or would like to see them for yourself, don’t hesitate to give us a call!